DeLonghi ECAM23210SB Owner Manual - Page 8
Making Capuccino - 14
 |
View all DeLonghi ECAM23210SB manuals
Add to My Manuals
Save this manual to your list of manuals |
Page 8 highlights
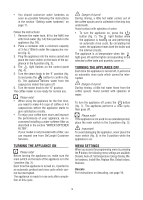
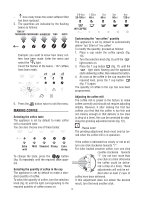
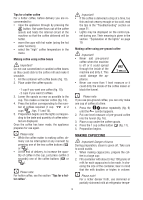
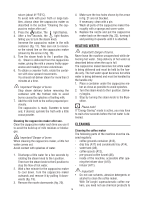
Tips for a hotter coffee For a hotter coffee, before delivery you are recommended to: • rinse the appliance through by pressing the button. Hot water flows out of the coffee spouts and heats the internal circuit of the machine so that the coffee delivered will be hotter. • warm the cups with hot water (using the hot water function); • select the "high" coffee temperature in the menu. Making coffee using coffee beans Important! Do not use caramelized or candied coffee beans as they could stick to the coffee mill and make it unusable. 1. Fill the container with coffee beans (fig. 13). 2. Place under the coffee spouts: - 1 cup if you want one coffee (fig. 10); - 2 cups if you want 2 coffees. 3. Lower the spouts as near as possible to the cup. This makes a creamier coffee (fig. 14). 4. Press the button corresponding to the num- ber of coffees required (1 cup or 2 cups , figs. 11 and 15). 5. Preparation begins and the lights correspon- ding to the taste and quantity of coffee selec- ted are displayed. Once the coffee has been made, the appliance prepares for use again. Please note: • While the coffee maker is making coffee, de- livery can be interrupted at any moment by pressing one of the two coffee buttons ( or ). • At the end of delivery, to increase the quantity of coffee in the cup, just press (within 3 seconds) one of the coffee buttons ( or ). Please note: For hotter coffee, see the section "Tips for a hotter coffee". Important! • If the coffee is delivered a drop at a time, too thin and not creamy enough or too cold, read the tips in the "Troubleshooting" section on page 21. • Lights may be displayed on the control panel during use. Their meaning is given in the section "Explanation of the lights" on page 19. Making coffee using pre-ground coffee Important! • Never add pre-ground coffee when the machine is off or it could spread through the inside of the machine and dirty it. This could damage the appliance. • Never use more than 1 level measure or it could dirty the inside of the coffee maker or block the funnel. Please note: If you use pre-ground coffee, you can only make one cup of coffee at a time. 1. Press the button repeatedly (fig. 9) until the symbol appears. 2. Put one level measure of pre-ground coffee into the funnel (fig. 16). 3. Place a cup under the coffee spouts. 4. Press the 1 cup coffee button (fig. 11). 5. Preparation begins. MAKING CAPUCCINO Important! Danger of burns During preparation, steam is given off. Take care to avoid scalds. 1. When making cappuccino, prepare the cof- fee in a large cup; 2. Fill a container with about 3.4oz/ 100 grams of milk for each cappuccino to be made. In choosing the size of the container, bear in mind that the milk doubles or triples in volume. Please note! For a richer denser froth, use skimmed or partially skimmed milk at refrigerator tempe- 13
-
 1
1 -
2
-
 3
3 -
 4
4 -
 5
5 -
 6
6 -
 7
7 -
 8
8 -
 9
9 -
 10
10 -
 11
11 -
 12
12 -
 13
13 -
14
-
15
-
16
-
17
 |
 |