Dell 1209S User Guide - Page 21
Using the Remote Control
 |
View all Dell 1209S manuals
Add to My Manuals
Save this manual to your list of manuals |
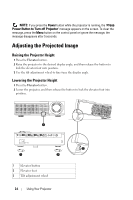
Page 21 highlights
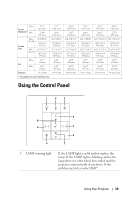
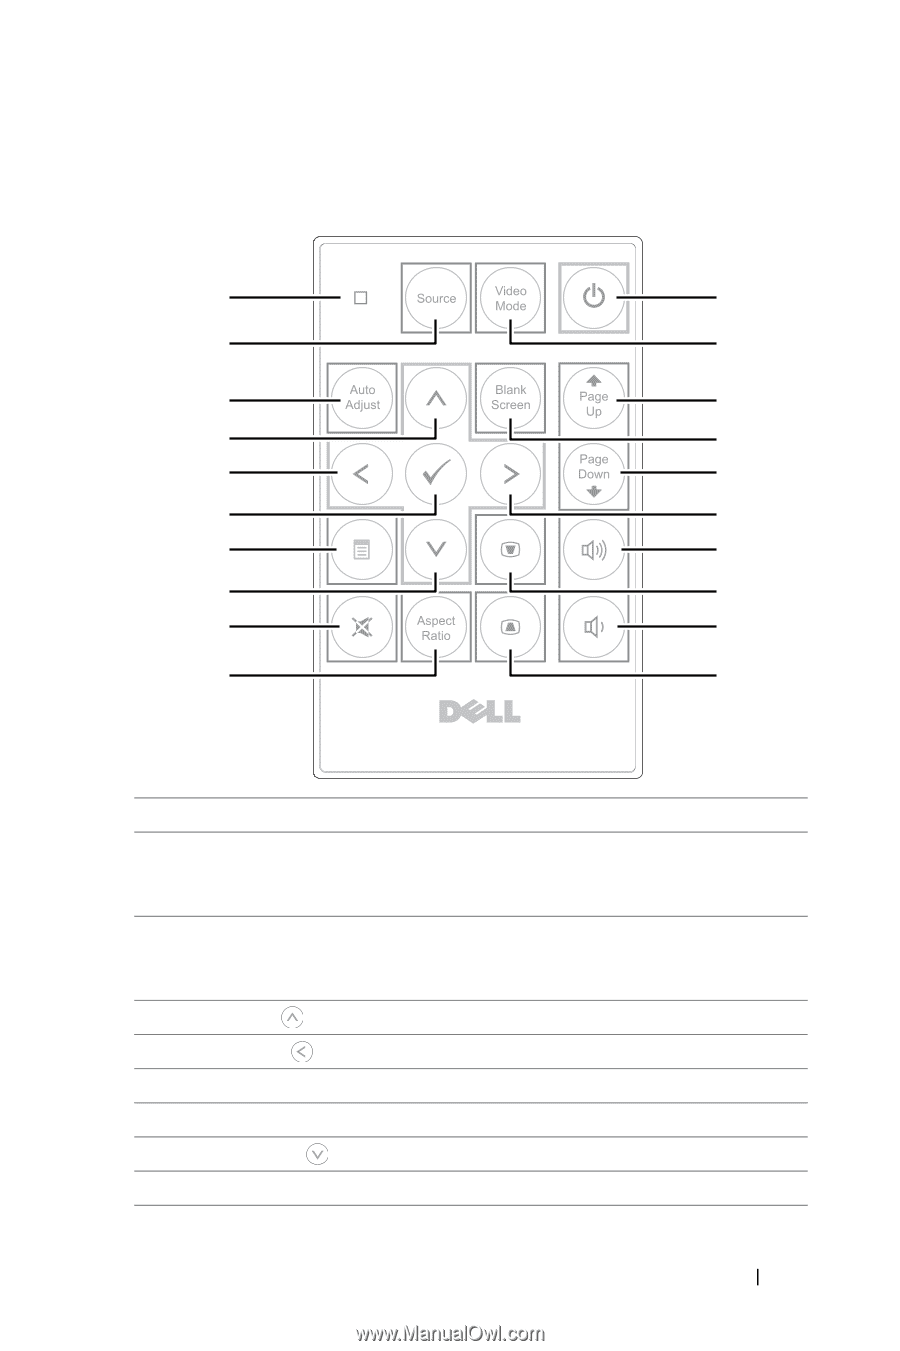
Using the Remote Control 1 11 2 12 3 13 4 14 5 15 6 16 7 17 8 18 9 19 10 20 1 LED light 2 Source 3 Auto adjust 4 Up button 5 Left button 6 Enter 7 Menu 8 Down button 9 Mute LED indicator. Press to switch between Digital RGB, Analog RGB, Composite, S-video, Component (YPbPr via VGA). Press to synchronize the projector to the input source. Auto adjust does not operate if the OSD (On-Screen Display) is displayed. Press to select an item on the OSD. Press to adjust the OSD setting. Press to confirm the selection. Press to activate the OSD. Press to select an item on the OSD. Press to mute or un-mute the projector speaker. Using Your Projector 21
-
 1
1 -
2
-
3
-
4
-
5
-
6
-
7
-
8
-
9
-
10
-
11
-
12
-
13
-
14
-
15
-
 16
16 -
 17
17 -
 18
18 -
 19
19 -
 20
20 -
 21
21 -
 22
22 -
 23
23 -
 24
24 -
 25
25 -
 26
26 -
27
-
28
-
29
-
30
-
31
-
32
-
33
-
34
-
35
-
36
-
37
-
38
-
39
-
40
-
41
-
42
-
43
-
44
-
45
-
46
-
47
-
48
-
49
 |
 |
Using Your Projector
21
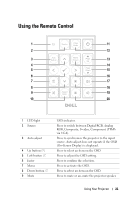
Using the Remote Control
1
LED light
LED indicator.
2
Source
Press to switch between Digital RGB, Analog
RGB, Composite, S-video, Component (YPbPr
via VGA).
3
Auto adjust
Press to synchronize the projector to the input
source. Auto adjust does not operate if the OSD
(On-Screen Display) is displayed.
4
Up button
Press to select an item on the OSD.
5
Left button
Press to adjust the OSD setting.
6
Enter
Press to confirm the selection.
7
Menu
Press to activate the OSD.
8
Down button
Press to select an item on the OSD.
9
Mute
Press to mute or un-mute the projector speaker.
11
11
12
12
13
13
15
15
17
17
14
14
19
19
16
16
18
18
20
20
1
2
3
5
7
4
9
6
8
10
10