Dell 1209S User Guide - Page 28
DISPLAY (in Video Mode), Frequency, Tracking, Display, Movie, Custom, White Intensity, Degamma
 |
View all Dell 1209S manuals
Add to My Manuals
Save this manual to your list of manuals |
Page 28 highlights
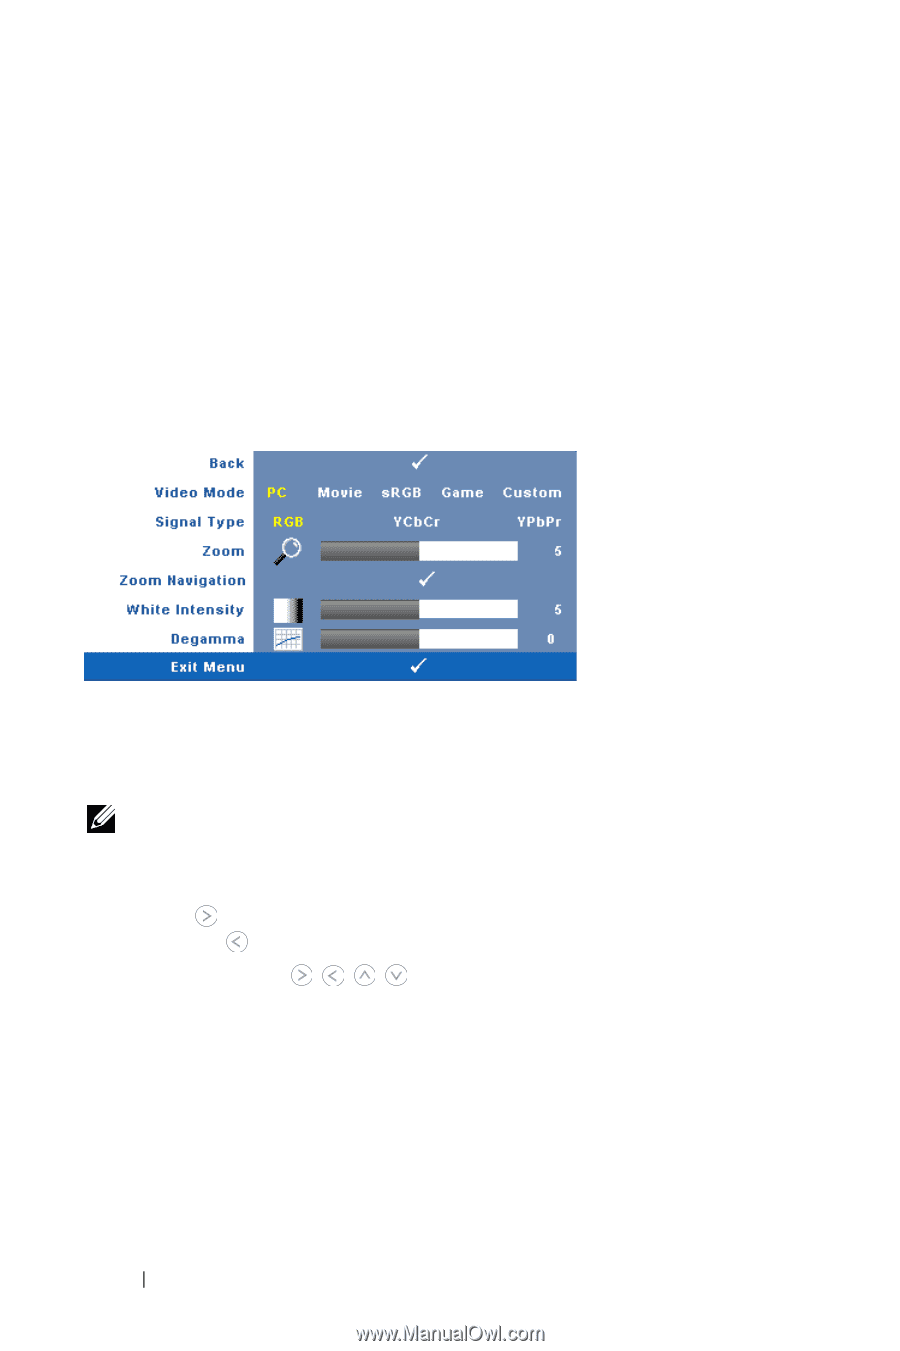
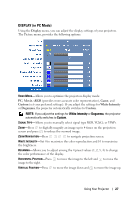
FREQUENCY-Allows you to change the display data clock frequency to match the frequency of your computer graphics card. If you see a vertical flickering wave, use Frequency control to minimize the bars. This is a coarse adjustment. TRACKING-Synchronize the phase of the display signal with the graphic card. If you experience an unstable or flickering image, use Tracking to correct it. This is a fine adjustment. DISPLAY (in Video Mode) Using the Display menu, you can adjust the display settings of your projectors. The Picture menu, provides the following options: VIDEO MODE-Allows you to optimize the projectors display mode: PC, Movie, sRGB (provides more accurate color representation), Game, and Custom (set your preferred settings). If you adjust the settings for White Intensity or Degamma, the projector automatically switches to Custom. NOTE: If you adjust the settings for White Intensity or Degamma, the projector automatically switches to Custom. SIGNAL TYPE-Manually select signal type RGB, YCbCr, or YPbPr. ZOOM-Press to digitally magnify an image up to 4 times on the projection screen and press to reduce the zoomed image. ZOOM NAVIGATION-Press to navigate projection screen. WHITE INTENSITY-Set 0 to maximize the color reproduction and 10 to maximize the brightness. DEGAMMA-Adjust among the 4 preset values (1, 2, 3, 4) to change the color performance of the display. 28 Using Your Projector
-
 1
1 -
2
-
3
-
4
-
5
-
6
-
7
-
8
-
9
-
10
-
11
-
12
-
13
-
14
-
15
-
16
-
17
-
18
-
19
-
20
-
21
-
22
-
 23
23 -
 24
24 -
 25
25 -
 26
26 -
 27
27 -
 28
28 -
 29
29 -
 30
30 -
 31
31 -
 32
32 -
 33
33 -
34
-
35
-
36
-
37
-
38
-
39
-
40
-
41
-
42
-
43
-
44
-
45
-
46
-
47
-
48
-
49
 |
 |