Dell 1600n Owner's Manual - Page 31
You can change the destination folder by clicking - drivers windows 7
 |
UPC - 708562765640
View all Dell 1600n manuals
Add to My Manuals
Save this manual to your list of manuals |
Page 31 highlights
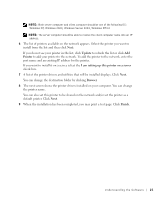
NOTE: Both server computer and client computer should be one of the following OS: Windows XP, Windows 2000, Windows Server 2003, Windows NT4.0 NOTE: The server computer should be able to resolve the client computer name into an IP address. 6 The list of printers available on the network appears. Select the printer you want to install from the list and then click Next. If you do not see your printer in the list, click Update to refresh the list or click Add Printer to add your printer to the network. To add the printer to the network, enter the port name and an existing IP address for the printer. If you want to install it on a server, select the I am setting up this printer on a server check box. 7 A list of the printer drivers and utilities that will be installed displays. Click Next. You can change the destination folder by clicking Browser. 8 The next screen shows the printer drivers installed on your computer. You can change the printer name. You can also set this printer to be shared on the network and/or set the printer as a default printer. Click Next. 9 When the installation has been completed, you may print a test page. Click Finish. Understanding the Software 21
-
 1
1 -
2
-
3
-
4
-
5
-
6
-
7
-
8
-
9
-
10
-
11
-
12
-
13
-
14
-
15
-
16
-
17
-
18
-
19
-
20
-
21
-
22
-
23
-
24
-
25
-
 26
26 -
 27
27 -
 28
28 -
 29
29 -
 30
30 -
 31
31 -
 32
32 -
 33
33 -
 34
34 -
 35
35 -
 36
36 -
37
-
38
-
39
-
40
-
41
-
42
-
43
-
44
-
45
-
46
-
47
-
48
-
49
-
50
-
51
-
52
-
53
-
54
-
55
-
56
-
57
-
58
-
59
-
60
-
61
-
62
-
63
-
64
-
65
-
66
-
67
-
68
-
69
-
70
-
71
-
72
-
73
-
74
-
75
-
76
-
77
-
78
-
79
-
80
-
81
-
82
-
83
-
84
-
85
-
86
-
87
-
88
-
89
-
90
-
91
-
92
-
93
-
94
-
95
-
96
-
97
-
98
-
99
-
100
-
101
-
102
-
103
-
104
-
105
-
106
-
107
-
108
-
109
-
110
-
111
-
112
-
113
-
114
-
115
-
116
-
117
-
118
-
119
-
120
-
121
-
122
-
123
-
124
-
125
-
126
-
127
-
128
-
129
-
130
-
131
-
132
-
133
-
134
 |
 |