Dell 1610HD User Guide - Page 31
Using the On-Screen Display, Main Menu, AUTO-ADJUST
 |
UPC - 884116026426
View all Dell 1610HD manuals
Add to My Manuals
Save this manual to your list of manuals |
Page 31 highlights
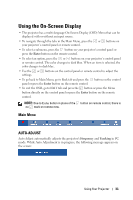
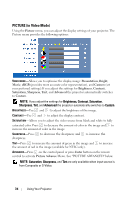
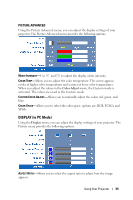
Using the On-Screen Display • The projector has a multi-language On-Screen Display (OSD) Menu that can be displayed with or without an input source. • To navigate through the tabs in the Main Menu, press the or buttons on your projector's control panel or remote control. • To select a submenu, press the button on your projector's control panel or press the Enter button on the remote control. • To select an option, press the or buttons on your projector's control panel or remote control. The color changes to dark blue. When an item is selected, the color changes to dark blue. • Use the or buttons on the control panel or remote control to adjust the settings. • To go back to Main Menu, go to Back tab and press the button on the control panel or press the Enter button on the remote control. • To exit the OSD, go to EXIT tab and press the button or press the Menu button directly on the control panel or press the Enter button on the remote control. NOTE: Due to Enter button in place of the button on remote control, there is no mark on remote now. Main Menu AUTO-ADJUST Auto Adjust automatically adjusts the projector's Frequency and Tracking in PC mode. While Auto Adjustment is in progress, the following message appears on the screen: Using Your Projector 31
-
 1
1 -
2
-
3
-
4
-
5
-
6
-
7
-
8
-
9
-
10
-
11
-
12
-
13
-
14
-
15
-
16
-
17
-
18
-
19
-
20
-
21
-
22
-
23
-
24
-
25
-
 26
26 -
 27
27 -
 28
28 -
 29
29 -
 30
30 -
 31
31 -
 32
32 -
 33
33 -
 34
34 -
 35
35 -
 36
36 -
37
-
38
-
39
-
40
-
41
-
42
-
43
-
44
-
45
-
46
-
47
-
48
-
49
-
50
-
51
-
52
-
53
-
54
-
55
-
56
-
57
-
58
-
59
-
60
-
61
-
62
-
63
-
64
-
65
-
66
-
67
-
68
-
69
-
70
-
71
-
72
-
73
-
74
-
75
-
76
-
77
-
78
-
79
-
80
 |
 |
