Dell 1610HD User Guide - Page 42
Menu Settings Menu Position Menu Transparency Menu Timeout Menu Lock Screen Settings Capture Screen - projector resolution
 |
UPC - 884116026426
View all Dell 1610HD manuals
Add to My Manuals
Save this manual to your list of manuals |
Page 42 highlights
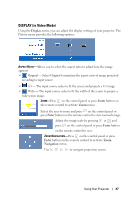
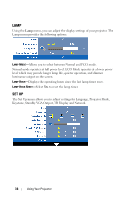
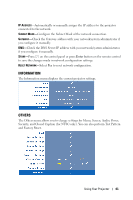
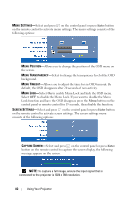
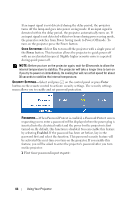
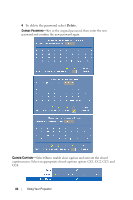
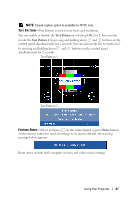
MENU SETTINGS-Select and press on the control panel or press Enter button on the remote control to activate menu settings. The menu settings consists of the following options: MENU POSITION-Allows you to change the position of the OSD menu on the screen. MENU TRANSPARENCY-Select to change the transparency level of the OSD background. MENU TIMEOUT-Allows you to adjust the time for an OSD timeout. By default, the OSD disappears after 20 seconds of non-activity. MENU LOCK-Select On to enable Menu Lock and hide the OSD menu. Select OFF to disable the Menu Lock. If you want to disable the Menu Lock function and have the OSD disappear, press the Menu button on the control panel or remote control for 15 seconds, then disable the function. SCREEN SETTINGS-Select and press on the control panel or press Enter button on the remote control to activate screen settings. The screen settings menu consists of the following options: CAPTURE SCREEN-Select and press on the control panel or press Enter button on the remote control to capture the screen display, the following message appears on the screen. NOTE: To capture a full image, ensure the input signal that is connected to the projector is 1024 x 768 resolution. 42 Using Your Projector
-
 1
1 -
2
-
3
-
4
-
5
-
6
-
7
-
8
-
9
-
10
-
11
-
12
-
13
-
14
-
15
-
16
-
17
-
18
-
19
-
20
-
21
-
22
-
23
-
24
-
25
-
26
-
27
-
28
-
29
-
30
-
31
-
32
-
33
-
34
-
35
-
36
-
 37
37 -
 38
38 -
 39
39 -
 40
40 -
 41
41 -
 42
42 -
 43
43 -
 44
44 -
 45
45 -
 46
46 -
 47
47 -
48
-
49
-
50
-
51
-
52
-
53
-
54
-
55
-
56
-
57
-
58
-
59
-
60
-
61
-
62
-
63
-
64
-
65
-
66
-
67
-
68
-
69
-
70
-
71
-
72
-
73
-
74
-
75
-
76
-
77
-
78
-
79
-
80
 |
 |