Dell 2350D User Guide - Page 149
Custom Paper Size, Attributes
 |
View all Dell 2350D manuals
Add to My Manuals
Save this manual to your list of manuals |
Page 149 highlights
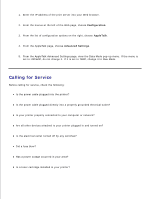
1. 2. From the Settings pop-up menu, choose Custom Paper Size. 3. Click New, and then enter the appropriate information about the custom paper size. 4. Click Save. NOTE: You must click Save before clicking OK or switching back to the Page Attributes pane in the Settings pop-up menu. 5. From the Settings pop-up menu, choose Page Attributes. 6. From the Paper Size pop-up menu, choose the custom paper size. This newly added custom paper size is an available option for all print jobs, regardless of the selection in the "Format for" menu. Another way to use custom paper for print jobs is to choose the source that contains the custom paper in the "All pages from" pop-up menu on the Paper Feed pane of the Print dialog. Why are screen fonts provided? PostScript fonts are stored in the printer. Matching screen fonts let you create documents that use the PostScript fonts. Why are there duplicates of some of the screen fonts? The fonts in your printer are not identical to the screen fonts provided by Apple. Dell provides screen fonts that match the printer fonts. Using these screen fonts allows you to make sure that the printed output will match what you see on the computer screen. How do I install screen fonts? Move the fonts you want to use from the /Users/Shared/Dell/Screen Fonts folder to the Library/Fonts folder in your home directory or at the root of the boot disk. Because most of the preinstalled fonts on Mac OS X are in /System/Library/Fonts, you can place your new fonts in either of these two locations without having to move the preexisting ones. The system will find fonts first in your home Library, then in the Library at the root of the boot disk, and then in /System/Library. How do I use an external print server when the data mode is TBCP (for printers that support external print servers)? Check the Data Mode setting: 1.
-
 1
1 -
2
-
3
-
4
-
5
-
6
-
7
-
8
-
9
-
10
-
11
-
12
-
13
-
14
-
15
-
16
-
17
-
18
-
19
-
20
-
21
-
22
-
23
-
24
-
25
-
26
-
27
-
28
-
29
-
30
-
31
-
32
-
33
-
34
-
35
-
36
-
37
-
38
-
39
-
40
-
41
-
42
-
43
-
44
-
45
-
46
-
47
-
48
-
49
-
50
-
51
-
52
-
53
-
54
-
55
-
56
-
57
-
58
-
59
-
60
-
61
-
62
-
63
-
64
-
65
-
66
-
67
-
68
-
69
-
70
-
71
-
72
-
73
-
74
-
75
-
76
-
77
-
78
-
79
-
80
-
81
-
82
-
83
-
84
-
85
-
86
-
87
-
88
-
89
-
90
-
91
-
92
-
93
-
94
-
95
-
96
-
97
-
98
-
99
-
100
-
101
-
102
-
103
-
104
-
105
-
106
-
107
-
108
-
109
-
110
-
111
-
112
-
113
-
114
-
115
-
116
-
117
-
118
-
119
-
120
-
121
-
122
-
123
-
124
-
125
-
126
-
127
-
128
-
129
-
130
-
131
-
132
-
133
-
134
-
135
-
136
-
137
-
138
-
139
-
140
-
141
-
142
-
143
-
 144
144 -
 145
145 -
 146
146 -
 147
147 -
 148
148 -
 149
149 -
 150
150 -
 151
151 -
 152
152 -
 153
153 -
 154
154 -
155
-
156
-
157
-
158
-
159
-
160
-
161
-
162
-
163
-
164
-
165
-
166
-
167
-
168
-
169
-
170
-
171
-
172
-
173
-
174
-
175
-
176
-
177
-
178
-
179
-
180
-
181
 |
 |
