Dell 5330 Wireless and Network Guide - Page 43
Configuring the printer - driver mac
 |
UPC - 884116002406
View all Dell 5330 manuals
Add to My Manuals
Save this manual to your list of manuals |
Page 43 highlights
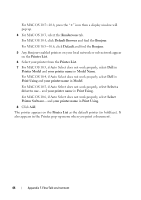
• Printer Type: shows the printer type. • Zone: shows the available printer zone list. You must select one. • Page Description Language: shows the EtherTalk protocol. 3 Click Submit. Configuring the printer NOTE: The following instructions are for Mac OS 10.3, but similar for other versions. The following steps must be taken to configure the network printer for use on a Macintosh system. If the network printer you want to use is not listed in the printer pop-up menu when you try to print a document, you should add it to your list of available printers. 1 Open the Applications folder Utilities, and Print Setup Utility. For MAC OS 10.5~10.6, open System Preferences from the Applications folder, and click Print & Fax. 2 If the printer already appears in the printer list, select the In Menu check box to add it to your list of available printers. You will see the printer in the Printer pop-up menu the next time you print. 3 Click Add on the Printer List. For MAC OS 10.5~10.6, press the "+" icon then a display window will pop up. 4 Choose an AppleTalk from the pop-up menu list on the top. 5 Choose an AppleTalk zone from the pop-up menu that appears directly below it. Any AppleTalk printers in the zone you have chosen appear in the Printer List. 6 Select the printer in the Printer List. 7 For MAC OS 10.3, if Auto Select does not work properly, select Dell in Printer Model and your printer name in Model Name. For MAC OS 10.4, if Auto Select does not work properly, select Dell in Print Using and your printer name in Model. For MAC OS 10.5, if Auto Select does not work properly, select Select a driver to use... and your printer name in Print Using. Appendix F. EtherTalk environment 41
-
 1
1 -
2
-
3
-
4
-
5
-
6
-
7
-
8
-
9
-
10
-
11
-
12
-
13
-
14
-
15
-
16
-
17
-
18
-
19
-
20
-
21
-
22
-
23
-
24
-
25
-
26
-
27
-
28
-
29
-
30
-
31
-
32
-
33
-
34
-
35
-
36
-
37
-
 38
38 -
 39
39 -
 40
40 -
 41
41 -
 42
42 -
 43
43 -
 44
44 -
 45
45 -
 46
46 -
 47
47 -
 48
48 -
49
-
50
-
51
-
52
-
53
-
54
-
55
-
56
-
57
-
58
-
59
-
60
-
61
-
62
-
63
-
64
-
65
-
66
-
67
-
68
 |
 |
