Dell 926 User's Guide - Page 29
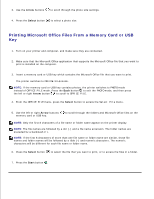
Printing Microsoft Office Files From a Memory Card or USB, Arrow, Select, Start
 |
UPC - 028000141776
View all Dell 926 manuals
Add to My Manuals
Save this manual to your list of manuals |
Page 29 highlights
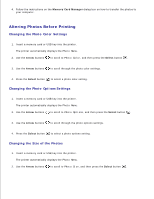
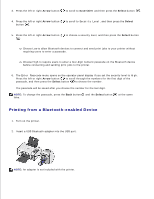
2. 3. Use the Arrow buttons to scroll through the photo size settings. 4. Press the Select button to select a photo size. Printing Microsoft Office Files From a Memory Card or USB Key 1. Turn on your printer and computer, and make sure they are connected. 2. Make sure that the Microsoft Office application that supports the Microsoft Office file that you want to print is installed on the computer. 3. Insert a memory card or USB key which contains the Microsoft Office file that you want to print. The printer switches to OFFICE FILE mode. NOTE: If the memory card or USB key contains photos, the printer switches to PHOTO mode instead of OFFICE FILE mode. Press the Back button to exit the PHOTO mode, and then press the left or right Arrow button to scroll to OFFICE FILE. 4. From the OFFICE FILE menu, press the Select button to access the Select File menu. 5. Use the left or right Arrow buttons memory card or USB key. to scroll through the folders and Microsoft Office files on the NOTE: Only the first 8 characters of a file name or folder name appear on the printer display. NOTE: The file names are followed by a dot (.) and a file name extension. The folder names are preceded by a backslash (\). NOTE: If the first 8 characters of more than one file name or folder name are similar, those file names and folder names will be followed by a tilde (~) and numeric characters. The numeric characters will be different for each file name or folder name. 6. Press the Select button to select the file that you want to print, or to access the files in a folder. 7. Press the Start button .
-
 1
1 -
2
-
3
-
4
-
5
-
6
-
7
-
8
-
9
-
10
-
11
-
12
-
13
-
14
-
15
-
16
-
17
-
18
-
19
-
20
-
21
-
22
-
23
-
 24
24 -
 25
25 -
 26
26 -
 27
27 -
 28
28 -
 29
29 -
 30
30 -
 31
31 -
 32
32 -
 33
33 -
 34
34 -
35
-
36
-
37
-
38
-
39
-
40
-
41
-
42
-
43
-
44
-
45
-
46
-
47
-
48
-
49
-
50
-
51
-
52
-
53
-
54
-
55
-
56
-
57
-
58
-
59
-
60
-
61
-
62
-
63
-
64
-
65
-
66
-
67
-
68
-
69
-
70
-
71
-
72
-
73
-
74
-
75
-
76
-
77
-
78
-
79
-
80
-
81
-
82
-
83
-
84
-
85
-
86
-
87
-
88
-
89
-
90
-
91
-
92
-
93
-
94
-
95
-
96
-
97
-
98
-
99
-
100
-
101
-
102
-
103
-
104
-
105
-
106
-
107
-
108
 |
 |
