Dell 944 All In One Inkjet Printer User's Guide - Page 60
General Problems - xp driver
 |
View all Dell 944 All In One Inkjet Printer manuals
Add to My Manuals
Save this manual to your list of manuals |
Page 60 highlights
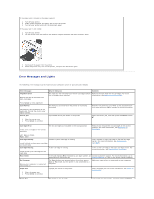
4. Set that print object as the default printer by right-clicking the printer name and selecting Set as Default Printer. 5. Delete the other copies of the print object by left-clicking the printer name and clicking File® Delete. To prevent multiple instances of your Dell printer in your Printers folder, make sure when disconnecting and reconnecting the printer from your computer that you always plug the USB cable back into the same USB port that was originally used for the Dell printer. Also, do not install the Dell printer drivers multiple times from your printer CD. Printer Problems Ensure that the printer power cable is firmly connected to the printer and the electrical outlet. Determine if the printer has been held or paused. 1. In Windows XP, click Start® Control Panel® Printers and Other Hardware® Printers and Faxes. In Windows 2000, click Start® Settings® Printers. 2. Double-click Dell Photo AIO Printer 944, and then click Printer. 3. Make sure a check mark is not next to Pause Printing. If a check mark is next to Pause Printing, click it to clear the option. Check for flashing lights on the printer. For more information, see Error Messages and Lights. Ensure you installed the ink cartridges correctly and removed the sticker and tape from each cartridge. Make sure you loaded the paper correctly. For more information, see Loading Paper. Ensure the printer is not connected to a PictBridge camera. For more information, see Printing Photos From a PictBridge-Enabled Camera. General Problems Fax Problems Make sure you turned on both your printer and your computer and the USB cable is properly connected. Ensure the computer is connected to an active analog phone line. l Using the fax function requires a phone connection to the fax modem in your computer. l When using a phone line with DSL broadband service, make sure you have a DSL filter installed to your fax modem. Contact your Internet Service Provider for more information. l Make sure your computer is not connected to the Internet via dial-up modem when trying to fax. When using an external modem, make sure it is turned on and it is correctly connected to your computer. Paper Problems Make sure you loaded the paper correctly. For more information, see Loading Paper. Use only paper recommended for your printer. For more information, see Loading Paper. Use a smaller amount of paper when printing multiple pages. For more information, see Loading Paper. Make sure the paper is not wrinkled, torn or damaged. Make sure the paper is against the right side of the paper support and the paper guide rests against the left edge of the paper. Check for a paper jam. Using your printer and your computer l Follow the instructions on the screen for clearing the paper jam. Using your printer only
-
 1
1 -
2
-
3
-
4
-
5
-
6
-
7
-
8
-
9
-
10
-
11
-
12
-
13
-
14
-
15
-
16
-
17
-
18
-
19
-
20
-
21
-
22
-
23
-
24
-
25
-
26
-
27
-
28
-
29
-
30
-
31
-
32
-
33
-
34
-
35
-
36
-
37
-
38
-
39
-
40
-
41
-
42
-
43
-
44
-
45
-
46
-
47
-
48
-
49
-
50
-
51
-
52
-
53
-
54
-
 55
55 -
 56
56 -
 57
57 -
 58
58 -
 59
59 -
 60
60 -
 61
61 -
 62
62
 |
 |