Dell EqualLogic PS6210XS EqualLogic Auto-Snapshot Manager/Microsoft Edition Ve - Page 96
Availability of SharePoint Data Restoration Operations, Mount a SharePoint Smart Copy, Restore
 |
View all Dell EqualLogic PS6210XS manuals
Add to My Manuals
Save this manual to your list of manuals |
Page 96 highlights
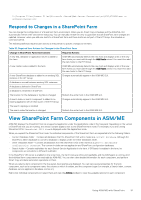
SharePoint Component Type Other databases Data Restoration Options • Mount As Read-Only • Clone Availability of SharePoint Data Restoration Operations Within the ASM GUI, some data restoration operations can only be initiated from certain HIT Group members: • Restore Selected Database operation-Must be initiated in the ASM/ME GUI on the HIT Group host on which the SharePoint VSS Writer is running. • Restore Search Service Application operation-Must be initiated in the ASM/ME GUI on the HIT Group host on which the SharePoint VSS Writer is running. • Restore All operation-Must be performed from the HIT Group host on which the SharePoint VSS Writer is running. If you still cannot perform this operation from the writer host, it might be because the Smart Copy contains a component that cannot be restored. • Restore As New operation-Must be performed from a compatible SQL Server host in the HIT Group. The SQL Server Writer must be running on that host. • Clone and Restore As New operation-Must be performed from a compatible SQL Server host in the HIT Group. The SQL Server Writer must be running on that host. Mount a SharePoint Smart Copy To mount a SharePoint Smart Copy: 1. Navigate to the HIT Group host on which you want to mount a Smart Copy. 2. In the tree panel, expand the Smart Copies node for that host. 3. Right-click the Smart Copy and select Mount. The Mount Smart Copy wizard opens. 4. Review the warnings and recommendations and click Next. The dialog box lists the volumes in the Smart Copy. 5. Click the upper-right corner of the Original Host column to filter the list of hosts. 6. Specify where to mount the volume. • Mount a volume to the default mount folder, specify a different mount folder, or mount the volume to a drive letter of your choice. The default mount folder is C:\ProgramData\EqualLogic\Mounts. A subfolder will be created for each volume in the Smart Copy. • Click Browse to specify a different mount path. • Select the drop-down menu under the Mount To column for each listed volume and select a drive letter. This action specifies a drive letter instead of a mount path. 7. Specify whether to mount each listed volume as read-write or read-only: • Select the checkbox under the Read Only column to mount the volume as read-only. • Clear the checkbox under the Read Only column to mount the volume as read-write. 8. Click Mount. The volume will be mounted to the host. Restore Selected Databases from a SharePoint Smart Copy To restore selected databases from a SharePoint Smart Copy: 1. Navigate to the HIT Group host on which the SharePoint VSS writer is running. 2. Expand the Smart Copies node for the writer host. 3. Right-click the Smart Copy and select Restore Selected Databases. 4. Select the database that you are restoring and click Next. Use Ctrl+select or Shift+select to select multiple databases. 5. Select Apply Logs or Fully Recover and then click Restore. ASM/ME displays the progress of the operation. 96 Using ASM/ME with SharePoint
-
 1
1 -
2
-
3
-
4
-
5
-
6
-
7
-
8
-
9
-
10
-
11
-
12
-
13
-
14
-
15
-
16
-
17
-
18
-
19
-
20
-
21
-
22
-
23
-
24
-
25
-
26
-
27
-
28
-
29
-
30
-
31
-
32
-
33
-
34
-
35
-
36
-
37
-
38
-
39
-
40
-
41
-
42
-
43
-
44
-
45
-
46
-
47
-
48
-
49
-
50
-
51
-
52
-
53
-
54
-
55
-
56
-
57
-
58
-
59
-
60
-
61
-
62
-
63
-
64
-
65
-
66
-
67
-
68
-
69
-
70
-
71
-
72
-
73
-
74
-
75
-
76
-
77
-
78
-
79
-
80
-
81
-
82
-
83
-
84
-
85
-
86
-
87
-
88
-
89
-
90
-
 91
91 -
 92
92 -
 93
93 -
 94
94 -
 95
95 -
 96
96 -
 97
97 -
 98
98 -
 99
99 -
 100
100 -
 101
101 -
102
-
103
-
104
-
105
-
106
-
107
-
108
-
109
-
110
-
111
-
112
-
113
-
114
-
115
-
116
-
117
-
118
-
119
-
120
-
121
-
122
-
123
-
124
-
125
-
126
-
127
-
128
-
129
-
130
-
131
-
132
-
133
-
134
 |
 |
