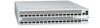
Dell Force10 Z9000 Dell Force10 Z9000 System Quick Start Guide - Page 7
Installing the Hardware, Installing the Z9000 Chassis in a Rack or Cabinet, Attach Mounting Brackets
 |
View all Dell Force10 Z9000 manuals
Add to My Manuals
Save this manual to your list of manuals |
Page 7 highlights
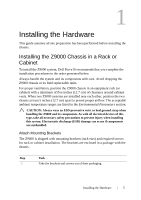
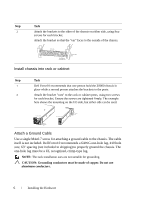
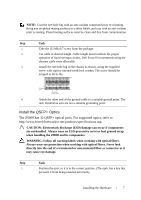
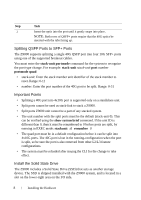
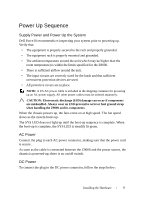
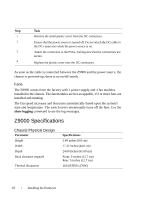
1 Installing the Hardware This guide assumes all site preparation has been performed before installing the chassis. Installing the Z9000 Chassis in a Rack or Cabinet To install the Z9000 system, Dell Force10 recommends that you complete the installation procedures in the order presented below. Always handle the system and its components with care. Avoid dropping the Z9000 chassis or its field replaceable units. For proper ventilation, position the Z9000 chassis in an equipment rack (or cabinet) with a minimum of five inches (12.7 cm) of clearance around exhaust vents. When two Z9000 systems are installed near each other, position the two chassis at least 5 inches (12.7 cm) apart to permit proper airflow. The acceptable ambient temperature ranges are listed in the Environmental Parameters section. CAUTION: Always wear an ESD-preventive wrist or heel ground strap when handling the Z9000 and its components. As with all electrical devices of this type, take all necessary safety precautions to prevent injury when installing this system. Electrostatic discharge (ESD) damage can occur if components are mishandled. Attach Mounting Brackets The Z9000 is shipped with mounting brackets (rack ears) and required screws for rack or cabinet installation. The brackets are enclosed in a package with the chassis. Step Task 1 Take the brackets and screws out of their packaging. Installing the Hardware 5
-
 1
1 -
 2
2 -
 3
3 -
 4
4 -
 5
5 -
 6
6 -
 7
7 -
 8
8 -
 9
9 -
 10
10 -
 11
11 -
 12
12 -
13
-
14
-
15
-
16
-
17
-
18
-
19
-
20
-
21
-
22
-
23
-
24
 |
 |