Dell Inspiron 1210 Service Manual - Page 11
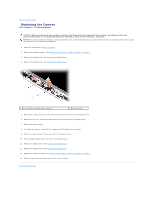
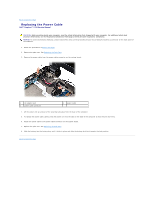
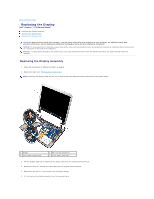
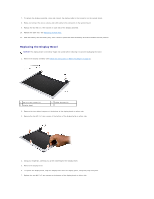
Replacing the Palm Rest, Flashing the BIOS, Back to Contents - memory
 |
View all Dell Inspiron 1210 manuals
Add to My Manuals
Save this manual to your list of manuals |
Page 11 highlights
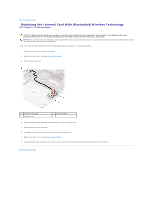
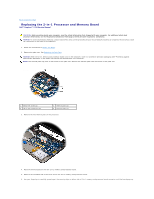
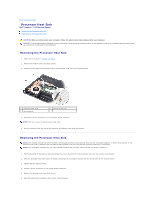
7. Lift the 2-in-1 memory and processor board out of its system board connector. 8. To replace the 2-in-1 memory and processor board, align the notch in the 2-in-1 memory and processor edge connector with the tab in the connector slot. 9. Slide the 2-in-1 memory and processor board firmly into the slot at a 45- degree angle, and gently press the 2-in-1 memory and processor board down until it clicks into place. If you do not hear the click, remove the module and reinstall it. 10. Replace the two M2x4-mm screws that secure the processor. 11. Replace the palm rest. See Replacing the Palm Rest. 12. Slide the battery into the battery bay, until it clicks into place and slide the battery-lock latch towards the lock position. NOTICE: Before turning on the computer, replace all screws and ensure that no stray screws remain inside the computer. Failure to do so may result in damage to the computer. 13. Update the BIOS using a flash BIOS-update program CD. See Flashing the BIOS". Back to Contents Page
-
 1
1 -
2
-
3
-
4
-
5
-
 6
6 -
 7
7 -
 8
8 -
 9
9 -
 10
10 -
 11
11 -
 12
12 -
 13
13 -
 14
14 -
 15
15 -
 16
16 -
17
-
18
-
19
-
20
-
21
-
22
-
23
-
24
-
25
-
26
-
27
-
28
-
29
-
30
-
31
-
32
-
33
-
34
-
35
-
36
-
37
-
38
 |
 |