Dell Inspiron 1210 Service Manual - Page 15
Replacing the Display Bezel
 |
View all Dell Inspiron 1210 manuals
Add to My Manuals
Save this manual to your list of manuals |
Page 15 highlights
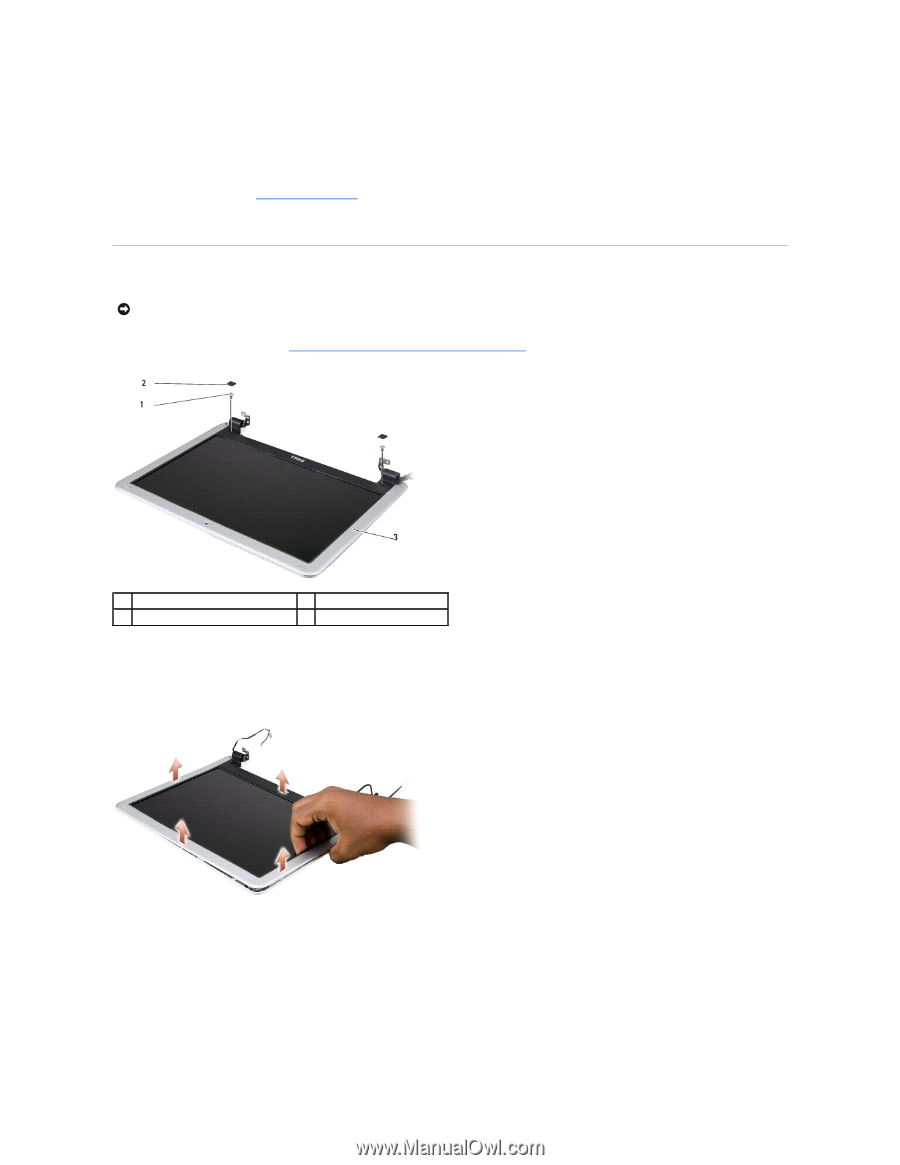
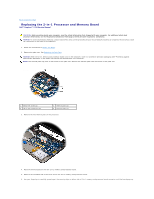
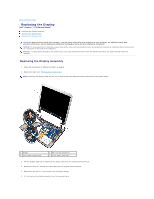
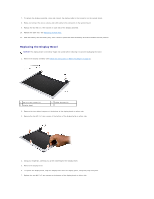
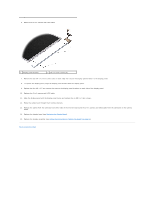
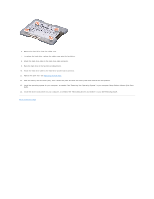
7. To replace the display assembly, route and connect the display cable to the connector on the system board. 8. Route and connect the 2-in-1 camera and LVDS cable to the connector on the system board. 9. Replace the four M2.5 x 3-mm screws on each side of the display assembly. 10. Replace the palm rest. See Replacing the Palm Rest. 11. Slide the battery into the battery bay, until it clicks in place and slide the battery-lock latch towards the lock position. Replacing the Display Bezel NOTICE: The display bezel is extremely fragile. Be careful when removing it to prevent damaging the bezel. 1. Remove the display assembly (see Follow the instructions in "Before You Begin" on page 9.). 1 M2.5 x 5-mm screws (2) 3 display bezel 2 rubber bumpers(2) 2. Remove the two rubber bumpers at the bottom of the display bezel on either side. 3. Remove the two M2.5 x 5-mm screws at the bottom of the display bezel on either side. 4. Using your fingertips, carefully pry up the inside edge of the display bezel. 5. Remove the display bezel. 6. To replace the display bezel, align the display bezel over the display panel, and gently snap into place. 7. Replace the two M2.5 x 5-mm screws at the bottom of the display bezel on either side.
-
 1
1 -
2
-
3
-
4
-
5
-
6
-
7
-
8
-
9
-
 10
10 -
 11
11 -
 12
12 -
 13
13 -
 14
14 -
 15
15 -
 16
16 -
 17
17 -
 18
18 -
 19
19 -
 20
20 -
21
-
22
-
23
-
24
-
25
-
26
-
27
-
28
-
29
-
30
-
31
-
32
-
33
-
34
-
35
-
36
-
37
-
38
 |
 |