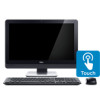
Dell Optiplex 9010 All In One Dell OptiPlex 9010 All-In-One Touch Owner's Manu - Page 35
Removing the Display Panel, Before Working Inside Your Computer, System and Setup Password - memory
 |
View all Dell Optiplex 9010 All In One manuals
Add to My Manuals
Save this manual to your list of manuals |
Page 35 highlights
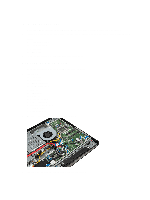
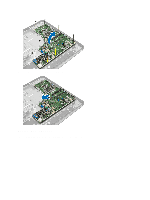
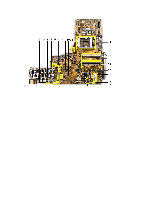
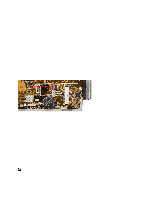
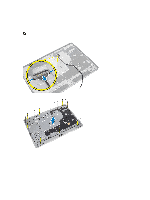
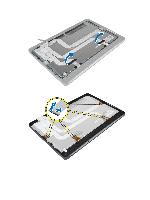
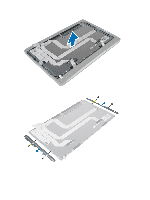
1. Follow the procedures in Before Working Inside Your Computer. 2. Remove the: a) VESA stand b) back cover c) VESA mount bracket d) system-board shield e) memory f) optical drive g) hard drive h) heat-sink assembly i) power supply unit j) input/output board shield k) converter board l) power-supply fan 3. Identify the PSWD jumper on the system board. 4. Remove the PSWD jumper from the system board. NOTE: The existing passwords are not disabled (erased) until the computer boots without the jumper. 5. Install all the components removed in step 2. NOTE: If you assign a new system and/or setup password with the PSWD jumper installed, the system disables the new password(s) the next time it boots. 6. Connect the computer to the electrical outlet and power-on the computer. 7. Power-off the computer and disconnect the power cable from the electrical outlet. 8. Repeat step 2. 9. Replace the PSWD jumper on the system board. 10. Install all the components removed in step 8. 11. Follow the procedures in After Working Inside Your Computer. 12. Power-on the computer. 13. Go to the system setup, and assign a new system or setup password. See System and Setup Password. Removing the Display Panel 1. Follow the procedures in Before Working Inside Your Computer. 2. Remove the: a) VESA stand b) back cover c) VESA mount bracket d) system-board shield e) input/output board shield f) WLAN card g) optical drive h) hard drive i) intrusion switch j) power-button board k) converter board l) power-supply fan m) power supply unit n) heat-sink assembly 35
-
 1
1 -
2
-
3
-
4
-
5
-
6
-
7
-
8
-
9
-
10
-
11
-
12
-
13
-
14
-
15
-
16
-
17
-
18
-
19
-
20
-
21
-
22
-
23
-
24
-
25
-
26
-
27
-
28
-
29
-
 30
30 -
 31
31 -
 32
32 -
 33
33 -
 34
34 -
 35
35 -
 36
36 -
 37
37 -
 38
38 -
 39
39 -
 40
40 -
41
-
42
-
43
-
44
-
45
-
46
-
47
-
48
-
49
-
50
-
51
-
52
-
53
-
54
-
55
-
56
-
57
-
58
-
59
-
60
-
61
-
62
-
63
-
64
-
65
-
66
-
67
 |
 |