Dell PowerEdge 1800 Information Update (.pdf) - Page 16
Slide the side cover toward the front of the system.
 |
View all Dell PowerEdge 1800 manuals
Add to My Manuals
Save this manual to your list of manuals |
Page 16 highlights
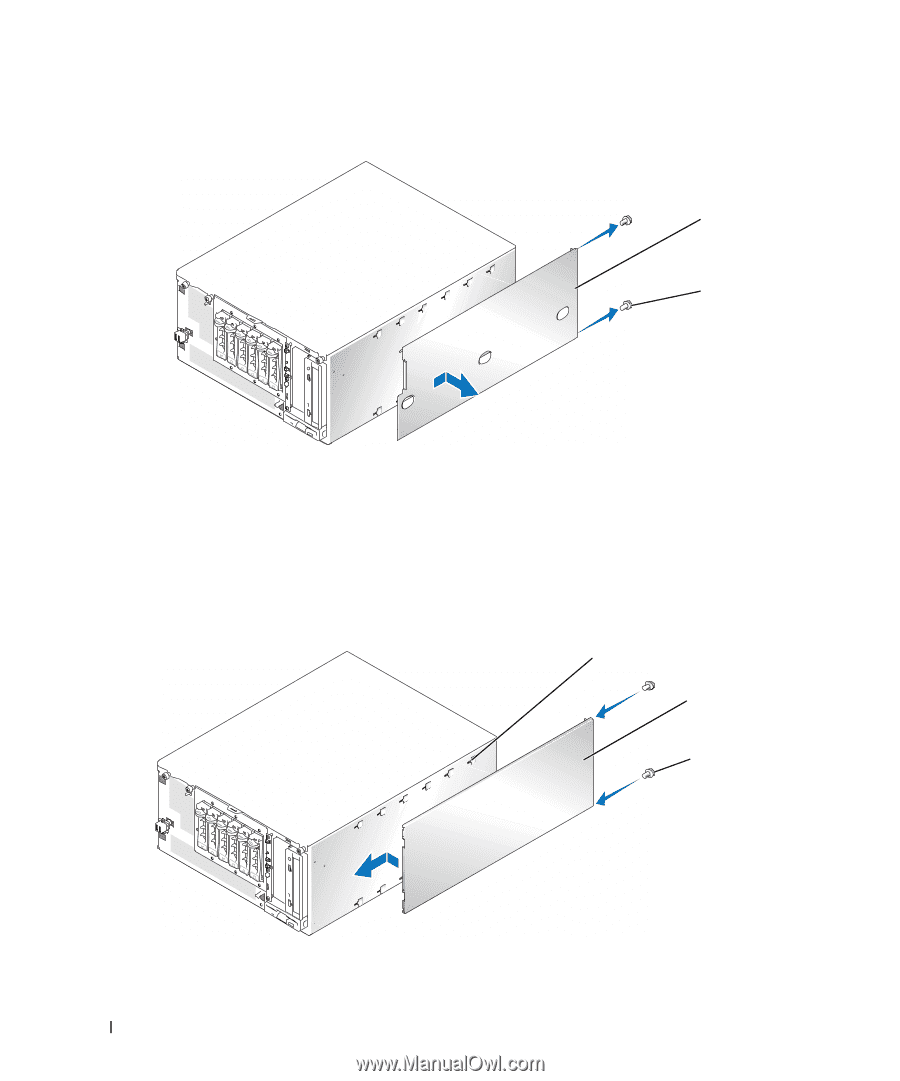
www.dell.com | support.dell.com Figure 1-11. Removing the Rack-Adapter Plate rack-adapter plate back-panel screws (2) 2 Install the system side cover: a Align the 16 securing tabs on the side edges and the front edge of the side cover with the 16 securing slots on the chassis. See Figure 1-12. b Slide the side cover toward the front of the system. c Replace the two back-panel screws to secure the side cover to the chassis. Figure 1-12. Installing the System Side Cover securing slots (16) system side cover back-panel screws (2) 14 Installing the Tower-to-Rack and Rack-to-Tower Kits
-
 1
1 -
2
-
3
-
4
-
5
-
6
-
7
-
8
-
9
-
10
-
 11
11 -
 12
12 -
 13
13 -
 14
14 -
 15
15 -
 16
16 -
 17
17 -
 18
18 -
 19
19 -
 20
20
 |
 |
14
Installing the Tower-to-Rack and Rack-to-Tower Kits
www.dell.com | support.dell.com
Figure 1-11.
Removing the Rack-Adapter Plate
2
Install the system side cover:
a
Align the 16 securing tabs on the side edges and the front edge of the side cover with the
16 securing slots on the chassis. See Figure 1-12.
b
Slide the side cover toward the front of the system.
c
Replace the two back-panel screws to secure the side cover to the chassis.
Figure 1-12.
Installing the System Side Cover
rack-adapter
plate
back-panel
screws (2)
securing slots (16)
system side
cover
back-panel
screws (2)