Dell PowerEdge R860 Host Bus Adapter Users Guide HBA 355 and 350 Series - Page 22
Before working inside your system, Remove the Dell HBA355i Adapter
 |
View all Dell PowerEdge R860 manuals
Add to My Manuals
Save this manual to your list of manuals |
Page 22 highlights
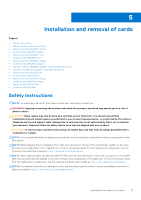
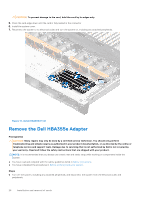
Before working inside your system Steps 1. Power off the system and all attached peripherals. 2. Disconnect the system from the electrical outlet, and disconnect the peripherals. 3. If applicable, remove the system from the rack. For more information, see the Rail Installation Guide relevant to your rail solutions at www.dell.com/poweredgemanuals. 4. Remove the system cover. Remove the Dell HBA355i Adapter Prerequisites CAUTION: Many repairs may only be done by a certified service technician. You should only perform troubleshooting and simple repairs as authorized in your product documentation, or as directed by the online or telephone service and support team. Damage due to servicing that is not authorized by Dell is not covered by your warranty. Read and follow the safety instructions that are shipped with your product. ● You have read and complied with the safety guidelines listed in Safety instructions. ● You have completed the procedures in Before working inside your system. Steps 1. Turn off the system, including any attached peripherals, and disconnect the system from the electrical outlet and peripherals. 2. Remove the system cover. 3. Locate the HBA355i Adapter in the expansion riser on the system board. CAUTION: To prevent damage to the card, hold the card by its edges only. 4. Unfasten and lift the riser from the system board. Remove the Dell HBA355i card from the system. 5. Disconnect the SAS cables from the card: a. Press down and hold the metal tab on the SAS cable connector. b. Pull the SAS cable out of the connector. 6. Replace the storage controller and reconnect the SAS cable before inserting them into the riser. 7. Reinstall the riser on the system board and fasten the riser. 8. Install the system cover. 9. Reconnect the system to its electrical outlet and turn the system on, including any attached peripherals. 22 Installation and removal of cards
-
 1
1 -
2
-
3
-
4
-
5
-
6
-
7
-
8
-
9
-
10
-
11
-
12
-
13
-
14
-
15
-
16
-
 17
17 -
 18
18 -
 19
19 -
 20
20 -
 21
21 -
 22
22 -
 23
23 -
 24
24 -
 25
25 -
 26
26 -
 27
27 -
28
-
29
-
30
-
31
-
32
-
33
-
34
-
35
-
36
-
37
-
38
-
39
-
40
-
41
-
42
-
43
-
44
-
45
-
46
-
47
-
48
-
49
-
50
-
51
-
52
-
53
-
54
-
55
 |
 |
