Dell PowerVault NX3200 User Manual - Page 37
Connection Point, Administrative Tools
 |
View all Dell PowerVault NX3200 manuals
Add to My Manuals
Save this manual to your list of manuals |
Page 37 highlights
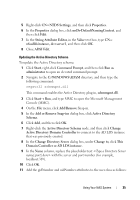
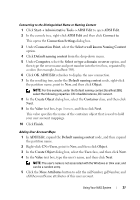
Connecting to the Distinguished Name or Naming Context 1 Click StartAdministrative Tools ADSI Edit to open ADSI Edit. 2 In the console tree, right-click ADSI Edit and then click Connect to. This opens the Connection Settings dialog box. 3 Under Connection Point, select the Select a well known Naming Context option. 4 Click Default naming context from the drop-down menu. 5 Under Computer, select the Select or type a domain or server option, and then type the server name and port number into the text box, separated by a colon (for example, localhost:389). 6 Click OK. ADSI Edit refreshes to display the new connection. 7 In the resulting tree, under the Default naming context node, right-click the partition name, point to New, and then click Object. NOTE: For this example, under the Default naming context [localhost:389], select the following properties: CN=nfsadldsinstance, DC=server1. 8 In the Create Object dialog box, select the Container class, and then click Next. 9 In the Value text box, type Users, and then click Next. This value specifies the name of the container object that is used to hold your user account mappings. 10 Click Finish. Adding User Account Maps 1 In ADSI Edit, expand the Default naming context node, and then expand the partition name. 2 Right-click CN=Users, point to New, and then click Object. 3 In the Create Object dialog box, select the User class, and then click Next. 4 In the Value text box, type the user's name, and then click Next. NOTE: The user's name is not associated with the Windows or Unix user, and can be a random entry. 5 Click the More Attributes button to edit the uidNumber, gidNumber, and sAMAccountName attributes of this user account. Using Your NAS System 37
-
 1
1 -
2
-
3
-
4
-
5
-
6
-
7
-
8
-
9
-
10
-
11
-
12
-
13
-
14
-
15
-
16
-
17
-
18
-
19
-
20
-
21
-
22
-
23
-
24
-
25
-
26
-
27
-
28
-
29
-
30
-
31
-
 32
32 -
 33
33 -
 34
34 -
 35
35 -
 36
36 -
 37
37 -
 38
38 -
 39
39 -
 40
40 -
 41
41 -
 42
42 -
43
-
44
-
45
-
46
-
47
-
48
-
49
-
50
 |
 |
