Dell SP2009WFP Dell SP2009W Flat Panel Monitor - Page 22
Using the Camera - sp2009w webcam driver
 |
View all Dell SP2009WFP manuals
Add to My Manuals
Save this manual to your list of manuals |
Page 22 highlights
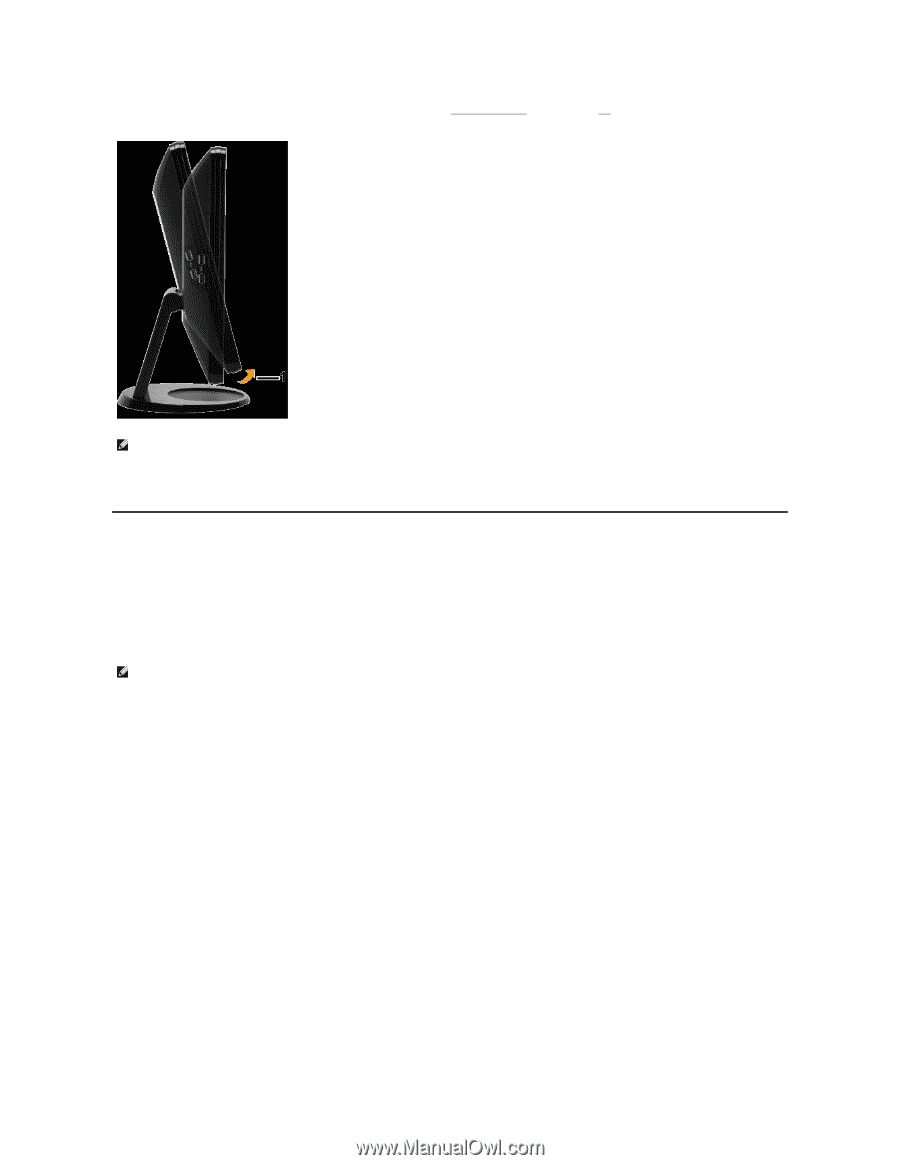
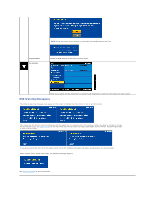
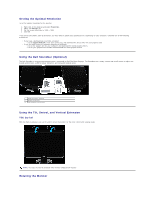
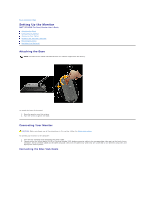
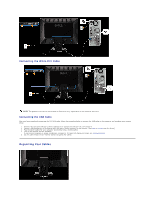
Before you rotate the monitor, your monitor should be fully vertically extended (Vertical Extension) and fully tilted (Tilt) up to avoid hitting the bottom edge of the monitor. NOTE: To use the Display Rotation function (Landscape versus Portrait view) with your Dell computer, you require an updated graphics driver that is not included with this monitor. To download the graphics driver, go to support.dell.com and see the Download section for Video Drivers for latest driver updates. Using the Camera Installing the Dell Webcam Software (Microsoft® Windows® Operating Systems) The Dell SP2009W webcam application media that ships with your monitor, allows you to the install the software and drivers for the integrated webcam. To install the Dell Webcam Software: 1. Insert the Dell SP2009W Webcam Resource CD into the drive. NOTE: Ensure that the USB cable is connected between the monitor and the computer. 2. The Install Shield Wizard automatically launches the setup application. Select the Language and click Next to continue. 3. Read Software License Agreement and click Yes to continue. 4. Click Browse to change Destination Folder where the software will be installed to and then click Next to continue. Choose Full Installation than click Next and follow the instructions to complete the installation. Alternatively, choose Custom Installation to select the 5. components to install. 6. Click Finish to restart the computer after installation completes. You are now ready to use the Webcam. The Webcam application provides the following functions Dell Webcam Center Dell Webcam Central enables convenient access to all exciting applications to enhance your Dell Webcam experience. Creative Live! Cam Avatar Creator Creative Live! Cam Avatar Creator lets you personalize an animated avatar from any digital photo you want. Using advanced speech technology, your personalized avatar even lip syncs with you. Share creation with friends using Live! Cam Avatar, via email or even YouTube(TM). Accessing the Camera Help File To access the camera's help file, right-click the Dell Webcam Central icon in the notification area and click. Click Help from the menu and select Contents.
-
 1
1 -
2
-
3
-
4
-
5
-
6
-
7
-
8
-
9
-
10
-
11
-
12
-
13
-
14
-
15
-
16
-
 17
17 -
 18
18 -
 19
19 -
 20
20 -
 21
21 -
 22
22 -
 23
23 -
 24
24 -
 25
25 -
 26
26 -
 27
27 -
28
-
29
-
30
-
31
-
32
-
33
-
34
 |
 |