Dell V515W User's Guide - Page 42
Printing photos from a memory device using the printer software - wireless all in one
 |
View all Dell V515W manuals
Add to My Manuals
Save this manual to your list of manuals |
Page 42 highlights
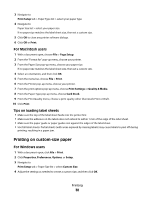
6 Adjust the print settings: • If you are in the Easy Photo menu, then press the arrow buttons to select the paper size and photo size. Press each time you make a selection. • If you are in the Print Photos menu, then press the arrow buttons to select the photo size, paper size, paper type, layout, photo effects, and quality of the photos, and to adjust the brightness and color effects of the photos. Press each time you make a selection. 7 Press the Color/Black button to set a color or black-and-white print. When you select color or black-only printing, the light near your choice comes on. 8 Press . Note: For best results, allow the prints to dry at least 24 hours before stacking, displaying, or storing. Printing photos from a memory device using the printer software 1 Load photo paper with the glossy or printable side faceup. (If you are not sure which side is the printable side, then see the instructions that came with the paper.) 2 From the printer control panel, press . 3 Insert a memory card, flash drive, or digital camera set to mass storage mode. If document files and image files are stored on the memory device, then press to select Photos. 4 Transfer or print the photos: If the printer is using a USB connection • Fast Pics launches automatically when you insert the memory device. Follow the instructions on the computer screen to transfer the photos to the computer or to print. If the printer is using a Wireless connection (selected models only) a Press the arrow buttons to scroll to Select Computer, and then press . b Press the arrow buttons to select the network computer where you want to save the photos, and then press . c Transfer or print the photos: • Fast Pics launches automatically when you insert the memory device. Follow the instructions on the computer screen to transfer the photos to the computer or to print. Printing 42
-
 1
1 -
2
-
3
-
4
-
5
-
6
-
7
-
8
-
9
-
10
-
11
-
12
-
13
-
14
-
15
-
16
-
17
-
18
-
19
-
20
-
21
-
22
-
23
-
24
-
25
-
26
-
27
-
28
-
29
-
30
-
31
-
32
-
33
-
34
-
35
-
36
-
 37
37 -
 38
38 -
 39
39 -
 40
40 -
 41
41 -
 42
42 -
 43
43 -
 44
44 -
 45
45 -
 46
46 -
 47
47 -
48
-
49
-
50
-
51
-
52
-
53
-
54
-
55
-
56
-
57
-
58
-
59
-
60
-
61
-
62
-
63
-
64
-
65
-
66
-
67
-
68
-
69
-
70
-
71
-
72
-
73
-
74
-
75
-
76
-
77
-
78
-
79
-
80
-
81
-
82
-
83
-
84
-
85
-
86
-
87
-
88
-
89
-
90
-
91
-
92
-
93
-
94
-
95
-
96
-
97
-
98
-
99
-
100
-
101
-
102
-
103
-
104
-
105
-
106
-
107
-
108
-
109
-
110
-
111
-
112
-
113
-
114
-
115
-
116
-
117
-
118
-
119
-
120
-
121
-
122
-
123
-
124
-
125
-
126
-
127
-
128
-
129
-
130
-
131
-
132
-
133
-
134
-
135
-
136
-
137
-
138
-
139
-
140
-
141
-
142
-
143
-
144
-
145
-
146
-
147
-
148
-
149
-
150
-
151
-
152
-
153
-
154
-
155
-
156
-
157
-
158
-
159
-
160
-
161
-
162
-
163
-
164
-
165
-
166
-
167
-
168
-
169
-
170
-
171
-
172
 |
 |
