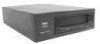
Dell VS160 Dell PowerVault 110T DLT VS160 Tape Drive - User's Guide - Page 17
Installing the Dell PowerVault Tools Diagnostic Package, Tape Backup Applications, Requirements - drivers
 |
View all Dell VS160 manuals
Add to My Manuals
Save this manual to your list of manuals |
Page 17 highlights
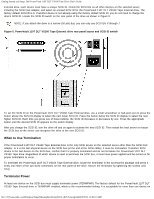
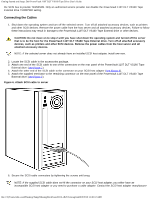
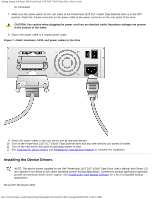
Getting Started and Setup: Dell PowerVault 110T DLT VS160 Tape Drive User's Guide Microsoft® Windows® 2000 and Windows® Server™ 2003 Windows Backup Red Hat Linux versions 7.3 and 8.0 and 9.0 Tar Tape Backup Applications NOTICE: See the Dell Support website at support.dell.com to obtain the latest patches and upgrades for the Tape Backup Applications noted below. Microsoft® Windows® 2000 and Windows® Server™ 2003 VERITAS™ BackupExec™ for Windows NT/2000 version 9.0 or later Yosemite Tapeware® version 7.0 or later Novell® NetWare® VERITAS™ BackupExec™ for NetWare™ version 9.0 or later Yosemite Tapeware® version 7.0 or later Red Hat Linux versions 7.3, 8.0, and 9.0 Yosemite Tapeware® version 7.0 or later Installing the Dell PowerVault Tools Diagnostic Package Requirements Microsoft® Windows® 2000 PowerVault 110T DLT1, PowerVault 110T DLT VS80, or PowerVault 110T DLT VS160 Tape drive Before Installing the Diagnostic Package 1. Make sure the tape drive is powered on and that the SCSI bus is in an idle state (stop and/or hold all backup applications). 2. Print these instructions. In the event the server needs to be restarted, you can resume where you left off. Installing the Diagnostic Package 1. Decide where on the server you plan to install the PowerVault Tools application and related files. You can place the application on your desktop, in an existing folder, or you can create a new folder for this purpose. Note that when the application runs, it creates a log file, which also resides in the designated folder. As a result, you should not run the application directly from the CD as this prevents the application from creating the log file. The log file is useful for Technical Support in the event that troubleshooting the drive becomes necessary. 2. Insert the Dell PowerVault 110T DLT VS160 Tape Drive User's Manual and Drivers CD into the CD drive. 3. Open the folder d:\Diags on the Dell PowerVault 110T DLT VS160 Tape Drive User's Manual and Drivers CD, where d: is the drive letter of the CD drive. 4. Drag or copy the PowerVault Tools application to the location chosen in step 1. 5. Browse to the folder chosen in step 1 and double-click the PowerVault Tools icon to run the diagnostic application. You can run the diagnostic application at any time by double-clicking the PowerVault Tools icon. 6. From the folder d:\Diags on the Dell PowerVault 110T DLT VS160 Tape Drive User's Manual and Drivers CD, where d: is the drive letter of the CD drive, view the README file for usage instructions, explanation of options, and troubleshooting guidelines for the PowerVault Tools application. You may want to copy this README file to the location chosen in step 1 for future use. file:///C|/Users/rishi_sood/Desktop/Temp/MissingDocsPosted/110t_dlt/UG/setup.htm[3/8/2013 11:46:12 AM]
-
 1
1 -
2
-
3
-
4
-
5
-
6
-
7
-
8
-
9
-
10
-
11
-
 12
12 -
 13
13 -
 14
14 -
 15
15 -
 16
16 -
 17
17 -
 18
18 -
 19
19 -
 20
20 -
 21
21 -
 22
22 -
23
-
24
-
25
-
26
-
27
-
28
-
29
-
30
-
31
-
32
-
33
-
34
-
35
-
36
-
37
-
38
 |
 |