Dell Vostro 15 3546 Owners Manual - Page 16
Installing the Keyboard, battery, After Working Inside Your computer
 |
View all Dell Vostro 15 3546 manuals
Add to My Manuals
Save this manual to your list of manuals |
Page 16 highlights
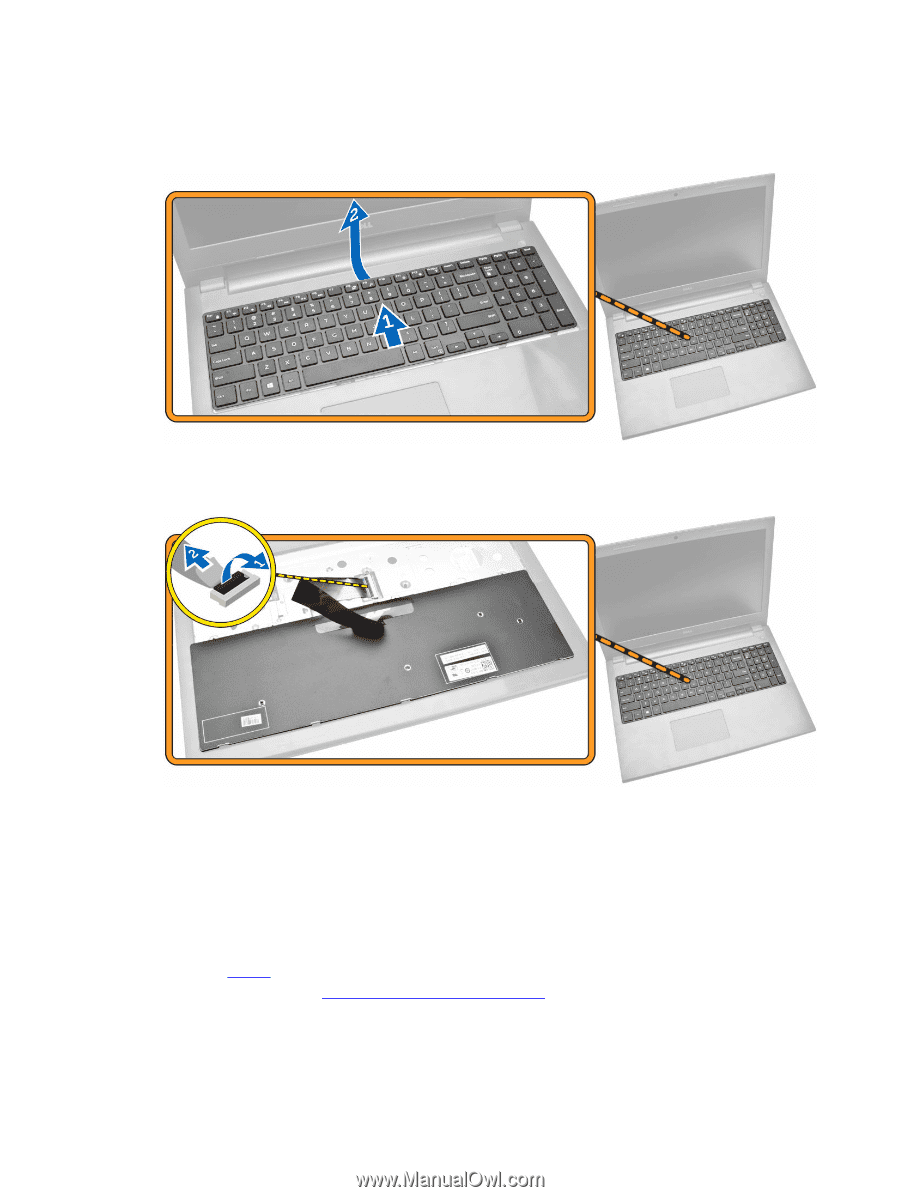
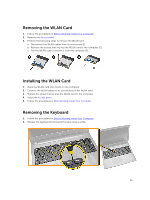
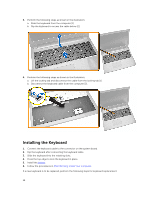
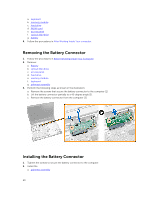
3. Perform the following steps as shown in the illustration: a. Slide the keyboard from the computer [1]. b. Flip the keyboard to access the cable below [2]. 4. Perform the following steps as shown in the illustration: a. Lift the locking tab and disconnect the cable from the locking tab [1]. b. Disconnect the keyboard cable from the computer [2]. Installing the Keyboard 1. Connect the keyboard cable to the connector on the system board. 2. Flip the keyboard after connecting the keyboard cable. 3. Slide the keyboard into the retaining slots. 4. Press the top edge to lock the keyboard in place. 5. Install the battery. 6. Follow the procedures in After Working Inside Your computer. If a new keyboard is to be replaced, perform the following steps for keyboard replacement. 16
-
 1
1 -
2
-
3
-
4
-
5
-
6
-
7
-
8
-
9
-
10
-
 11
11 -
 12
12 -
 13
13 -
 14
14 -
 15
15 -
 16
16 -
 17
17 -
 18
18 -
 19
19 -
 20
20 -
 21
21 -
22
-
23
-
24
-
25
-
26
-
27
-
28
-
29
-
30
-
31
-
32
-
33
-
34
-
35
-
36
-
37
-
38
-
39
-
40
-
41
-
42
-
43
-
44
-
45
-
46
-
47
-
48
-
49
-
50
 |
 |