Denon AVR 4806 Owners Manual - Page 116
Setting the Channel Level, Channel Level at the Speaker Setup
 |
UPC - 081757506465
View all Denon AVR 4806 manuals
Add to My Manuals
Save this manual to your list of manuals |
Page 116 highlights
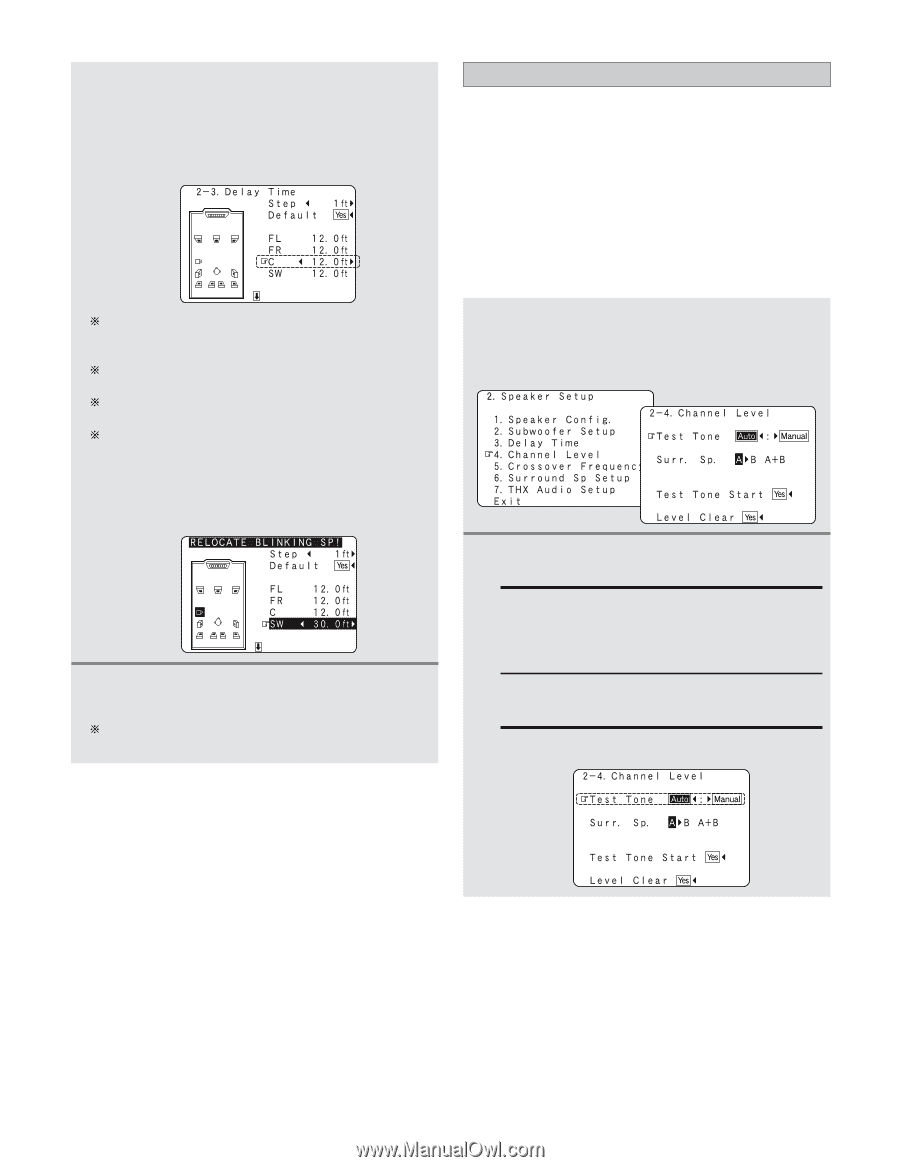
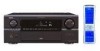
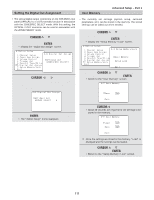
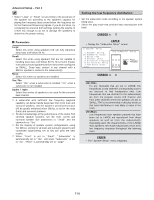
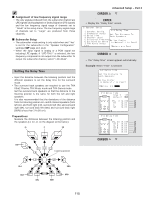
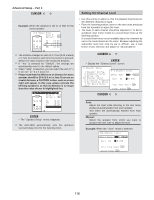
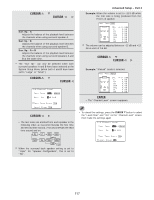
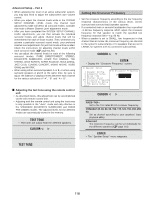
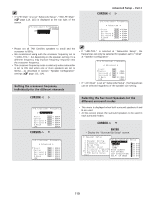
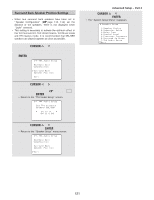
Advanced Setup - Part 2 4 Press the CURSOR F or G button to set the distance between the center speaker and listening position. Example: When the distance is set to 12 feet for the center speaker The distance changes in units of 0.1 foot (0.03 meters) or 1 foot (0.3 meters) each time the button is pressed. Select the value closest to the measured distance. If "Yes" is selected for "Default", the settings are automatically reset to the default values. When "Step" is selected, you can select the unit of "1 ft (0.1 m)" or "0.1 ft (0.01 m)". Please note that the difference of distance for every speaker should be 20 ft (6.0 m) or less. If you set an invalid distance, a CAUTION notice, such as screen right will appear. In this case, please relocate the blinking speaker(s) so that its distance is no larger than the value shown in highlighted line. 5 Press the ENTER button to enter the setting. • The "Speaker Setup" menu reappears. The AVR-4806 automatically sets the optimum surround delay time for the listening room. Setting the Channel Level • Use this setting to adjust so that the playback level between the different channels is equal. • From the listening position, listen to the test tones produced from the speakers to adjust the level. • The level of each channel should be adjusted to 75 dB (Cweighted, slow meter mode) on a sound level meter at the listening position. If a sound level meter is not available adjust the channels by ear so the sound levels are the same. Because adjusting the subwoofer level test tone by ear is difficult, use a well known music selection and adjust for natural balance. 1 Press the CURSOR D or H button to select the "Channel Level" at the "Speaker Setup" menu, then press the ENTER button. • Display the "Channel Level" screen. 2 Press the CURSOR F or G button to select the "Auto" or "Manual". Auto: Adjust the level while listening to the test tones produced automatically from each speaker. Test tones are automatically emitted from each speaker. Manual: Select the speaker from which you want to produce the test tone to adjust the level. Example: When the "Auto" mode is selected 116
-
 1
1 -
2
-
3
-
4
-
5
-
6
-
7
-
8
-
9
-
10
-
11
-
12
-
13
-
14
-
15
-
16
-
17
-
18
-
19
-
20
-
21
-
22
-
23
-
24
-
25
-
26
-
27
-
28
-
29
-
30
-
31
-
32
-
33
-
34
-
35
-
36
-
37
-
38
-
39
-
40
-
41
-
42
-
43
-
44
-
45
-
46
-
47
-
48
-
49
-
50
-
51
-
52
-
53
-
54
-
55
-
56
-
57
-
58
-
59
-
60
-
61
-
62
-
63
-
64
-
65
-
66
-
67
-
68
-
69
-
70
-
71
-
72
-
73
-
74
-
75
-
76
-
77
-
78
-
79
-
80
-
81
-
82
-
83
-
84
-
85
-
86
-
87
-
88
-
89
-
90
-
91
-
92
-
93
-
94
-
95
-
96
-
97
-
98
-
99
-
100
-
101
-
102
-
103
-
104
-
105
-
106
-
107
-
108
-
109
-
110
-
 111
111 -
 112
112 -
 113
113 -
 114
114 -
 115
115 -
 116
116 -
 117
117 -
 118
118 -
 119
119 -
 120
120 -
 121
121 -
122
-
123
-
124
-
125
-
126
-
127
-
128
-
129
-
130
-
131
-
132
-
133
-
134
-
135
-
136
-
137
-
138
-
139
-
140
-
141
-
142
-
143
-
144
-
145
-
146
-
147
-
148
-
149
-
150
-
151
-
152
-
153
-
154
 |
 |