Denon AVR 4806 Owners Manual - Page 85
ZONE3/REC SELECT, FUNCTION, INPUT MODE, DIRECT/STEREO, PHONES, Multi-source recording / playback
 |
UPC - 081757506465
View all Denon AVR 4806 manuals
Add to My Manuals
Save this manual to your list of manuals |
Page 85 highlights
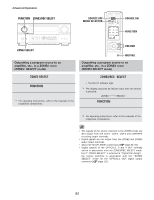
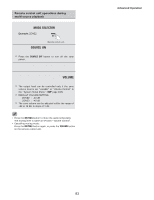
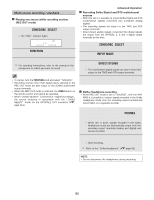
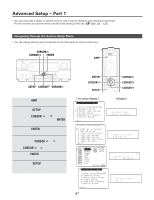
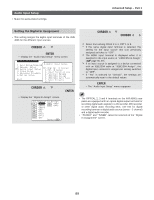
Multi-source recording / playback 2 Playing one source while recording another (REC OUT mode) 1 Press the ZONE3/REC SELECT button until "RECOUT SOURCE" appears on the display. • The "REC" indicator lights. Advanced Operation 2 Recording Dolby Digital and DTS multichannel sources • With this set it is possible to record Dolby Digital and DTS multichannel signals converted into 2-channel analog signals. • The recording signals are output to the TAPE and VCR output terminals. • Down-mixed analog signals converted into digital signals are output from the OPTICAL 2, 3 and 4 digital output terminals at this time. DVD RECOUT SOURCE 2 Turn the FUNCTION knob to select the source you wish to record. 3 Set the recording mode. For operating instructions, refer to the manual of the component on which you want to record. 1 Press the ZONE3/REC SELECT button until "RECOUT SOURCE" appears on the display. 2 Press the INPUT MODE button to set the input mode according to the source to be played. 3 Press the DIRECT/STEREO button to set the surround mode. • The multichannel digital signals are down-mixed and output to the TAPE and VCR output terminals. • To cancel, turn the FUNCTION knob and select "SOURCE". • Recording sources other than digital inputs selected in the REC OUT mode are also output to the ZONE3 audio/video output terminals. • When the REC OUT mode is selected, the ZONE3 button on the remote control unit cannot be operated. • When "ZONE2 SELECT" is selected at "Digital Out Assign", the source switches in association with the "ZONE2 SELECT" mode for the OPTICAL2 OUT connector ( page 111). 4 Set the recording mode. 2 Dolby Headphone recording • When REC OUT mode is set to "SOURCE", with the AVR4806 it is possible to output signals encoded in the Dolby Headphone mode from the recording output terminal and record them on a separate recorder. 1 The Dolby Headphone play mode is set when headphones are connected to the PHONES jack during playback in the DOLBY/DTS surround mode. • When this is done, signals encoded in the Dolby Headphone mode are automatically output from the recording output terminals (analog and digital) and can be recorded. 2 Select the parameters and set the desired mode. • Start recording. Refer to the "Dolby Headphone" ( page 58). NOTE: • Do not disconnect the headphones during recording. 85
-
 1
1 -
2
-
3
-
4
-
5
-
6
-
7
-
8
-
9
-
10
-
11
-
12
-
13
-
14
-
15
-
16
-
17
-
18
-
19
-
20
-
21
-
22
-
23
-
24
-
25
-
26
-
27
-
28
-
29
-
30
-
31
-
32
-
33
-
34
-
35
-
36
-
37
-
38
-
39
-
40
-
41
-
42
-
43
-
44
-
45
-
46
-
47
-
48
-
49
-
50
-
51
-
52
-
53
-
54
-
55
-
56
-
57
-
58
-
59
-
60
-
61
-
62
-
63
-
64
-
65
-
66
-
67
-
68
-
69
-
70
-
71
-
72
-
73
-
74
-
75
-
76
-
77
-
78
-
79
-
 80
80 -
 81
81 -
 82
82 -
 83
83 -
 84
84 -
 85
85 -
 86
86 -
 87
87 -
 88
88 -
 89
89 -
 90
90 -
91
-
92
-
93
-
94
-
95
-
96
-
97
-
98
-
99
-
100
-
101
-
102
-
103
-
104
-
105
-
106
-
107
-
108
-
109
-
110
-
111
-
112
-
113
-
114
-
115
-
116
-
117
-
118
-
119
-
120
-
121
-
122
-
123
-
124
-
125
-
126
-
127
-
128
-
129
-
130
-
131
-
132
-
133
-
134
-
135
-
136
-
137
-
138
-
139
-
140
-
141
-
142
-
143
-
144
-
145
-
146
-
147
-
148
-
149
-
150
-
151
-
152
-
153
-
154
 |
 |
