Dewalt DCGG571M1 Instruction Manual - Page 15
Filler Pump Filling From A Bulk Container - lowes
 |
View all Dewalt DCGG571M1 manuals
Add to My Manuals
Save this manual to your list of manuals |
Page 15 highlights
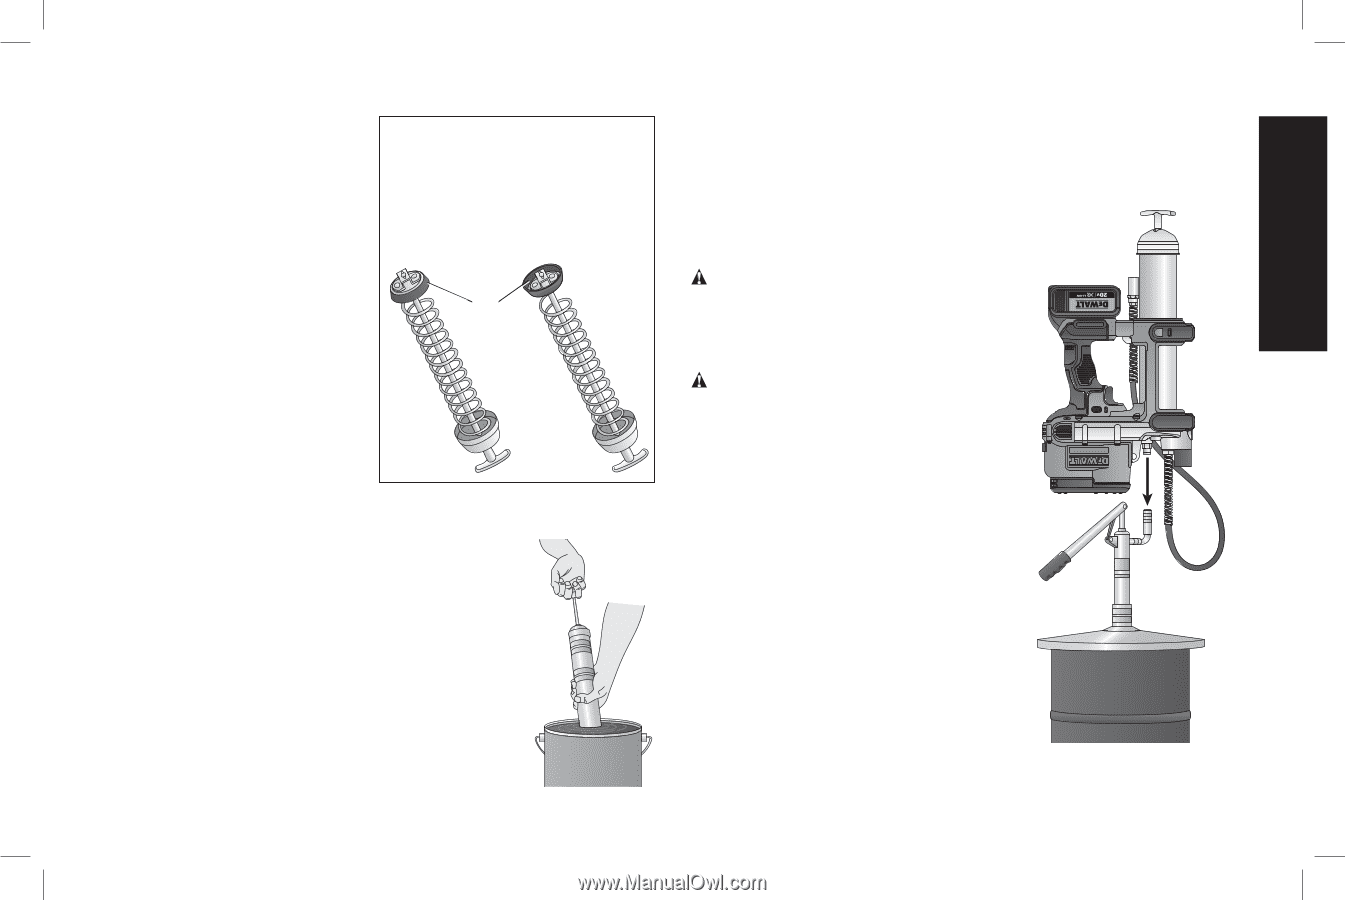
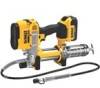
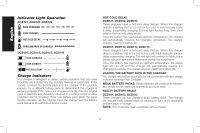
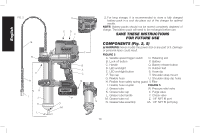
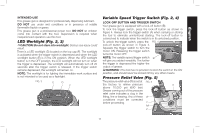
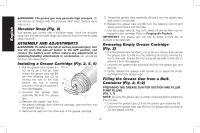
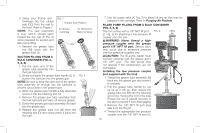
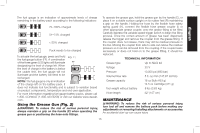
3. Using your thumb and forefinger, flip the rubber seal (GG) from the rear to the front. Refer to Figure 7. NOTE: The seal resembles a cup, which should open toward the top cap (F, Fig. 2) when prepared for suction and filler pump filling. 4. Reinsert the grease tube rod (M) back into the grease tube (J). FIG. 7 Rubber Seal Position for Grease Cartridge for Filling from Bulk Container GG SUCTION FILLING FROM A BULK CONTAINER (FIG. 2, 5, 6, 8) 1. Put the open end of the grease tube assembly into the bulk lubricant. 2. Slowly pull back the grease tube handle (L) to suction the lubricant into the grease gun. NOTE: Be sure to keep the open end of the grease tube assembly far enough into the lubricant to prevent air pockets in the grease tube. 3. When the grease tube rod (M) is fully extended, secure it into the retaining slot (O) 4. Remove the grease gun tube assembly from the bulk lubricant and wipe off excess grease. 5. Screw the grease gun tube assembly (N) back into the grease gun. 6. Release the grease tube rod (M) from the retaining slot (O) and slowly press it back into the tube. FIG. 8 7. Use the purge valve (X, Fig. 5) to bleed off any air that may be trapped in the cartridge. Refer to Purging Air Pockets. FILLER PUMP FILLING FROM A BULK CONTAINER (FIG. 5, 6, 9) This tool comes with a 1/8" NPT fill port FIG. 9 (Z, Fig. 5) for attaching a low pressure fill coupler onto the unit. WARNING: Never thread a highpressure coupler onto the grease gun's 1/8" NPT fill port. Serious injury may occur due to excessive pressure. Use low-pressure couplers only. CAUTION: The fill pump loader must connect correctly with the grease gun's 1/8" NPT port. The filler pump may not operate if the components are not compatible. Installing the low pressure coupler (not supplied with the tool) 1. Thread the grease tube assembly (N) back into the grease gun and screw it in securely. 2. Pull the grease tube handle (L) out as far as it will go, then secure the grease tube rod (M) into the retaining slot (O) by moving the rod to the side. Ensure the rod is placed securely in the slot to prevent it from disengaging. 3. Remove the 1/8" NPT fill port plug (AA) from the fill port. 4. Thread the appropriate low pressure coupler onto the 1/8" NPT fill port (Z). 13 English
-
 1
1 -
2
-
3
-
4
-
5
-
6
-
7
-
8
-
9
-
 10
10 -
 11
11 -
 12
12 -
 13
13 -
 14
14 -
 15
15 -
 16
16 -
 17
17 -
 18
18 -
 19
19 -
 20
20 -
21
-
22
-
23
-
24
-
25
-
26
-
27
-
28
-
29
-
30
-
31
-
32
-
33
-
34
-
35
-
36
-
37
-
38
-
39
-
40
-
41
-
42
-
43
-
44
-
45
-
46
-
47
-
48
-
49
-
50
-
51
-
52
-
53
-
54
-
55
-
56
-
57
-
58
-
59
-
60
-
61
-
62
-
63
-
64
-
65
-
66
-
67
-
68
 |
 |