Dewalt DCGG571M1 Instruction Manual - Page 17
Using the Grease Gun Fig. 2, MAINTENANCE
 |
View all Dewalt DCGG571M1 manuals
Add to My Manuals
Save this manual to your list of manuals |
Page 17 highlights
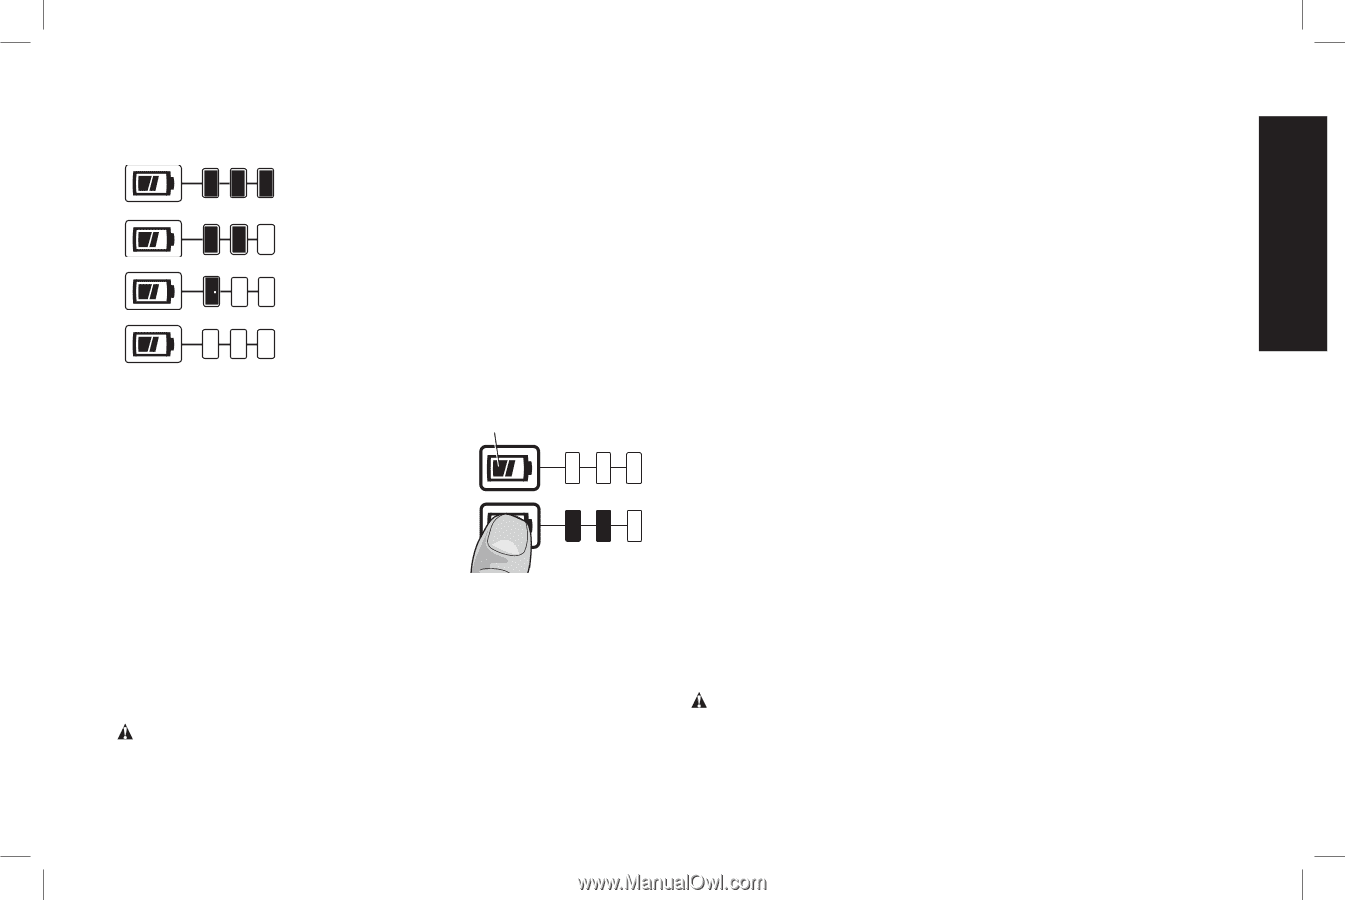
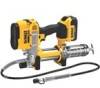
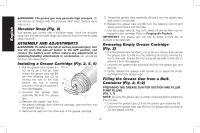
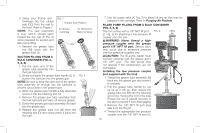
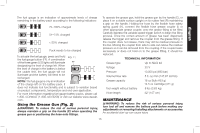
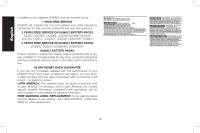
English The fuel gauge is an indication of approximate levels of charge remaining in the battery pack according to the following indicators: 75-100% charged 51-74% charged < 50% charged Pack needs to be charged To actuate the fuel gauge, press and hold FIG. 11 the fuel gauge button (FF). A combination of the three green LED lights will illuminate FF designating the level of charge left. When the level of charge in the battery is below the usable limit, the fuel gauge will not illuminate and the battery will need to be recharged. NOTE: The fuel gauge is only an indication of the charge left on the battery pack. It does not indicate tool functionality and is subject to variation based on product components, temperature and end-user application. For more information regarding fuel gauge battery packs, please call 1-800-4-DeWALT (1-800-433-9258) or visit our website www.dewalt. com. Using the Grease Gun (Fig. 2) WARNING: To reduce the risk of serious personal injury, always maintain a grip on the handle (C) when operating the grease gun or positioning the hose onto fittings. To operate the grease gun, hold the grease gun by the handle (C), or place it on a stable surface upright on its rubber feet (R) maintaining a grip on the handle. Holding the hose by the flexible hose safety spring guard (H), connect the flexible hose grease coupler (I) or other appropriate grease coupler, onto the grease fitting to be filled. Carefully depress the variable speed trigger switch to begin the filling process. Once the correct amount of grease has been dispensed, release the trigger and remove the coupler from the grease fitting. If the coupler does not release, there may still be residual pressure in the line. Moving the coupler from side to side can relieve the residual pressure so it can be removed from the coupling. If the coupler leaks excessively or does not hold on to the grease fitting, it should be replaced. TECHNICAL INFORMATION Grease type Up to NLGI #2 Voltage 20 V Pressure 10,000 psi (690 bar) Volume/Flow rate 5 fl. oz./min (147.87 ml/min) Grease capacity 16 oz Bulk (453 g) 14.5 oz Cartridge (411 g) Tool weight without battery 8 lbs (3.63 kg) Hose length 42" (107 cm) MAINTENANCE WARNING: To reduce the risk of serious personal injury, turn tool off and remove the battery pack before making any adjustments or removing/installing attachments or accessories. An accidental start-up can cause injury. 15
-
 1
1 -
2
-
3
-
4
-
5
-
6
-
7
-
8
-
9
-
10
-
11
-
 12
12 -
 13
13 -
 14
14 -
 15
15 -
 16
16 -
 17
17 -
 18
18 -
 19
19 -
 20
20 -
 21
21 -
 22
22 -
23
-
24
-
25
-
26
-
27
-
28
-
29
-
30
-
31
-
32
-
33
-
34
-
35
-
36
-
37
-
38
-
39
-
40
-
41
-
42
-
43
-
44
-
45
-
46
-
47
-
48
-
49
-
50
-
51
-
52
-
53
-
54
-
55
-
56
-
57
-
58
-
59
-
60
-
61
-
62
-
63
-
64
-
65
-
66
-
67
-
68
 |
 |