Dewalt DXCMTA1980854 Instruction Manual - Page 11
Assembly Fig. 1
 |
View all Dewalt DXCMTA1980854 manuals
Add to My Manuals
Save this manual to your list of manuals |
Page 11 highlights
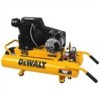
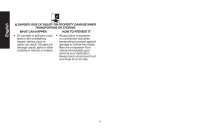
English Deciding the best mode of operation is as simple as determining the amount of time the compressor will be required to supply air. If the air needed is infrequent, turn the adjustment knob on top of the pilot valve clockwise to start/stop, this allows the compressor to start building up pressure in the air tank and then stop when the correct pressure is achieved, minimizing unnecessary run time and saves energy. When there is a frequent demand for air and/or the compressor is located a distance from the work area, turn the adjustment knob on top of the pilot valve counter clockwise to constant run, this allows the compressor to constantly build up pressure in the air tank. When pressure reaches the preset level, pressure will bleed through the pilot valve. This minimizes the number of times the motor must start in an hour, ensuring good motor life. AIR COMPRESSOR PUMP The pump compresses air into the air tank. Working air is not available until the compressor has raised the air tank pressure above that required at the air outlet. MOTOR OVERLOAD PROTECTOR The motor has a thermal overload protector. If the motor overheats for any reason, the overload protector will shut off the motor. The N motor must be allowed to cool down before restarting. To restart: 1. Set the Auto/Off switch to OFF (O) and unplug unit. 2. Allow the motor to cool. 3. Depress the red reset button (N) on the motor. 4. Plug the power cord into the correct branch circuit receptacle. 5. Set the Auto/Off switch to AUTO (-). INSTALLATION Assembly (Fig. 1) Unpack the air compressor. Inspect the unit for damage. If the unit has been damaged in transit, contact the carrier and complete a damage claim. Do this immediately because there are time limitations to damage claims. The carton should contain: • air compressor • operator and parts manuals Check the compressor's serial label to ensure that you have received the model ordered, and that it has the required pressure rating for its intended use. INSTALLING HOSES WARNING: Risk of unsafe operation. Firmly grasp hose in hand when installing or disconnecting to prevent hose whip. 1. Ensure regulated pressure gauge reads 0 psi. 2. Apply sealant tape to hose threads. 3. Assemble hose to air outlet (F). IMPORTANT: Do not assemble splitters directly to the air outlet (F). NOTE: Assembling quick connect bodies (L) to air outlet (F) and quick connect plugs to hose ends make connecting and disconnecting hoses simple and easy. Quick connect bodies and plugs are available for purchase from your local dealer or authorized service center. DISCONNECTING HOSES WARNING: Risk of unsafe operation. Firmly grasp hose in hand when installing or disconnecting to prevent hose whip. 1. Ensure regulated pressure gauge reads 0 psi. 2. Remove hose from air outlet (F). 11
-
 1
1 -
2
-
3
-
4
-
5
-
 6
6 -
 7
7 -
 8
8 -
 9
9 -
 10
10 -
 11
11 -
 12
12 -
 13
13 -
 14
14 -
 15
15 -
 16
16 -
17
-
18
-
19
-
20
-
21
-
22
-
23
-
24
-
25
-
26
-
27
-
28
-
29
-
30
-
31
-
32
-
33
-
34
-
35
-
36
-
37
-
38
-
39
-
40
-
41
-
42
-
43
-
44
-
45
-
46
-
47
-
48
-
49
-
50
-
51
-
52
-
53
-
54
-
55
-
56
-
57
-
58
-
59
-
60
-
61
-
62
-
63
-
64
-
65
-
66
-
67
-
68
-
69
-
70
-
71
-
72
-
73
-
74
-
75
-
76
-
77
-
78
-
79
-
80
-
81
-
82
-
83
-
84
-
85
-
86
-
87
-
88
-
89
-
90
-
91
-
92
 |
 |
