Epson 570e User Manual - Page 57
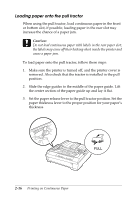
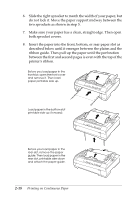
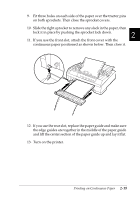
You are now ready to load continuous paper onto the pull tractor
 |
UPC - 010343813854
View all Epson 570e manuals
Add to My Manuals
Save this manual to your list of manuals |
Page 57 highlights
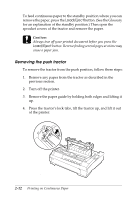
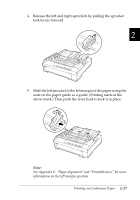
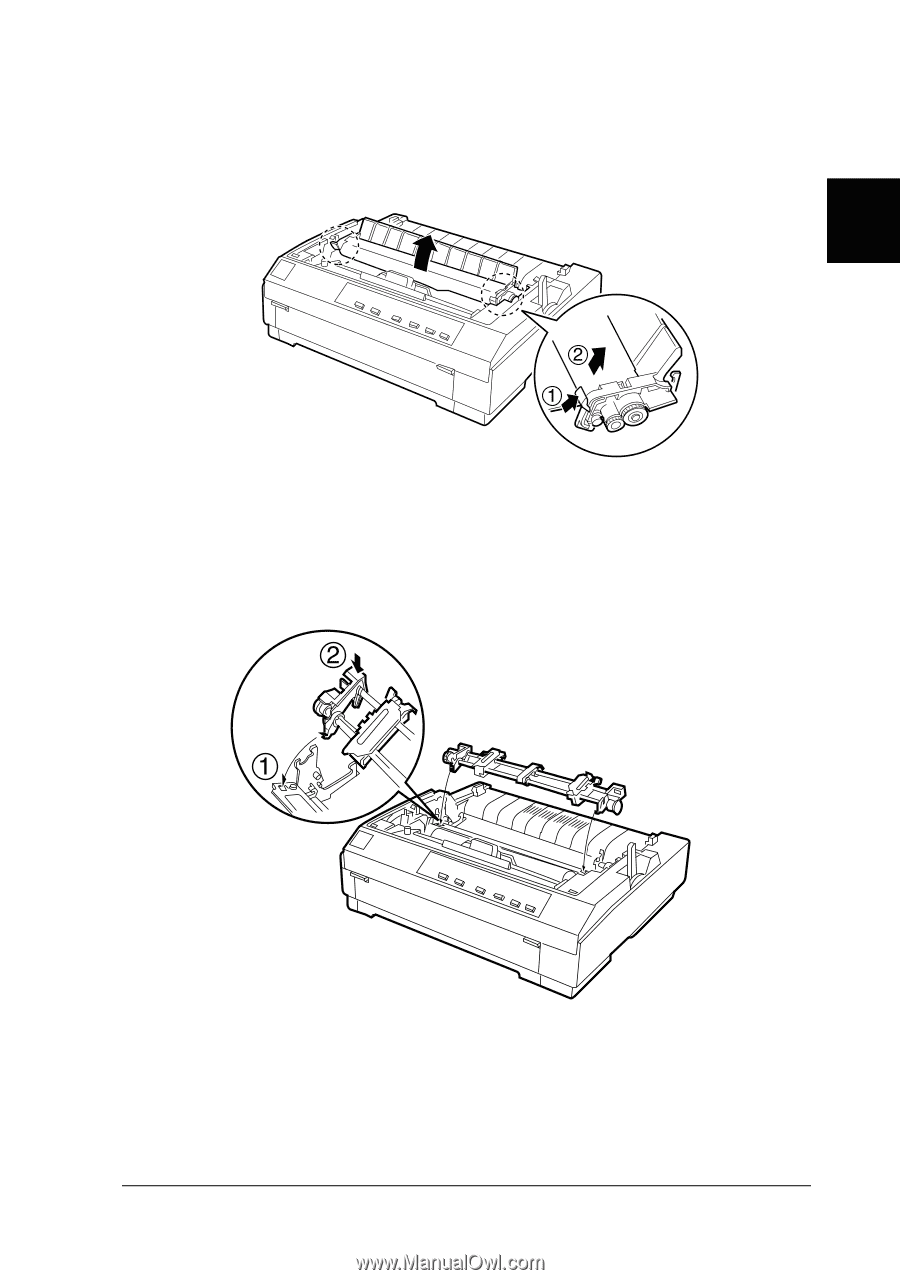
2. Push up the tabs on each side of the paper tension unit and lift the unit up and off the printer. Store the paper tension unit in a safe place. 2 3. Lower the tractor into the printer's mounting slots and press down both ends of the tractor to make sure that it is firmly seated. You are now ready to load continuous paper onto the pull tractor as described in the next section. To remove the pull tractor, see "Removing the pull tractor" on page 2-24. Printing on Continuous Paper 2-15
-
 1
1 -
2
-
3
-
4
-
5
-
6
-
7
-
8
-
9
-
10
-
11
-
12
-
13
-
14
-
15
-
16
-
17
-
18
-
19
-
20
-
21
-
22
-
23
-
24
-
25
-
26
-
27
-
28
-
29
-
30
-
31
-
32
-
33
-
34
-
35
-
36
-
37
-
38
-
39
-
40
-
41
-
42
-
43
-
44
-
45
-
46
-
47
-
48
-
49
-
50
-
51
-
 52
52 -
 53
53 -
 54
54 -
 55
55 -
 56
56 -
 57
57 -
 58
58 -
 59
59 -
 60
60 -
 61
61 -
 62
62 -
63
-
64
-
65
-
66
-
67
-
68
-
69
-
70
-
71
-
72
-
73
-
74
-
75
-
76
-
77
-
78
-
79
-
80
-
81
-
82
-
83
-
84
-
85
-
86
-
87
-
88
-
89
-
90
-
91
-
92
-
93
-
94
-
95
-
96
-
97
-
98
-
99
-
100
-
101
-
102
-
103
-
104
-
105
-
106
-
107
-
108
-
109
-
110
-
111
-
112
-
113
-
114
-
115
-
116
-
117
-
118
-
119
-
120
-
121
-
122
-
123
-
124
-
125
-
126
-
127
-
128
-
129
-
130
-
131
-
132
-
133
-
134
-
135
-
136
-
137
-
138
-
139
-
140
-
141
-
142
-
143
-
144
-
145
-
146
-
147
-
148
-
149
-
150
-
151
-
152
-
153
-
154
-
155
-
156
-
157
-
158
-
159
-
160
-
161
-
162
-
163
-
164
-
165
-
166
-
167
-
168
-
169
-
170
-
171
-
172
-
173
-
174
-
175
-
176
-
177
-
178
-
179
-
180
-
181
-
182
-
183
-
184
-
185
-
186
-
187
-
188
-
189
-
190
-
191
-
192
-
193
-
194
-
195
-
196
-
197
-
198
-
199
-
200
-
201
-
202
-
203
-
204
-
205
-
206
-
207
-
208
-
209
-
210
-
211
-
212
-
213
-
214
-
215
-
216
-
217
-
218
-
219
-
220
-
221
-
222
-
223
-
224
-
225
-
226
-
227
-
228
-
229
-
230
-
231
-
232
-
233
-
234
-
235
-
236
-
237
-
238
-
239
-
240
-
241
-
242
-
243
-
244
-
245
 |
 |
2
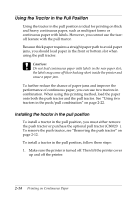
Printing on Continuous Paper
2-15
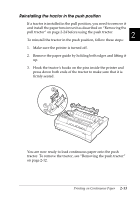
2.
Push up the tabs on each side of the paper tension unit and
lift the unit up and off the printer. Store the paper tension unit
in a safe place.
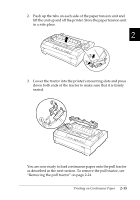
3.
Lower the tractor into the printer
’
s mounting slots and press
down both ends of the tractor to make sure that it is firmly
seated.
You are now ready to load continuous paper onto the pull tractor
as described in the next section. To remove the pull tractor, see
“
Removing the pull tractor
”
on page 2-24.