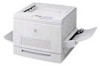
Epson ColorPage 8000 Quick Start - Page 6
REPLACING THE FUSER OIL ROLL, fuser unit, face-up
 |
View all Epson ColorPage 8000 manuals
Add to My Manuals
Save this manual to your list of manuals |
Page 6 highlights
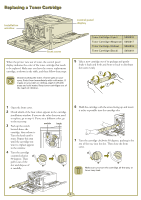
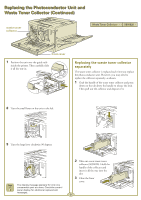
Replacing the Fuser Oil Roll fuser unit face-up tray Fuser Oil Roll S052002 1 Lower the face-up tray, if necessary. Then pull the fuser unit all the way out. 3 Take a new fuser oil roll (S052002) out of its box and remove the cover and shipping pins, as shown. Be careful not to touch the fuser-marked CAUTION! HIGH TEMPERATURE-or the adjoining areas. If you've used the printer recently, the fuser and the area around it can be very hot. 2 Grab the handle of the fuser oil roll and remove it. fuser oil roll 4 Hold the roll handle and insert it into the fuser unit, matching the green marks on the roll and unit. handle positioning marks 5 Push the roll down firmly until it clicks into place. Do not dispose of the used oil roll in fire; it can explode and cause injury. 6 Slide the fuser unit back into the printer. 4
-
 1
1 -
 2
2 -
 3
3 -
 4
4 -
 5
5 -
 6
6 -
 7
7 -
 8
8 -
 9
9 -
 10
10 -
 11
11 -
 12
12 -
13
 |
 |
