Epson EMP 50 User Manual - Page 46
Adjusting the Image, Repositioning the Image, Adjusting Image Appearance
 |
UPC - 010343832626
View all Epson EMP 50 manuals
Add to My Manuals
Save this manual to your list of manuals |
Page 46 highlights
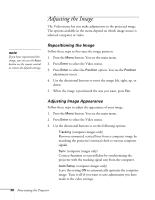
Adjusting the Image The Video menu lets you make adjustments to the projected image. The options available in the menu depend on which image source is selected: computer or video. note If you have repositioned the image, you can use the Auto button on the remote control to restore the default settings. Repositioning the Image Follow these steps to fine-tune the image position: 1. Press the Menu button. You see the main menu. 2. Press Enter to select the Video menu. 3. Press Enter to select the Position option. You see the Position adjustment screen. 4. Use the directional buttons to move the image left, right, up, or down. 5. When the image is positioned the way you want, press Esc. Adjusting Image Appearance Follow these steps to adjust the appearance of your image: 1. Press the Menu button. You see the main menu. 2. Press Enter to select the Video menu. 3. Use the directional buttons to set the following options: ■ Tracking (computer images only) Removes unwanted vertical lines from a computer image by matching the projector's internal clock to various computer signals. ■ Sync (computer images only) Corrects fuzziness or screen flicker by synchronizing the projector with the tracking signal sent from the computer. ■ Auto Setup (computer images only) Leave this setting ON to automatically optimize the computer image. Turn it off if you want to save adjustments you have made to the video settings. 40 Fine-tuning the Projector
-
 1
1 -
2
-
3
-
4
-
5
-
6
-
7
-
8
-
9
-
10
-
11
-
12
-
13
-
14
-
15
-
16
-
17
-
18
-
19
-
20
-
21
-
22
-
23
-
24
-
25
-
26
-
27
-
28
-
29
-
30
-
31
-
32
-
33
-
34
-
35
-
36
-
37
-
38
-
39
-
40
-
 41
41 -
 42
42 -
 43
43 -
 44
44 -
 45
45 -
 46
46 -
 47
47 -
 48
48 -
 49
49 -
 50
50 -
 51
51 -
52
-
53
-
54
-
55
-
56
-
57
-
58
-
59
-
60
-
61
-
62
-
63
-
64
-
65
-
66
-
67
-
68
-
69
-
70
-
71
-
72
-
73
-
74
-
75
-
76
-
77
-
78
-
79
-
80
-
81
-
82
-
83
-
84
-
85
-
86
-
87
-
88
-
89
-
90
-
91
-
92
-
93
-
94
-
95
-
96
-
97
-
98
-
99
-
100
-
101
-
102
-
103
-
104
-
105
-
106
-
107
-
108
 |
 |
