Epson FX-86e User Manual - Page 10
Installing the Ribbon, Setting Up Your FX Printer - ribbons
 |
View all Epson FX-86e manuals
Add to My Manuals
Save this manual to your list of manuals |
Page 10 highlights
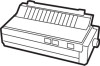
l Place the printer or printer stand on a solid and level foundation. Avoid setting it on carpet or on unstable surfaces such as chairs. l Use a grounded outlet-one that has three holes to match the power plug on the printer. Don't use an adapter plug. l Avoid using electrical outlets that are controlled by wall switches. If you accidentally turn off a switch, you could wipe out valuable information and stop your printing. l Keep your printer and computer away from base units for cordless telephones. l Avoid using an outlet on the same circuit breaker with large electrical machines or appliances that might disrupt the flow of power to your printer. l Choose a place that is clean and away from moisture, dust, and excessive heat (such as a heater or direct sunlight). If you are going to use continuous-feed paper, clear enough space around the printer so that the paper has an unobstructed path in and out of the printer. There are three common methods of arranging a printer and continuous paper: l Using a printer stand with the paper stacked underneath it. l Using a desk or table as a stand, with the printer near the rear edge and the paper on the floor or on a shelf. l Putting the printer on a desk or table and stacking the paper behind the printer. 3 Installing the Ribbon To install the ribbon, follow the directions below: 1. Remove the tractor cover that comes installed on the printer. To remove it, simply pull the back of the cover toward you until the cover is vertical. Then lift it up and off the printer. 2. Manually move the print head to the middle of the platen. Setting Up Your FX Printer 1-3
-
 1
1 -
2
-
3
-
4
-
 5
5 -
 6
6 -
 7
7 -
 8
8 -
 9
9 -
 10
10 -
 11
11 -
 12
12 -
 13
13 -
 14
14 -
 15
15 -
16
-
17
-
18
-
19
-
20
-
21
-
22
-
23
-
24
-
25
-
26
-
27
-
28
-
29
-
30
-
31
-
32
-
33
-
34
-
35
-
36
-
37
-
38
-
39
-
40
-
41
-
42
-
43
-
44
-
45
-
46
-
47
-
48
-
49
-
50
-
51
-
52
-
53
-
54
-
55
-
56
-
57
-
58
-
59
-
60
-
61
-
62
-
63
-
64
-
65
-
66
-
67
-
68
-
69
-
70
-
71
-
72
-
73
-
74
-
75
-
76
-
77
-
78
-
79
-
80
-
81
-
82
-
83
-
84
-
85
-
86
-
87
-
88
-
89
-
90
-
91
-
92
-
93
-
94
-
95
-
96
-
97
-
98
-
99
-
100
-
101
-
102
-
103
-
104
-
105
-
106
-
107
-
108
-
109
-
110
-
111
-
112
-
113
-
114
-
115
-
116
-
117
-
118
-
119
-
120
-
121
-
122
-
123
-
124
-
125
-
126
-
127
-
128
-
129
-
130
-
131
-
132
-
133
-
134
-
135
-
136
-
137
-
138
-
139
-
140
-
141
-
142
-
143
-
144
-
145
-
146
-
147
-
148
-
149
-
150
-
151
-
152
-
153
-
154
-
155
-
156
-
157
-
158
-
159
-
160
-
161
-
162
-
163
-
164
-
165
-
166
-
167
-
168
-
169
-
170
-
171
-
172
-
173
 |
 |
