Epson FX-86e User Manual - Page 11
WARNING, Setting Up Your FX Printer, Now use the point of a pencil to guide the ribbon into place - cartridge
 |
View all Epson FX-86e manuals
Add to My Manuals
Save this manual to your list of manuals |
Page 11 highlights
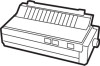
WARNING The power must be OFF when you move the print head. Moving the print head when the power is ON may damage your printer. If you've been using your printer just before changing the ribbon cartridge, be careful not to touch the print head because it becomes hot during use. 3. before installing the ribbon cartridge, turn the small knob on top in the direction of the arrow to tighten the ribbon as shown in Figure 1-3. Figure 1-3 Tightening the ribbon 4. For the FX-86e, hold the ribbon cartridge by the raised plastic fin on top of the cartridge; for the FX-286e hold the cartridge by the two plastic tabs. Lower the cartridge into the printer, guiding the two pins on each end of the cartridge into the slots in the printer frame, as shown in Figure 1-4. Press firmly on each end of the cartridge to make sure the pins are firmly seated in the slots. 5. Now use the point of a pencil to guide the ribbon into place between the ribbon guide and the print head as shown in Figure 1-5. (There is also a diagram on the top of the ribbon cartridge itself.) 6. With the cartridge in place, again turn the ribbon knob in the direction of the arrow to tighten the ribbon. And that's it-the ribbon is now installed. 1-4 Setting Up Your FX Printer
-
 1
1 -
2
-
3
-
4
-
5
-
 6
6 -
 7
7 -
 8
8 -
 9
9 -
 10
10 -
 11
11 -
 12
12 -
 13
13 -
 14
14 -
 15
15 -
 16
16 -
17
-
18
-
19
-
20
-
21
-
22
-
23
-
24
-
25
-
26
-
27
-
28
-
29
-
30
-
31
-
32
-
33
-
34
-
35
-
36
-
37
-
38
-
39
-
40
-
41
-
42
-
43
-
44
-
45
-
46
-
47
-
48
-
49
-
50
-
51
-
52
-
53
-
54
-
55
-
56
-
57
-
58
-
59
-
60
-
61
-
62
-
63
-
64
-
65
-
66
-
67
-
68
-
69
-
70
-
71
-
72
-
73
-
74
-
75
-
76
-
77
-
78
-
79
-
80
-
81
-
82
-
83
-
84
-
85
-
86
-
87
-
88
-
89
-
90
-
91
-
92
-
93
-
94
-
95
-
96
-
97
-
98
-
99
-
100
-
101
-
102
-
103
-
104
-
105
-
106
-
107
-
108
-
109
-
110
-
111
-
112
-
113
-
114
-
115
-
116
-
117
-
118
-
119
-
120
-
121
-
122
-
123
-
124
-
125
-
126
-
127
-
128
-
129
-
130
-
131
-
132
-
133
-
134
-
135
-
136
-
137
-
138
-
139
-
140
-
141
-
142
-
143
-
144
-
145
-
146
-
147
-
148
-
149
-
150
-
151
-
152
-
153
-
154
-
155
-
156
-
157
-
158
-
159
-
160
-
161
-
162
-
163
-
164
-
165
-
166
-
167
-
168
-
169
-
170
-
171
-
172
-
173
 |
 |
