Epson GT-2500 Plus Product Information Guide - Page 7
Epson GT-2500 and GT-2500 Plus, button. You see the EPSON PDF Plug-in - windows 7
 |
View all Epson GT-2500 Plus manuals
Add to My Manuals
Save this manual to your list of manuals |
Page 7 highlights
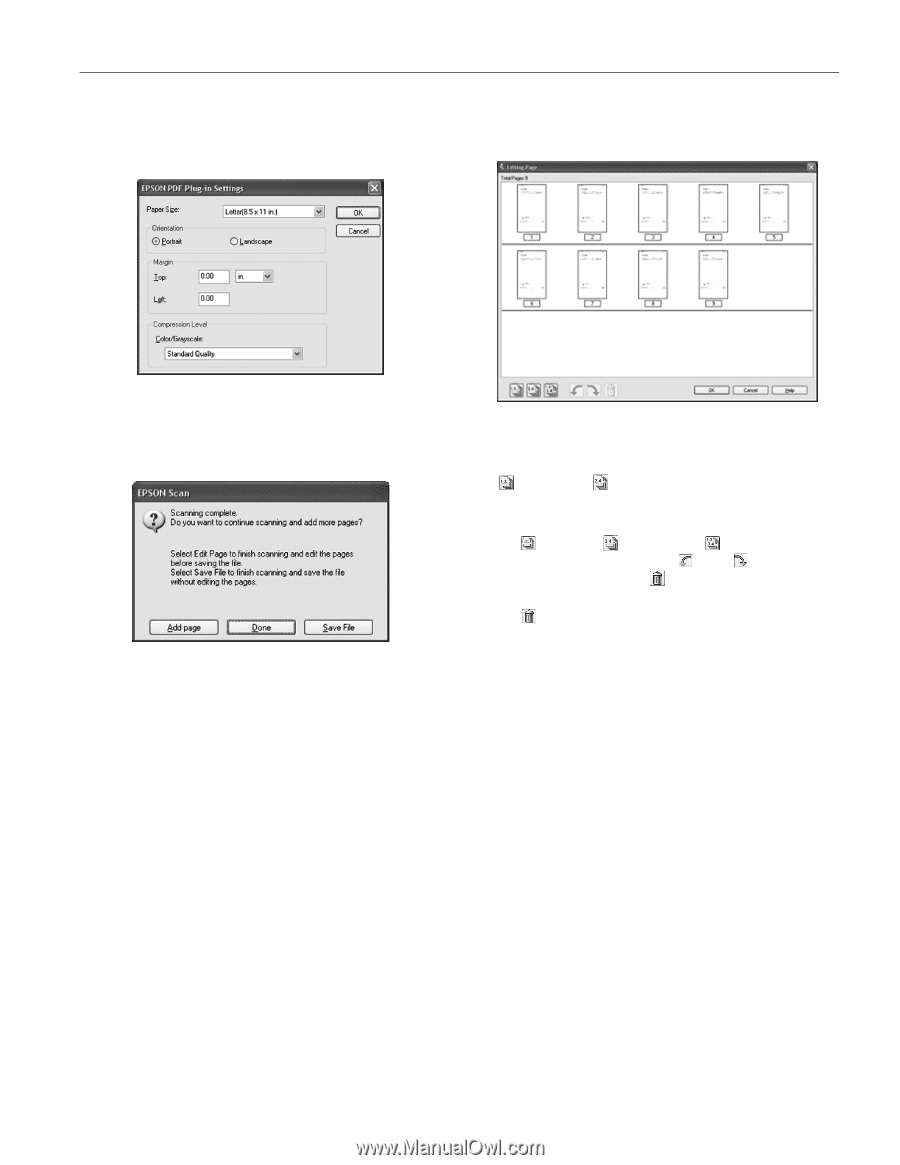
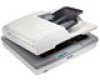
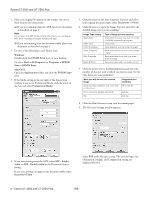
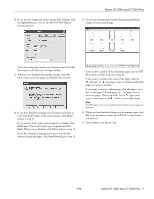
Epson GT-2500 and GT-2500 Plus 10. If you need to change any of the current PDF settings, click the Options button. You see the EPSON PDF Plug-in Settings window: 13. You see the Editing Page window displaying thumbnail images of each scanned page: Select the settings that match your document and click OK. You return to the File Save Settings window. 11. When you are finished selecting file settings, click OK. Epson Scan scans your pages and displays this window: 12. If you have finished scanning your document and want to view thumbnail images of the scanned pages, click Done and go to step 13. If you need to load or place more pages for scanning, click Add page. Then load or place your originals and click Scan. When you are finished, click Done and go to step 13. If you have finished scanning and want to save the file without editing the pages, click Save File and go to step 15. If you want to include all the document pages in your PDF file as they currently look, go to step 14. If you want to include only some of the pages, click the odd pages or even pages icons, or click the individual pages you want to include. If you want to rotate or delete pages, click the pages or use the odd pages, even pages, or all pages icon to select the pages. Then click the left or right rotate icon to rotate them or the delete icon to delete them. Note: The delete icon is not available when all document pages are selected. 14. When you have finished editing your document pages, click OK. Your document is saved in a PDF file in the location you selected. 15. Click Close to exit Epson Scan. 7/06 Epson GT-2500 and GT-2500 Plus - 7
-
 1
1 -
 2
2 -
 3
3 -
 4
4 -
 5
5 -
 6
6 -
 7
7 -
 8
8 -
 9
9 -
 10
10
 |
 |