Epson GT-2500 Plus Product Information Guide - Page 8
Converting Scanned Documents into Editable Text, OCR Software Limitations - document scanner
 |
View all Epson GT-2500 Plus manuals
Add to My Manuals
Save this manual to your list of manuals |
Page 8 highlights
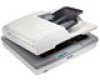
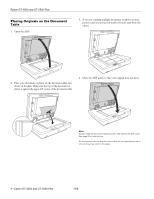
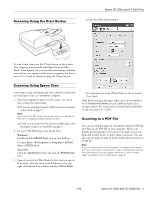
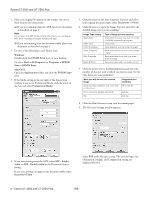
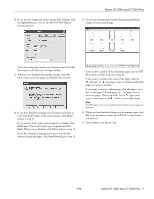
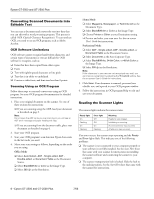
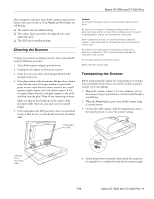
Epson GT-2500 and GT-2500 Plus Converting Scanned Documents into Editable Text You can scan a document and convert the text into data that you can edit with a word processing program. This process is called OCR (Optical Character Recognition). To scan and use OCR, you need to use an OCR program, such as Adobe Acrobat. OCR Software Limitations OCR software cannot recognize handwritten characters, and certain types of documents or text are difficult for OCR software to recognize, such as: ❏ Items that have been copied from other copies ❏ Faxes ❏ Text with tightly spaced characters or line pitch ❏ Text that is in tables or underlined ❏ Cursive or italic fonts, and font sizes less than 8 points Scanning Using an OCR Program Follow these steps to scan and convert text using an OCR program. See your OCR program documentation for detailed instructions. 1. Place your original document on the scanner. See one of these sections for instructions: ❏ If you are scanning using the ADF, load your document as described on page 3. Note: Do not open the ADF while you are scanning or you will see an ADF error message and paper feeding will stop. ❏ If you are scanning from the document table, place your document as described on page 4. 2. Start your OCR program. 3. Start your OCR program's scan function. Epson Scan starts in the last mode you used. 4. Select your scan settings as follows, depending on the mode you are using: Office Mode ❏ Select Auto Detect, ADF - Single-sided, ADF - Double-sided, or Document Table as the Document Source. ❏ Select Black&White or Color as the Image Type. ❏ Select 300 dpi as the Resolution. Home Mode ❏ Select Magazine, Newspaper, or Text/Line Art as the Document Type. ❏ Select Black&White or Color as the Image Type. ❏ Choose Printer or Other as your Destination setting. ❏ Preview and select your scan area. See the on-screen User's Guide for instructions. Professional Mode ❏ Select ADF - Single-sided, ADF - Double-sided, or Document Table as the Document Source. ❏ Select Document as the Auto Exposure Type. ❏ Select Black&White, 24-bit Color, or 48-bit Color as the Image Type. ❏ Select 300 dpi as the Resolution. Note: If the characters in your text are not recognized very well, you can improve recognition by adjusting the Threshold setting. See the on-screen User's Guide for instructions. 5. Click Scan. Your document is scanned, processed into editable text, and opened in your OCR program window. 6. Follow the instructions in OCR program Help to edit and save your document. Reading the Scanner Lights The scanner lights indicate the scanner status. Ready light On Flashing On Flashing Error light Off Off On Flashing Meaning Ready to scan images. Initializing or scanning. A command error has occurred. A fatal error has occurred. If an error occurs, the scanner stops operating and the Ready and Error lights flash. This indicates one of the following problems: ❏ The scanner is not connected to your computer properly or your software is not fully installed. See the Start Here sheet that came with your scanner for instructions on installing the scanner software and connecting the scanner to your computer. ❏ The scanner transportation lock is locked. Slide the lock to the unlock position. See the Start Here sheet that came with the scanner for instructions. 8 - Epson GT-2500 and GT-2500 Plus 7/06
-
 1
1 -
2
-
 3
3 -
 4
4 -
 5
5 -
 6
6 -
 7
7 -
 8
8 -
 9
9 -
 10
10
 |
 |