Epson LQ 1050 Technical Manual - Page 160
NOTE: Default setting is the EPSON PC EQUITY.
 |
View all Epson LQ 1050 manuals
Add to My Manuals
Save this manual to your list of manuals |
Page 160 highlights
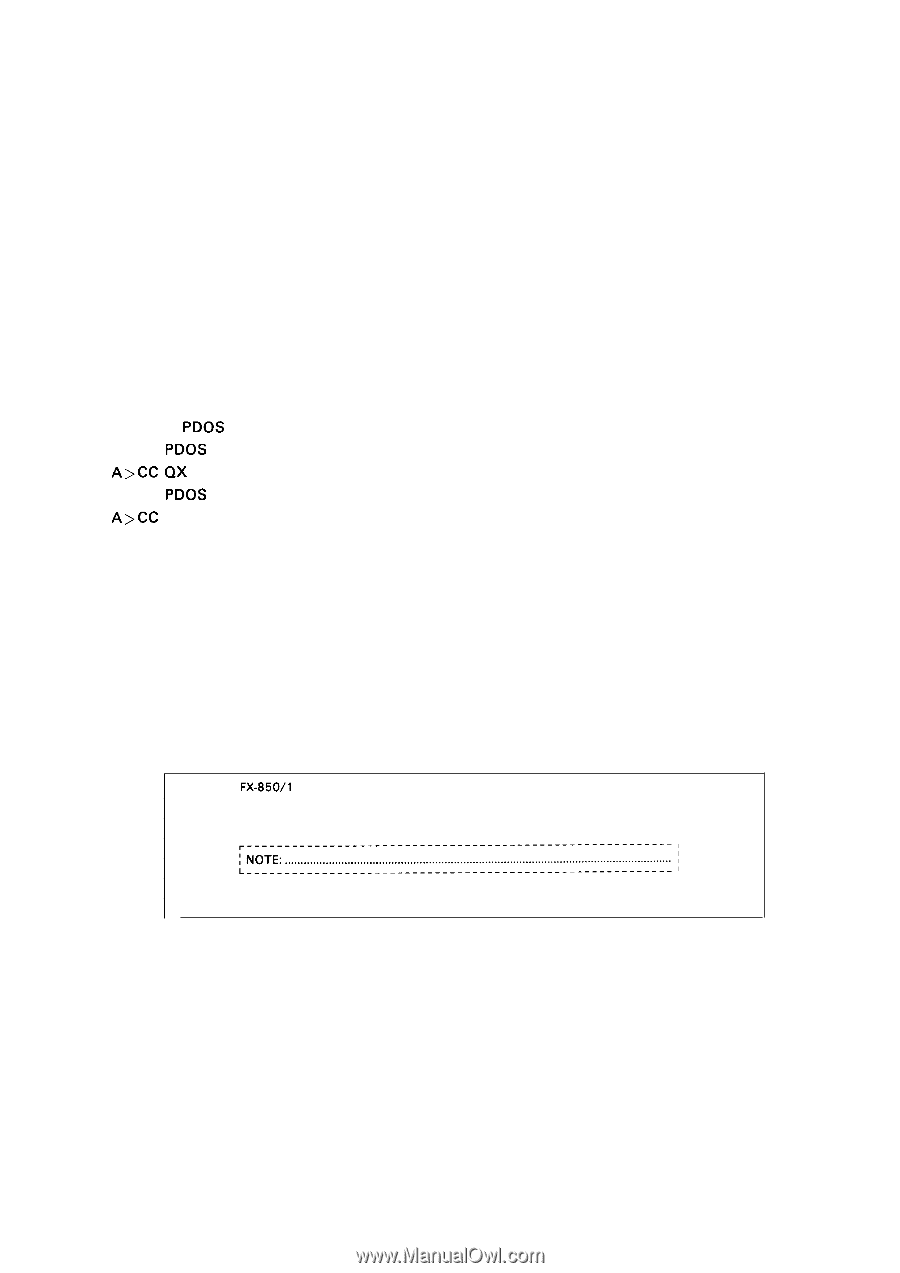
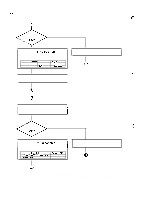
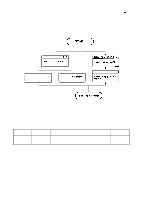
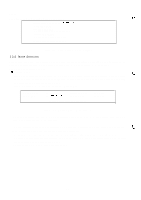
REV.-A In this system, a printer is connected to an MS-DOS-based computer using a parallel interface cable, with the diagnostics ROM installed inside the printer at location IC4A This system works as follows: The host computer displays the DIP switch configurations necessary for performing diagnostics on the printer. The user sets the corresponding switch on the printer, and turns the printer power on. The CPU in the printer reads the DIP SW, and performs the diagnostics program that depends on the DIP SW values. 5.2.3 How to Select The Host Computer This flexible disk can be used on EPSON PC (EQUITY) or the QX-16 to select the computer. 1) Active the MS-DOS system for your host computer. 2) Remove the MS-DOS system disk. 3) Place the PDOS system disk in drive A. 4) To use PDOS on EPSON QX-16 type A>CC QX To use PDOS on EPSON PC (EQUITY) type A>CC IBM 5) The host computer is now selected. NOTE: Default setting is the EPSON PC (EQUITY). 5.2.4 System Activation After the system has been connected, as shown in Figure 5-2, turn on the Host-Computer and place the system disk in drive A. The main program is automatically activated, and displays the initial screen message shown in Figure 5-3. FX-850/l 050 MAINTENANCE PROGRAM PROGRAMMED BY EPSON, JAPAN VERSION 1.0 (1 987/NOV./3RD) PUSH ANY KEY TO START THIS PROGRAM Figure 5-3. Initial Screen. 5-3
-
 1
1 -
2
-
3
-
4
-
5
-
6
-
7
-
8
-
9
-
10
-
11
-
12
-
13
-
14
-
15
-
16
-
17
-
18
-
19
-
20
-
21
-
22
-
23
-
24
-
25
-
26
-
27
-
28
-
29
-
30
-
31
-
32
-
33
-
34
-
35
-
36
-
37
-
38
-
39
-
40
-
41
-
42
-
43
-
44
-
45
-
46
-
47
-
48
-
49
-
50
-
51
-
52
-
53
-
54
-
55
-
56
-
57
-
58
-
59
-
60
-
61
-
62
-
63
-
64
-
65
-
66
-
67
-
68
-
69
-
70
-
71
-
72
-
73
-
74
-
75
-
76
-
77
-
78
-
79
-
80
-
81
-
82
-
83
-
84
-
85
-
86
-
87
-
88
-
89
-
90
-
91
-
92
-
93
-
94
-
95
-
96
-
97
-
98
-
99
-
100
-
101
-
102
-
103
-
104
-
105
-
106
-
107
-
108
-
109
-
110
-
111
-
112
-
113
-
114
-
115
-
116
-
117
-
118
-
119
-
120
-
121
-
122
-
123
-
124
-
125
-
126
-
127
-
128
-
129
-
130
-
131
-
132
-
133
-
134
-
135
-
136
-
137
-
138
-
139
-
140
-
141
-
142
-
143
-
144
-
145
-
146
-
147
-
148
-
149
-
150
-
151
-
152
-
153
-
154
-
 155
155 -
 156
156 -
 157
157 -
 158
158 -
 159
159 -
 160
160 -
 161
161 -
 162
162 -
 163
163 -
 164
164 -
 165
165 -
166
-
167
-
168
-
169
-
170
-
171
-
172
-
173
-
174
-
175
-
176
-
177
-
178
-
179
-
180
-
181
-
182
-
183
-
184
-
185
-
186
-
187
-
188
-
189
-
190
-
191
-
192
-
193
-
194
-
195
-
196
-
197
-
198
-
199
-
200
-
201
-
202
-
203
-
204
-
205
-
206
-
207
-
208
-
209
-
210
-
211
-
212
-
213
-
214
-
215
-
216
-
217
-
218
-
219
-
220
-
221
-
222
-
223
-
224
-
225
 |
 |