Epson NX300 Quick Guide - Page 28
Mac OS X 10.3 to 10.4, Epson Information Center - stylus all in one printer
 |
UPC - 010343869080
View all Epson NX300 manuals
Add to My Manuals
Save this manual to your list of manuals |
Page 28 highlights
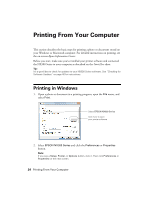
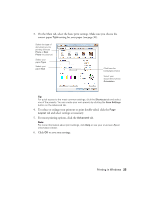
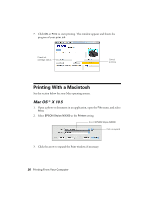
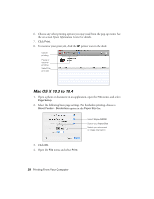
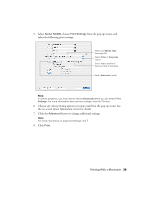
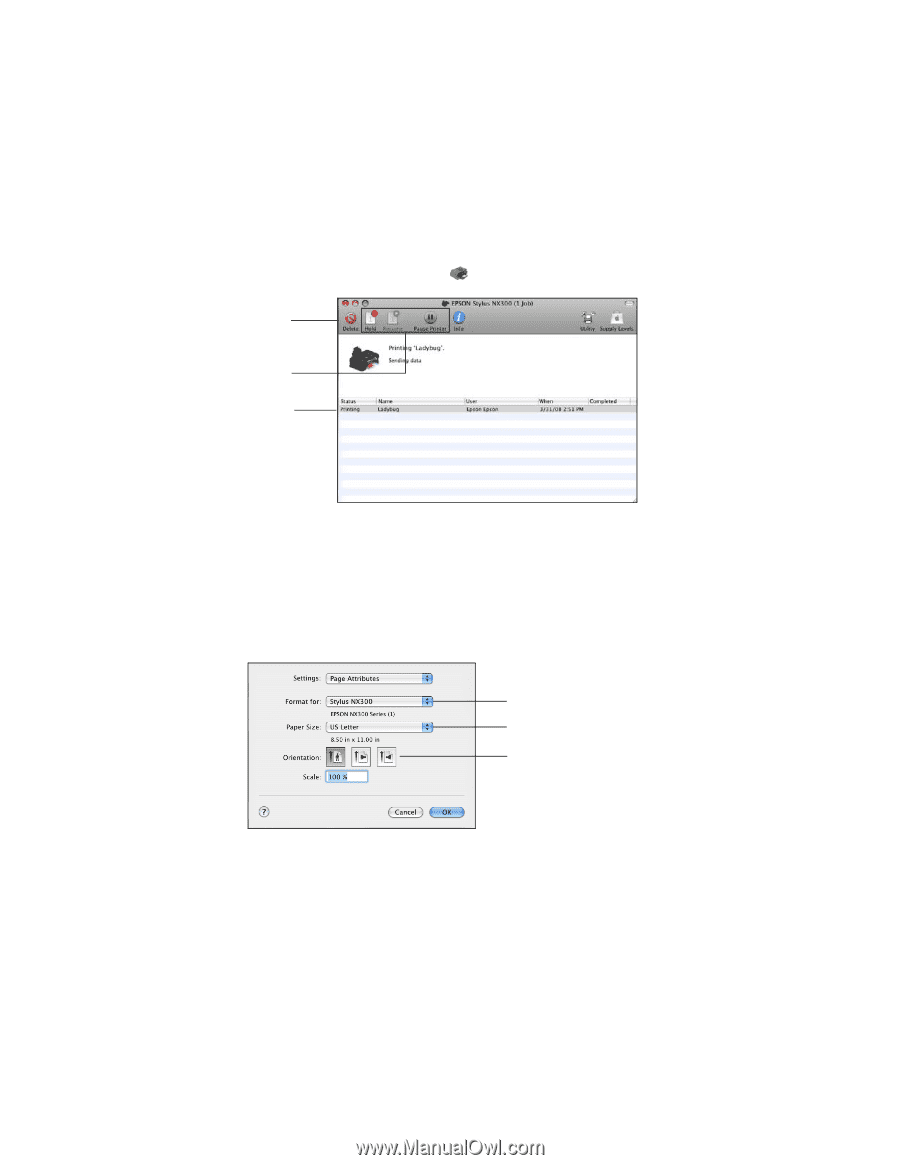
6. Choose any other printing options you may need from the pop-up menu. See the on-screen Epson Information Center for details. 7. Click Print. 8. To monitor your print job, click the printer icon in the dock. Cancel printing Pause or resume printing Select the print job Mac OS X 10.3 to 10.4 1. Open a photo or document in an application, open the File menu, and select Page Setup. 2. Select the following basic page settings. For borderless printing, choose a Sheet Feeder - Borderless option in the Paper Size list. Select Stylus NX300 Select your Paper Size Select your document or image orientation 3. Click OK. 4. Open the File menu and select Print. 28 Printing From Your Computer
-
 1
1 -
2
-
3
-
4
-
5
-
6
-
7
-
8
-
9
-
10
-
11
-
12
-
13
-
14
-
15
-
16
-
17
-
18
-
19
-
20
-
21
-
22
-
 23
23 -
 24
24 -
 25
25 -
 26
26 -
 27
27 -
 28
28 -
 29
29 -
 30
30 -
 31
31 -
 32
32 -
 33
33 -
34
-
35
-
36
-
37
-
38
-
39
-
40
-
41
-
42
-
43
-
44
-
45
-
46
-
47
-
48
-
49
-
50
-
51
-
52
-
53
-
54
-
55
-
56
 |
 |
28
Printing From Your Computer
6.
Choose any other printing options you may need from the pop-up menu. See
the on-screen
Epson Information Center
for details.
7.
Click
Print
.
8.
To monitor your print job, click the
printer icon in the dock.
Mac OS X 10.3 to 10.4
1.
Open a photo or document in an application, open the
File
menu, and select
Page Setup
.
2.
Select the following basic page settings. For borderless printing, choose a
Sheet Feeder - Borderless
option in the
Paper Size
list.
3.
Click
OK
.
4.
Open the
File
menu and select
Print
.
Cancel
printing
Select the
print job
Pause or
resume
printing
Select
Stylus NX300
Select your
Paper Size
Select your document
or image orientation