Epson Perfection 610 Scanner Basics - Page 50
Printing Your Image or Photo Windows
 |
View all Epson Perfection 610 manuals
Add to My Manuals
Save this manual to your list of manuals |
Page 50 highlights
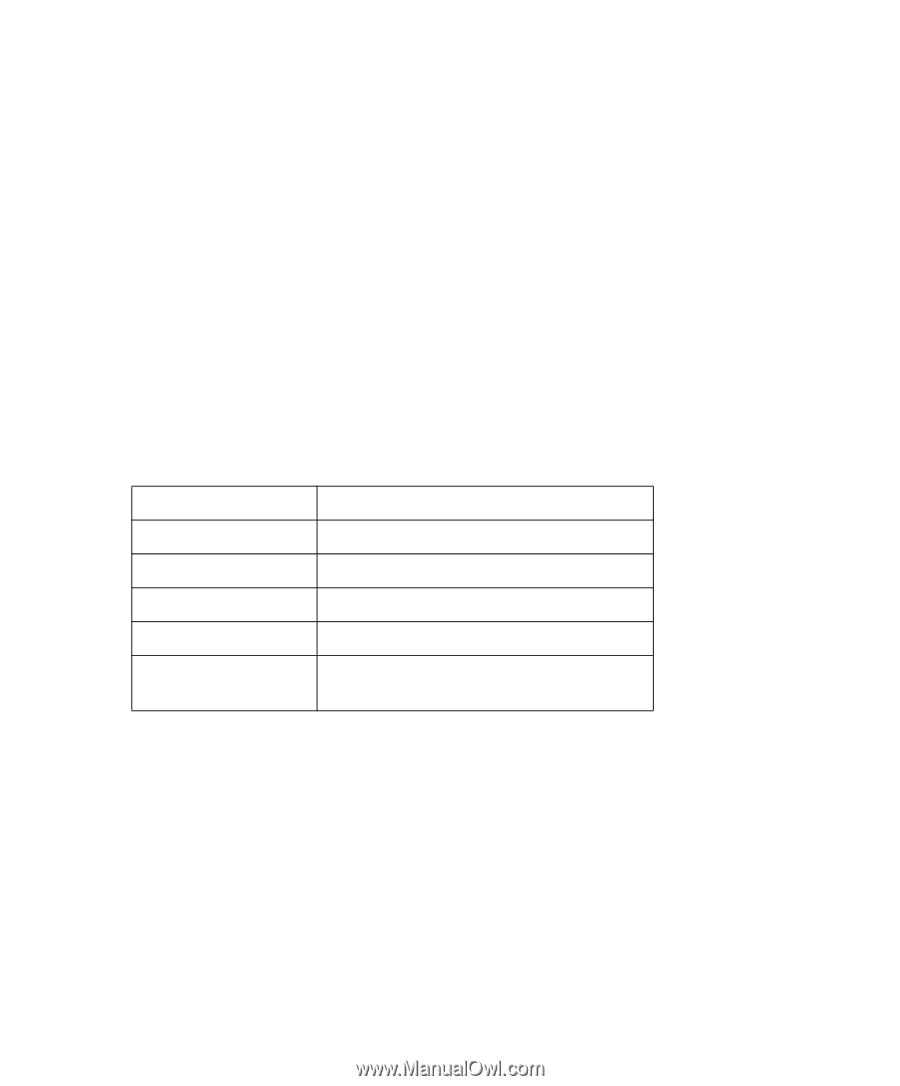
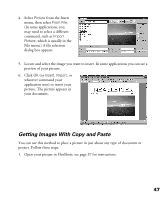
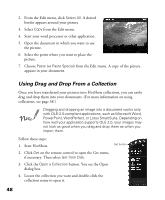
6. To import your picture into your photo page, place the mouse cursor in the gray bar between the image and the title bar (or in the center of an image in a collection); the cursor changes to a hand. Click and drag the picture to a Photo Page import area; then release the mouse button. To delete a picture from the import area, select Undo from the Edit menu (if you just added it), or drag a new image to the import area to replace it. Printing Your Image or Photo Page Follow these steps to print: 1. Select Print Pictures from the Share menu on the remote control. 2. Select the size at which you want to print your picture, as described in the following table. Size setting Wallet size 3 × 5 4 × 6 5 × 7 Fit to page Description 2 × 3 inches (5.08 × 7.62 cm) 7.62 × 12.70 cm 10.16 × 15.24 cm 12.70 × 17.78 cm Prints as large as possible on the paper size you select in your print settings 3. Select the number of copies of your picture you want printed on one page: either 1 per page or Fill Page. 4. Follow the instructions for your operating system to select your print settings: Windows: Select Printer Setup at the bottom of the Share menu on the remote control. (You can also select Printer Setup from the File menu.) Make sure your printer is selected and click the Properties button. Select the print settings for your printer, making sure to select the correct paper size setting. (See your printer manual for instructions.) When you return to the Printer Setup dialog box, click OK. 45
-
 1
1 -
2
-
3
-
4
-
5
-
6
-
7
-
8
-
9
-
10
-
11
-
12
-
13
-
14
-
15
-
16
-
17
-
18
-
19
-
20
-
21
-
22
-
23
-
24
-
25
-
26
-
27
-
28
-
29
-
30
-
31
-
32
-
33
-
34
-
35
-
36
-
37
-
38
-
39
-
40
-
41
-
42
-
43
-
44
-
 45
45 -
 46
46 -
 47
47 -
 48
48 -
 49
49 -
 50
50 -
 51
51 -
 52
52 -
 53
53 -
 54
54 -
 55
55 -
56
-
57
-
58
-
59
-
60
-
61
-
62
-
63
-
64
-
65
-
66
-
67
-
68
-
69
-
70
-
71
-
72
-
73
-
74
-
75
-
76
-
77
-
78
-
79
-
80
 |
 |