Epson PictureMate 400 - PM400 Quick Guide and Warranty - Page 18
Network Problems, Check Network Status, Printing Problems
 |
View all Epson PictureMate 400 - PM400 manuals
Add to My Manuals
Save this manual to your list of manuals |
Page 18 highlights
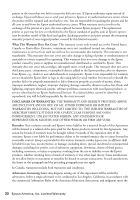
Network Problems ■ Try connecting to the router or access point with your computer or another device to confirm that it is working correctly. ■ The product can only connect to a network that supports 2.4 GHz. If you are using a 5 GHz wireless router, set the router to operate in dual band (2.4 GHz and 5 GHz) mode. ■ Try resetting the router (turn it off and then on), then try to connect to it again. ■ View the network status (see the next section) to check the signal strength. If it is poor, try moving the product closer to your router or access point. Avoid placing it next to a microwave oven, 2.4 GHz cordless phone, or large metal object such as a filing cabinet. ■ If your wireless router doesn't broadcast its network name (SSID), manually enter your wireless network name. ■ If your wireless router has security enabled, make sure you entered the WEP key or WPA passphrase correctly. ■ When using TCP/IP, make sure your network's DHCP option is enabled (your router manufacturer will be able to assist you with this setting). ■ Remove and reinstall your product software. ■ Disable the firewall temporarily to see if that may be causing the problem. Contact your firewall manufacturer for assistance. ■ You may need to disable any anti-virus software on your wireless router or access point. Check Network Status 1. Press if necessary, then select Setup and press the OK button. 2. Select Network Settings and press the OK button. 3. Select Network Status and press the OK button. 4. Press d or u to scroll through your network information, or press l or r to view additional options. Printing Problems ■ Make sure your paper is loaded short edge first and is positioned against the left side with the edge guide against its right side. Don't load paper above the arrow mark inside the edge guide. ■ Make sure the paper size and paper type settings are correct for the paper you loaded. 18 Problems and Solutions
-
 1
1 -
2
-
3
-
4
-
5
-
6
-
7
-
8
-
9
-
10
-
11
-
12
-
 13
13 -
 14
14 -
 15
15 -
 16
16 -
 17
17 -
 18
18 -
 19
19 -
 20
20 -
 21
21 -
 22
22 -
 23
23 -
24
-
25
-
26
-
27
-
28
-
29
-
30
-
31
-
32
-
33
-
34
-
35
-
36
-
37
-
38
-
39
-
40
-
41
-
42
-
43
-
44
-
45
-
46
-
47
-
48
-
49
-
50
-
51
-
52
 |
 |