Epson PictureMate 400 - PM400 Quick Guide and Warranty - Page 9
Printing Photos From a Digital Camera, Printing From a Computer
 |
View all Epson PictureMate 400 - PM400 manuals
Add to My Manuals
Save this manual to your list of manuals |
Page 9 highlights
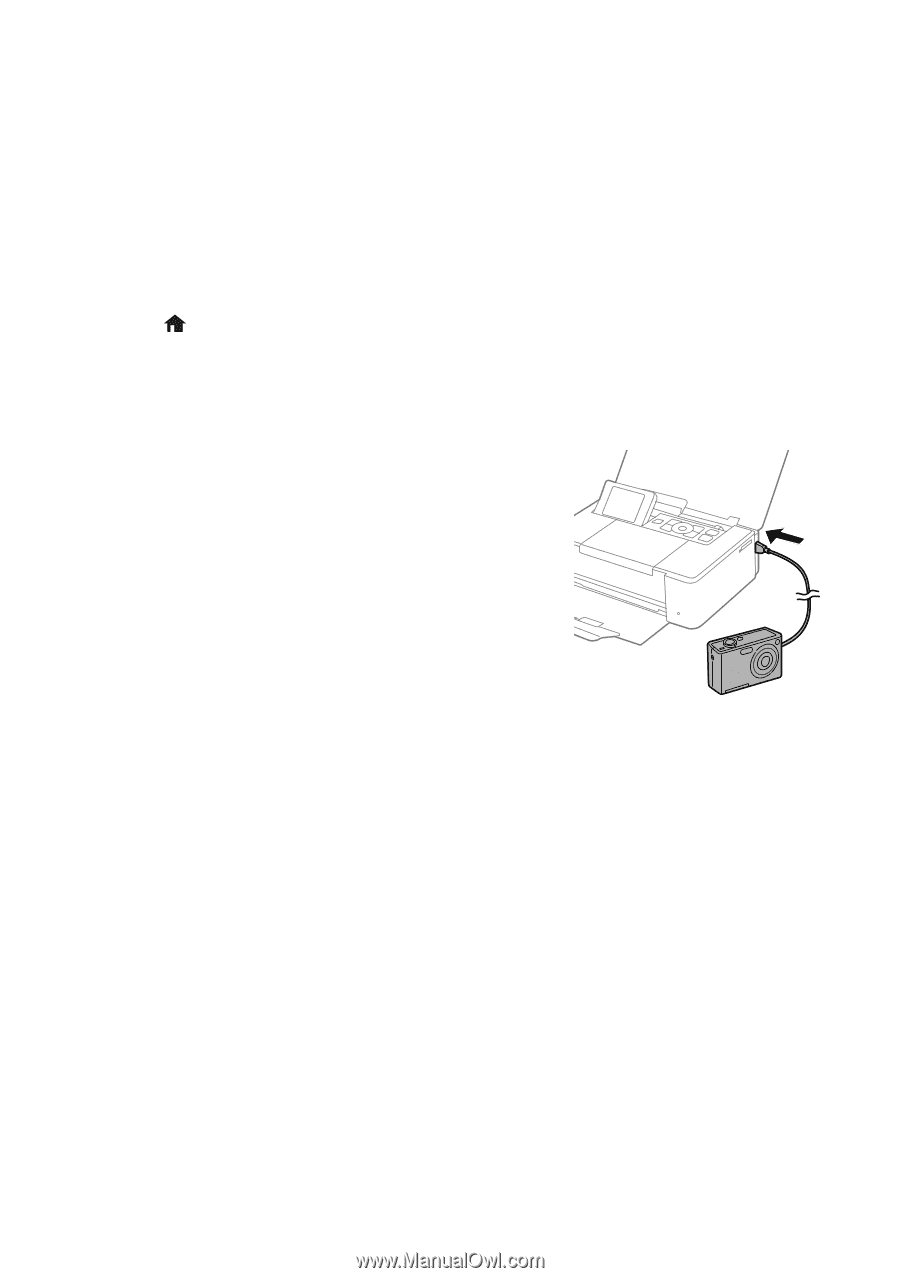
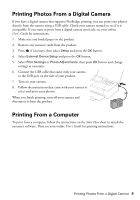
Printing Photos From a Digital Camera If you have a digital camera that supports PictBridge printing, you can print your photos directly from the camera using a USB cable. Check your camera manual to see if it is compatible. If you want to print from a digital camera wirelessly, see your online User's Guide for instructions. 1. Make sure you loaded paper in the product. 2. Remove any memory cards from the product. 3. Press if necessary, then select Setup and press the OK button. 4. Select External Device Setup and press the OK button. 5. Select Print Settings or Photo Adjustments, then press OK button and change settings as necessary. 6. Connect the USB cable that came with your camera to the USB port on the side of your product. 7. Turn on your camera. 8. Follow the instructions that came with your camera to select and print your photos. When you finish printing, turn off your camera and disconnect it from the product. Printing From a Computer To print from a computer, follow the instructions on the Start Here sheet to install the necessary software. Then see your online User's Guide for printing instructions. Printing Photos From a Digital Camera 9
-
 1
1 -
2
-
3
-
 4
4 -
 5
5 -
 6
6 -
 7
7 -
 8
8 -
 9
9 -
 10
10 -
 11
11 -
 12
12 -
 13
13 -
 14
14 -
15
-
16
-
17
-
18
-
19
-
20
-
21
-
22
-
23
-
24
-
25
-
26
-
27
-
28
-
29
-
30
-
31
-
32
-
33
-
34
-
35
-
36
-
37
-
38
-
39
-
40
-
41
-
42
-
43
-
44
-
45
-
46
-
47
-
48
-
49
-
50
-
51
-
52
 |
 |