Epson PictureMate Flash - PM 280 Product Information Guide - Page 4
Viewing Photos, Removing a Memory Card - picturemate flash - picturemate pm 280 printer
 |
View all Epson PictureMate Flash - PM 280 manuals
Add to My Manuals
Save this manual to your list of manuals |
Page 4 highlights
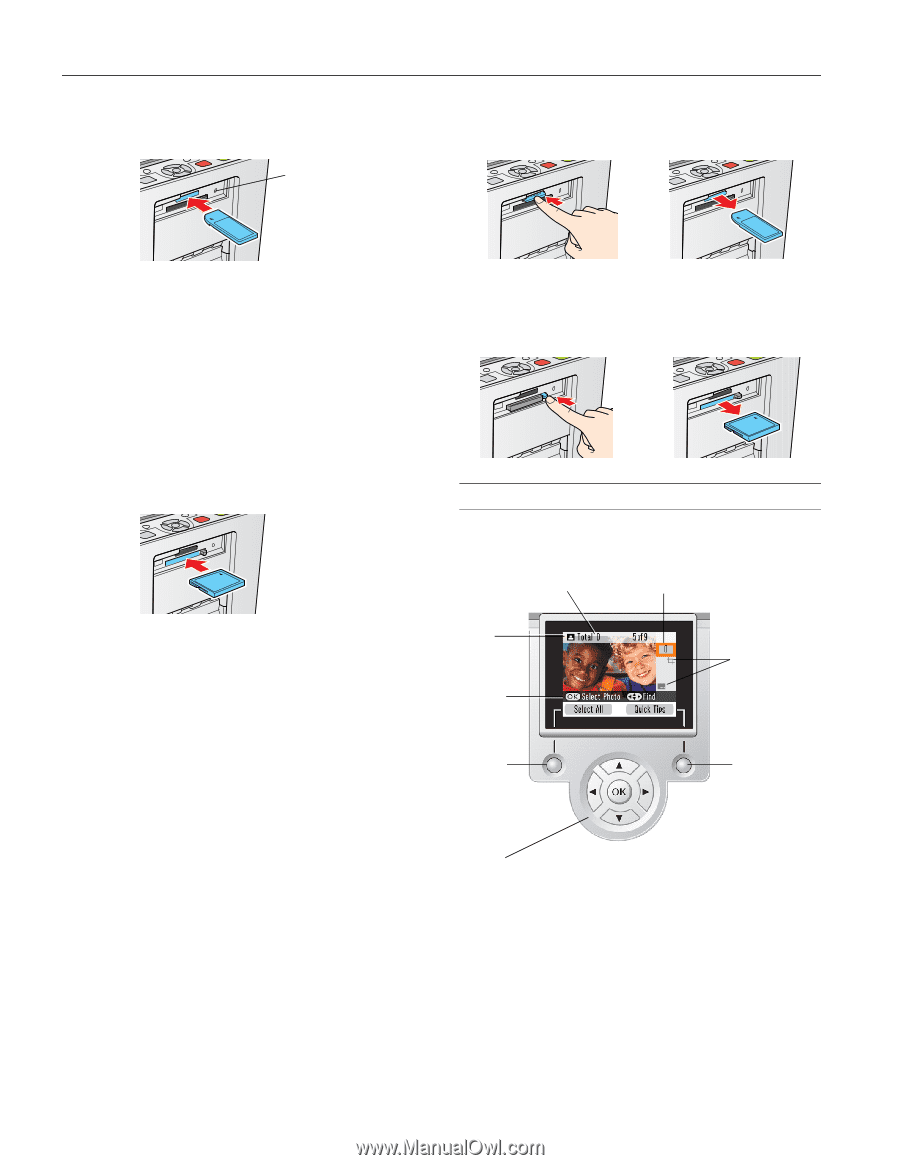
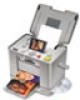
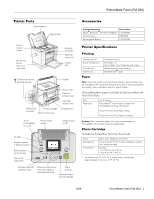
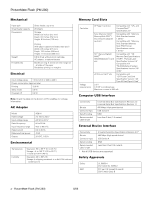
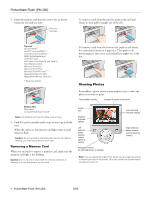
PictureMate Flash (PM 280) 3. Insert the memory card into the correct slot, as shown. Insert just one card at a time. Memory card light To remove a card from the top slot, push in the card and release it, then pull it straight out of the slot. Top slot: SD and SDHC™ miniSD™ and miniSDHC * microSD and microSDHC * MMC (MultiMediaCard) xD-Picture Card xD-Picture Card (Type M and Type H) Sony Memory Stick Memory Stick Duo * Memory Stick PRO™ Memory Stick PRO Duo™ * MagicGate Memory Stick MagicGate Memory Stick Duo * Requires adapter To remove a card from the bottom slot, push in and release the card release button so it pops out. Then push in the button again to eject your card and pull it straight out of the slot. Viewing Photos PictureMate's photo viewer screen makes it easy to select the photos you want to print. Total number of prints Number of copies of this photo Bottom slot: Microdrive™ CompactFlash (Type I and II) Note: PictureMate can't read multiple cards at once. 4. Push the card in carefully until it stops (it won't go in all the way). When the card is in, the memory card light comes on and begins to flash. Caution: Do not remove a card while the memory card light is flashing; you may lose photos on your card. Removing a Memory Card When you are ready to remove a memory card, make sure the memory card light is not flashing. Caution: Do not remove a card while the memory card light is flashing; you may lose photos on your card. Layout icon Guide to available options Left selection button (selects current option on screen) Navigation buttons for selecting photos or settings Icons showing selected settings Right selection button (selects current option on screen) Note: You can adjust the angle of the photo viewer screen by raising or lowering the top of the screen. Be sure to lower the screen before closing the printer lid. 4 - PictureMate Flash (PM 280) 8/06
-
 1
1 -
 2
2 -
 3
3 -
 4
4 -
 5
5 -
 6
6 -
 7
7 -
 8
8 -
 9
9 -
 10
10 -
11
-
12
-
13
-
14
-
15
-
16
-
17
-
18
 |
 |