Epson PowerLite 1825 Product Information Guide - Page 7
Adjusting the Brightness, Selecting the Color Mode
 |
View all Epson PowerLite 1825 manuals
Add to My Manuals
Save this manual to your list of manuals |
Page 7 highlights
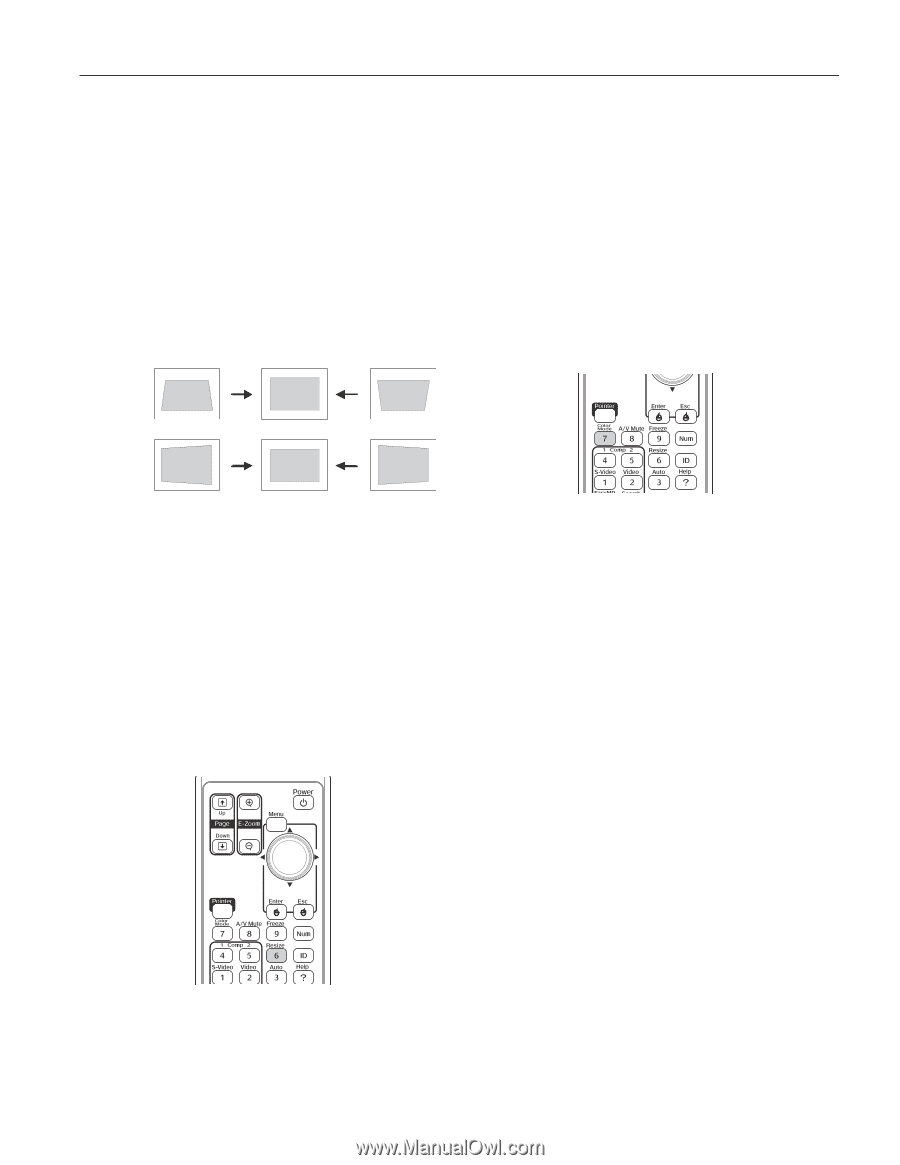
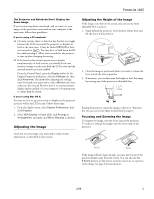
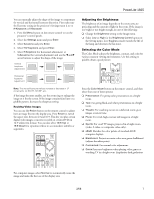
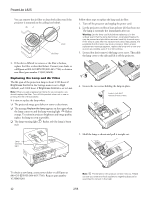
PowerLite 1825 You can manually adjust the shape of the image to compensate for vertical and horizontal keystone distortion. First make sure the Keystone setting in the projector's Settings menu is set to H-Keystone or V-Keystone: 1. Press the Menu button on the remote control (or on the projector's control panel). 2. Select the Settings menu and press Enter. 3. Select Keystone and press Enter. 4. Select H/V-Keystone and press Enter. 5. Select H-Keystone (for horizontal adjustment) or V-Keystone (for vertical adjustment) and use the l and r arrow buttons to adjust the shape of the image. Vertical keystone adjustment Horizontal keystone adjustment Note: The vertical keystone values increase or decrease in .5° increments; so 30=15°, 60=30°, etc. If the image becomes smaller, use the zoom ring to enlarge the image so it fits the screen. If the image contains faint lines or a gridlike pattern, decrease the sharpness setting. Resizing Video images You can use the Resize button on the remote control to adjust how an image fits into the display area. Press Resize to switch the aspect ratio between 4:3 and 16:9. This lets you play certain digital video images or movies recorded on certain DVDs in 16:9 widescreen format. You can also select 16:9 (Up) or 16:9 (Down) to reposition videos to accommodate subtitles or supertitles. Adjusting the Brightness The brightness of an image depends on the source you are projecting and the amount of light in the room. If the image is too bright or not bright enough, do one of the following: ❏ Change the Brightness setting in the Image menu. ❏ Select Low or High for the Brightness Control option in the Setting menu. Low Brightness mode extends the life of the lamp and decreases the fan noise. Selecting the Color Mode The Color Mode adjusts the brightness, contrast, and color for various common viewing environments. Use this setting to quickly obtain a good picture. Press the Color Mode button on the remote control, and then select from one of these options: ❏ Presentation: For giving color presentations in a bright room. ❏ Text: For giving black-and-white presentations in a bright room. ❏ Theatre: For watching movies in a darkened room; gives images a natural tone. ❏ Photo: For vivid, high-contrast still images in a bright room. ❏ Sports: For vivid TV images projected in a bright room (video, S-video, or composite video only). ❏ sRGB: Matches the color palette of standard sRGB computer displays. ❏ Blackboard: Projects accurate colors on a green chalkboard (adjusts the white point). ❏ Customized: For manual color adjustment. ❏ Game: Increases brightness when playing video games or watching TV in a bright room. Emphasizes dark gradations. For computer images, select Normal to automatically resize the image and make the best use of the display area. 2/08 7
-
 1
1 -
 2
2 -
 3
3 -
 4
4 -
 5
5 -
 6
6 -
 7
7 -
 8
8 -
 9
9 -
 10
10 -
 11
11 -
 12
12 -
13
 |
 |