Epson PowerLite 50c Product Information Guide - Page 10
Using the Menus, Changing Menu Settings, Cleaning the Lens, Cleaning the Projector Case - remote
 |
View all Epson PowerLite 50c manuals
Add to My Manuals
Save this manual to your list of manuals |
Page 10 highlights
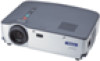
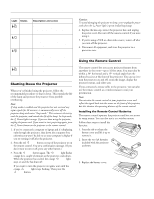
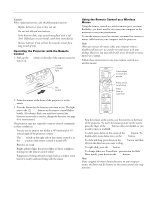
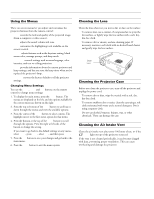
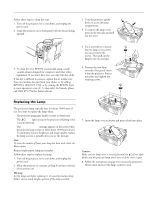
EPSON Powerlite 50c/70c Using the Menus These on-screen menus let you adjust and customize the projector features from the remote control: t Video controls the look and quality of the projected image (from a computer or video source). t Audio adjusts the sound volume and tone. t Effect customizes the highlighting tools available on the remote control. t Setting adjusts features such as the keystone setting, blank screen color, message prompt, and sleep mode. t Advanced controls settings such as menu language, color intensity, and rear or ceiling projection. t About provides information about the current projector and lamp settings, and lets you reset the lamp timer when you've replaced the projector's lamp. t Reset All restores the factory defaults to all the projector settings. Changing Menu Settings You use the Menu, Enter and Esc buttons on the remote control to change menu settings. 1. To display the main menu, press the Menu button. The menus are displayed on the left, and the options available for the current menu are shown on the right. 2. Press the top or bottom of the Enter button to scroll up or down through the menus and view the available options. 3. Press the center of the Enter button to select a menu. The highlight moves to the first menu option for that menu. 4. Press the bottom or the top of the Enter button to scroll through the options. Press the right or left side of the Enter button to change the setting. If you want to go back to the default settings on any menu, select Reset, press Enter, select Yes, and then press Enter. 5. Press the Esc button to save your changes and go back to the main menu. 6. Press the Menu button to exit the menu system. Cleaning the Lens Clean the lens whenever you notice dirt or dust on the surface. t To remove dust, use a canister of compressed air to spray the lens surface, or lightly wipe the lens surface with a soft, dry, lint-free cloth. t To remove dirt or smears, use lens-cleaning paper. If necessary, moisten a soft cloth with an alcohol-based cleaner and gently wipe the lens surface. Clean here Cleaning the Projector Case Before you clean the projector case, turn off the projector and unplug the power cord. t To remove dirt or dust, wipe the outside with a soft, dry, lint-free cloth. t To remove stubborn dirt or stains, clean the case using a soft cloth moistened with water and a neutral detergent. Dry it using a separate cloth. t Do not use alcohol, benzene, thinner, wax, or other chemicals. These can damage the case. Cleaning the Air Intake Vent Clean the air intake vent after every 100 hours of use, or if the Error light on top of the projector turns red. If the vent is not cleaned periodically, it can become clogged with dust, preventing proper ventilation. This can cause overheating and damage the projector. 10 - EPSON Powerlite 50c/70c 01/01
-
 1
1 -
2
-
3
-
4
-
 5
5 -
 6
6 -
 7
7 -
 8
8 -
 9
9 -
 10
10 -
 11
11 -
 12
12
 |
 |