Epson PowerLite 50c Product Information Guide - Page 11
Replacing the Lamp, Warning, Caution - parts
 |
View all Epson PowerLite 50c manuals
Add to My Manuals
Save this manual to your list of manuals |
Page 11 highlights
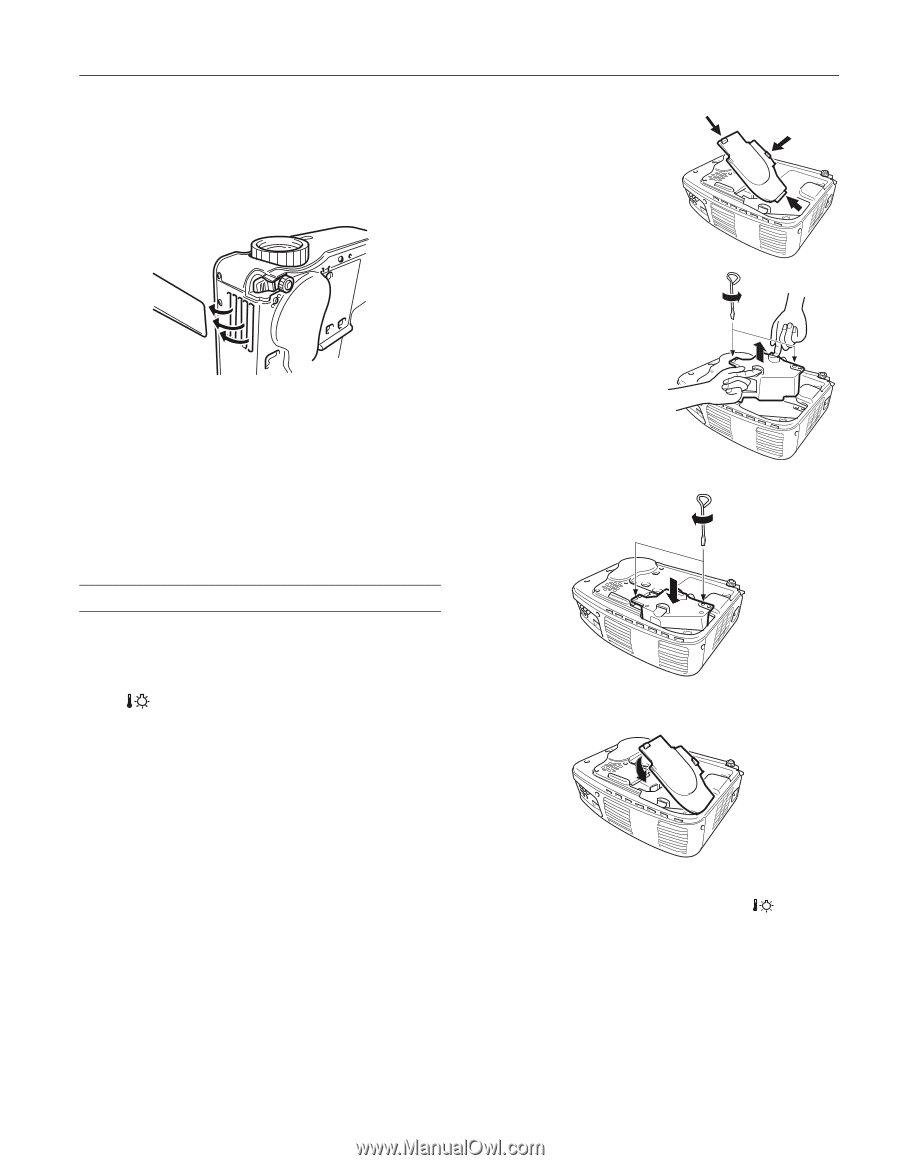
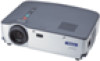
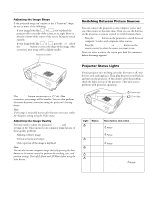
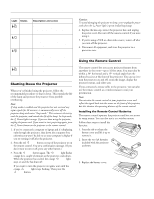
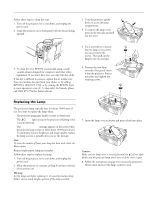
EPSON Powerlite 50c/70c Follow these steps to clean the vent: 1. Turn off the projector, let it cool down, and unplug the power cord. 2. Stand the projector on its back panel with the lens pointing upward. 3. Turn the projector upsidedown to access the lamp compartment. 4. To remove the lamp cover, press on the two tabs and pull out the cover. 3. To clean the vent, EPSON recommends using a small vacuum cleaner designed for computers and other office equipment. If you don't have one, use a dry, lint-free cloth. If the dirt is difficult to remove, replace the air intake vent. You can purchase the part from your dealer, or by calling EPSON at (800) 873-7766, or by visiting the EPSON Store at www.epsonstore.com (U. S. sales only). In Canada, please call (800) 873-7766 for dealer referral. 5. Use a screwdriver to loosen the two lamp cover screws; you can't remove the screws. Then pull out the lamp by the two notches. 6. Position the new lamp correctly, then gently insert it into the projector. Press it into place and tighten the retaining screws. Replacing the Lamp The projection lamp typically lasts for about 1500 hours of use. It is time to replace the lamp when: t The projected image gets darker or starts to deteriorate. t The Error light on top of the projector is flashing red in 1-second intervals. t The LAMP REPLACE message appears on the screen when the projector lamp comes on (after about 1500 hours of use). To maintain projector brightness and image quality, replace the lamp as soon as possible after you see the message. Note: To view the number of hours your lamp has been used, check the About menu. Request replacement lamp part number ELPLP13. Follow these steps to replace the lamp: 1. Turn off the projector, let it cool down, and unplug the power cord. 2. Allow the projector to continue cooling for at least one hour (if it has been on). Warning: Let the lamp cool before replacing it. To avoid premature lamp failure, do not touch the glass portion of the lamp assembly. 7. Insert the lamp cover as shown and press it back into place. Caution: Make sure the lamp cover is securely fastened; the Error light flashes and the projector lamp won't turn on if the cover is open. 8. Follow the instructions on page 10 to access the projector's About menu and reset the lamp counter to zero. 01/01 EPSON Powerlite 50c/70c - 11
-
 1
1 -
2
-
3
-
4
-
5
-
 6
6 -
 7
7 -
 8
8 -
 9
9 -
 10
10 -
 11
11 -
 12
12
 |
 |