Epson PowerLite 50c Product Information Guide - Page 7
Adjusting the Image Shape, Switching Between Picture Sources, Projector Status Lights - lamp
 |
View all Epson PowerLite 50c manuals
Add to My Manuals
Save this manual to your list of manuals |
Page 7 highlights
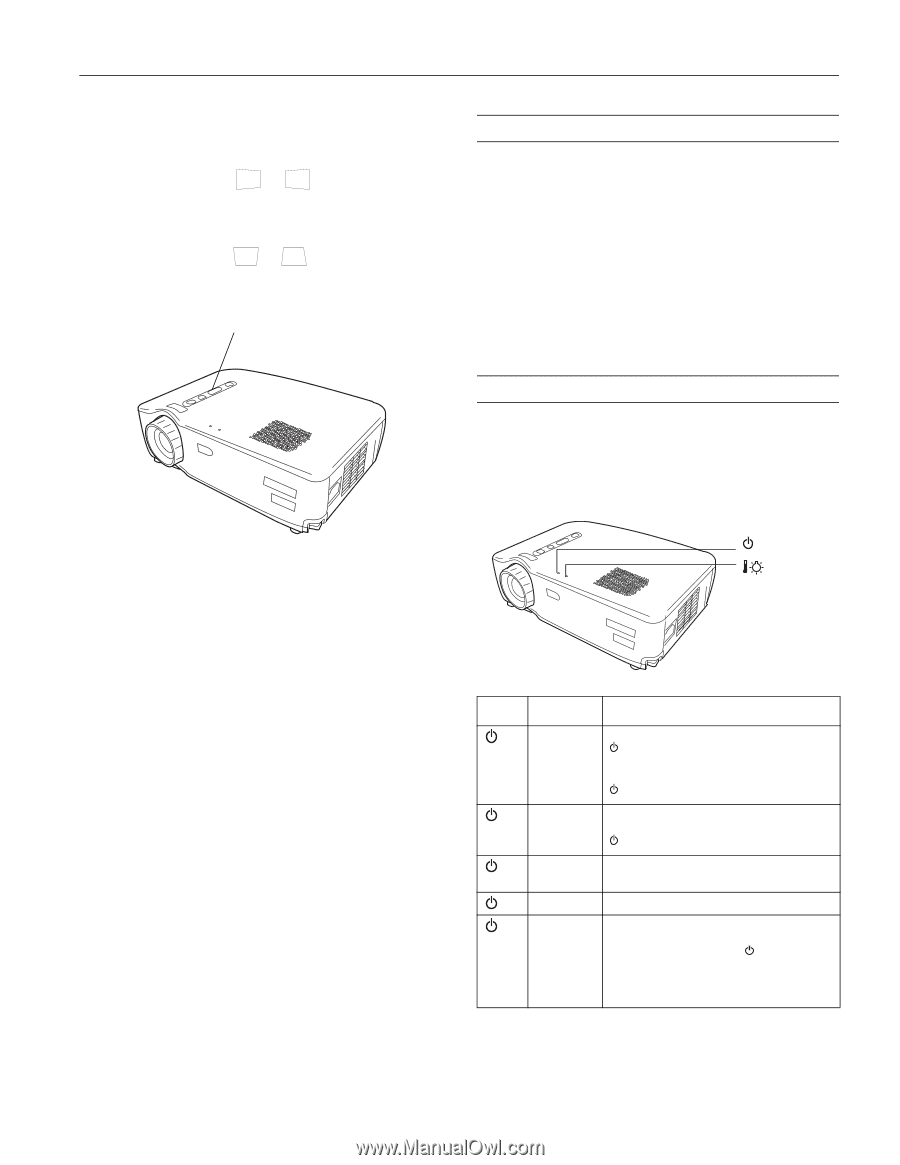
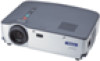
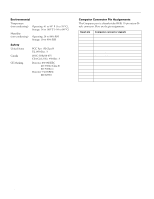
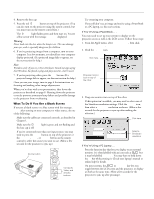
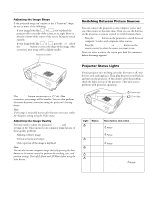
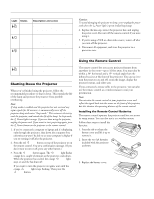
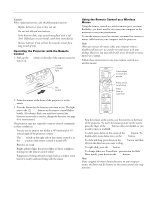
EPSON Powerlite 50c/70c Adjusting the Image Shape If the projected image isn't square or has a "keystone" shape, do one or more of the following: t If your image looks like or , you've placed the projector off to one side of the screen, at an angle. Move it directly in front of the center of the screen, facing the screen squarely. t If your image looks like or , press the + or - side of the Keystone button to correct the shape of the image. After correction, your image will be slightly smaller. Keystone button Switching Between Picture Sources You can connect the projector to one computer source and one video source at the same time. Then you use the buttons on the projector or remote control to switch between them. t Press the Source button on the projector to switch between computer, S-video, and composite video sources. t Press the Computer, Video, or S-Video button on the remote control to select the source you want to use. After you select a source, the screen goes dark for a moment before the image appears. The Keystone button corrects up to a 15° tilt. After correction, your image will be smaller. You can also perform electronic keystone correction using the projector's Setting menu. Note: If the image is noticeably uneven after keystone correction, reduce the Sharpness setting using the Video menu. Adjusting the Image Quality You may need to adjust the projector's Tracking and Sync settings on the Video menu if your computer image has any of these quality problems: t Flashing or blurry image t Vertical or horizontal stripes t Only a portion of the image is displayed Note: You can also increase computer image clarity by pressing the Auto button on the remote control to optimize the tracking, sync, and position settings. Turn off E-Zoom and A/VMute before using the Auto button. Projector Status Lights If your projector isn't working correctly, first turn it off, wait for it to cool, and unplug it. Then plug the power cord back in and turn on the projector. If this doesn't solve the problem, check the lights on top of the projector. They alert you to problems with projector operations. Power light Error light Light Status off orange flashing green green flashing orange Description and action The projector is unplugged. Press the Power button to turn off the projector, check that the power cable is connected securely at both ends, then press the Power button to turn on the projector. The projector is in sleep mode. You can unplug it to disconnect the power or press the Power button to turn on the projector lamp. The projector is warming up. Wait for the image to appear. The projector is operating normally. The projector lamp is off and the projector is cooling down. Wait until the light stops flashing and then press the Power button to turn on the projector. (You can't turn the projector on or unplug it when the light is flashing orange.) 01/01 EPSON Powerlite 50c/70c - 7
-
 1
1 -
 2
2 -
 3
3 -
 4
4 -
 5
5 -
 6
6 -
 7
7 -
 8
8 -
 9
9 -
 10
10 -
 11
11 -
 12
12
 |
 |