Epson RX-80 User Manual - Page 12
Setting Up, down into its proper place between the print head and the ribbon
 |
View all Epson RX-80 manuals
Add to My Manuals
Save this manual to your list of manuals |
Page 12 highlights
4. Insert the cartridge by placing the black hooks on each side of the cartridge into the slots located inside the printer in the right and left front corners. Push down until the cartridge snaps into place. (See Figure 1-4.) Figure 1-4. Ribbon cartridge installation 5. Turn the knob on the cartridge in the direction of the arrow to tighten the ribbon. As you turn the knob, see that the ribbon slips down into its proper place between the print head and the ribbon guide. (See the figure on the ribbon cartridge itself.) You may want to use a pencil to direct the ribbon, as shown in Figure 1-5. Setting Up 1-5
-
 1
1 -
2
-
3
-
4
-
5
-
6
-
 7
7 -
 8
8 -
 9
9 -
 10
10 -
 11
11 -
 12
12 -
 13
13 -
 14
14 -
 15
15 -
 16
16 -
 17
17 -
18
-
19
-
20
-
21
-
22
-
23
-
24
-
25
-
26
-
27
-
28
-
29
-
30
-
31
-
32
-
33
-
34
-
35
-
36
-
37
-
38
-
39
-
40
-
41
-
42
-
43
-
44
-
45
-
46
-
47
-
48
-
49
-
50
-
51
-
52
-
53
-
54
-
55
-
56
-
57
-
58
-
59
-
60
-
61
-
62
-
63
-
64
-
65
-
66
-
67
-
68
-
69
-
70
-
71
-
72
-
73
-
74
-
75
-
76
-
77
-
78
-
79
-
80
-
81
-
82
-
83
-
84
-
85
-
86
-
87
-
88
-
89
-
90
-
91
-
92
-
93
-
94
-
95
-
96
-
97
-
98
-
99
-
100
-
101
-
102
-
103
-
104
-
105
-
106
-
107
-
108
-
109
-
110
-
111
-
112
-
113
-
114
-
115
-
116
-
117
-
118
-
119
-
120
-
121
-
122
-
123
-
124
-
125
-
126
-
127
-
128
-
129
-
130
-
131
-
132
-
133
-
134
-
135
-
136
-
137
-
138
-
139
-
140
-
141
-
142
-
143
-
144
-
145
-
146
-
147
-
148
-
149
 |
 |

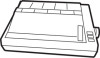
4. Insert the cartridge by placing the black hooks on each side of the
cartridge into the slots located inside the printer in the right and left
front corners. Push down until the cartridge snaps into place. (See
Figure 1-4.)
Figure 1-4.
Ribbon cartridge installation
5. Turn the knob on the cartridge in the direction of the arrow to
tighten the ribbon. As you turn the knob, see that the ribbon slips
down into its proper place between the print head and the ribbon
guide. (See the figure on the ribbon cartridge itself.) You may want
to use a pencil to direct the ribbon, as shown in Figure 1-5.
Setting Up
1-5