Epson RX-80 User Manual - Page 14
Using Continuous-feed Paper, Installing the tractor unit, Setting Up
 |
View all Epson RX-80 manuals
Add to My Manuals
Save this manual to your list of manuals |
Page 14 highlights
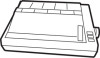
Using Continuous-feed Paper The following section covers use of continuous-feed paper with your tractor unit. If you plan to use single-sheet paper, skip to the Using Single-sheet Paper section later in this chapter. The tractor unit for the Apex80 allows you to use paper with pin feed holes along the sides (continuous-feed paper). You can adjust the tractor unit to accommodate widths of paper ranging from 4 to 10 inches, including the pin feed holes. Installing the tractor unit You will need to install the tractor unit each time you wish to load continuous-feed paper after using single-sheet paper, which can only be loaded when the tractor unit is removed. If you have received your printer with the tractor unit installed, simply install the paper rest by fitting it into the slots along the top edge of the back of the printer and snapping it into place. (See Figure 1-7.) Then see the instructions later in this chapter for loading continuous-feed paper. To install the tractor unit, follow these steps: 1. If the paper guide is installed, remove it by tipping it toward you and pulling it out. 2. Pop out the tractor unit slot cover, which is located above the indicator lights. It may help to use the flat edge of a screwdriver, as shown in Figure 1-6. Store the cover in a safe place while you use the tractor unit, and replace it when you remove the tractor unit. Setting Up 1-7
-
 1
1 -
2
-
3
-
4
-
5
-
6
-
7
-
8
-
 9
9 -
 10
10 -
 11
11 -
 12
12 -
 13
13 -
 14
14 -
 15
15 -
 16
16 -
 17
17 -
 18
18 -
 19
19 -
20
-
21
-
22
-
23
-
24
-
25
-
26
-
27
-
28
-
29
-
30
-
31
-
32
-
33
-
34
-
35
-
36
-
37
-
38
-
39
-
40
-
41
-
42
-
43
-
44
-
45
-
46
-
47
-
48
-
49
-
50
-
51
-
52
-
53
-
54
-
55
-
56
-
57
-
58
-
59
-
60
-
61
-
62
-
63
-
64
-
65
-
66
-
67
-
68
-
69
-
70
-
71
-
72
-
73
-
74
-
75
-
76
-
77
-
78
-
79
-
80
-
81
-
82
-
83
-
84
-
85
-
86
-
87
-
88
-
89
-
90
-
91
-
92
-
93
-
94
-
95
-
96
-
97
-
98
-
99
-
100
-
101
-
102
-
103
-
104
-
105
-
106
-
107
-
108
-
109
-
110
-
111
-
112
-
113
-
114
-
115
-
116
-
117
-
118
-
119
-
120
-
121
-
122
-
123
-
124
-
125
-
126
-
127
-
128
-
129
-
130
-
131
-
132
-
133
-
134
-
135
-
136
-
137
-
138
-
139
-
140
-
141
-
142
-
143
-
144
-
145
-
146
-
147
-
148
-
149
 |
 |
