Epson Stylus COLOR 740i User Manual - Page 60
Reducing and Enlarging Your Document Size, Printing from Windows
 |
View all Epson Stylus COLOR 740i manuals
Add to My Manuals
Save this manual to your list of manuals |
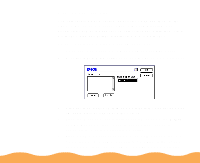
Page 60 highlights
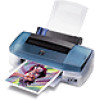
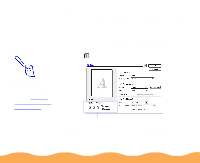
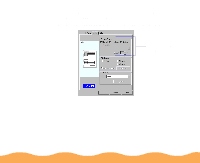
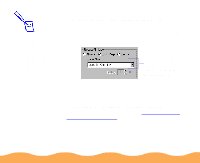
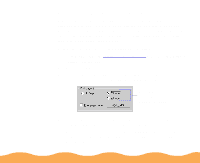
Reducing and Enlarging Your Document Size When you want to make the printed size of a document different from its actual size, you can use your printer software's Reduce/Enlarge settings. You can make the document fit into the printable area on a selected paper size or you can choose to reduce or enlarge it to a selected percentage. Follow these steps to reduce or enlarge your document size: 1 Follow the steps in Printing from Windows to access the printer settings dialog box, then click the Paper tab. 2 Click the Paper Size list and select the actual size of the document you want to print. For example, if your document size is 11 × 22 inches, select US C 11 × 22 in. This paper size is too large to fit in your printer, so you'll need to proportion it to fit on a smaller paper size (by reducing the document size). If your document size is 5 × 8 inches, but you want it to fit in the maximum area on Letter-size paper, you'll need to proportion it to fit on a larger paper size (by enlarging the document size). 3 If the Paper Size setting you selected for your document is within the maximum paper size that can fit on your printer, but you want to enlarge or reduce the document, you need to select the reduction/enlargement manually. Go to step 5. Advanced Printing Page 60
-
 1
1 -
2
-
3
-
4
-
5
-
6
-
7
-
8
-
9
-
10
-
11
-
12
-
13
-
14
-
15
-
16
-
17
-
18
-
19
-
20
-
21
-
22
-
23
-
24
-
25
-
26
-
27
-
28
-
29
-
30
-
31
-
32
-
33
-
34
-
35
-
36
-
37
-
38
-
39
-
40
-
41
-
42
-
43
-
44
-
45
-
46
-
47
-
48
-
49
-
50
-
51
-
52
-
53
-
54
-
 55
55 -
 56
56 -
 57
57 -
 58
58 -
 59
59 -
 60
60 -
 61
61 -
 62
62 -
 63
63 -
 64
64 -
 65
65 -
66
-
67
-
68
-
69
-
70
-
71
-
72
-
73
-
74
-
75
-
76
-
77
-
78
-
79
-
80
-
81
-
82
-
83
-
84
-
85
-
86
-
87
-
88
-
89
-
90
-
91
-
92
-
93
-
94
-
95
-
96
-
97
-
98
-
99
-
100
-
101
-
102
-
103
-
104
-
105
-
106
-
107
-
108
-
109
-
110
-
111
-
112
-
113
-
114
-
115
-
116
-
117
-
118
-
119
-
120
-
121
-
122
-
123
-
124
-
125
-
126
-
127
-
128
-
129
-
130
-
131
-
132
-
133
-
134
-
135
-
136
-
137
-
138
-
139
-
140
-
141
-
142
-
143
-
144
-
145
-
146
-
147
-
148
-
149
-
150
-
151
-
152
-
153
-
154
-
155
-
156
-
157
-
158
-
159
-
160
-
161
-
162
-
163
-
164
-
165
-
166
-
167
-
168
-
169
-
170
-
171
-
172
-
173
-
174
-
175
-
176
-
177
-
178
-
179
-
180
-
181
-
182
-
183
-
184
-
185
-
186
 |
 |