Epson Stylus CX4600 Product Information Guide - Page 8
Printing an Index Sheet to Select Photos, Selecting Photos, Printing All Photos or DPOF Photos - instructions
 |
View all Epson Stylus CX4600 manuals
Add to My Manuals
Save this manual to your list of manuals |
Page 8 highlights
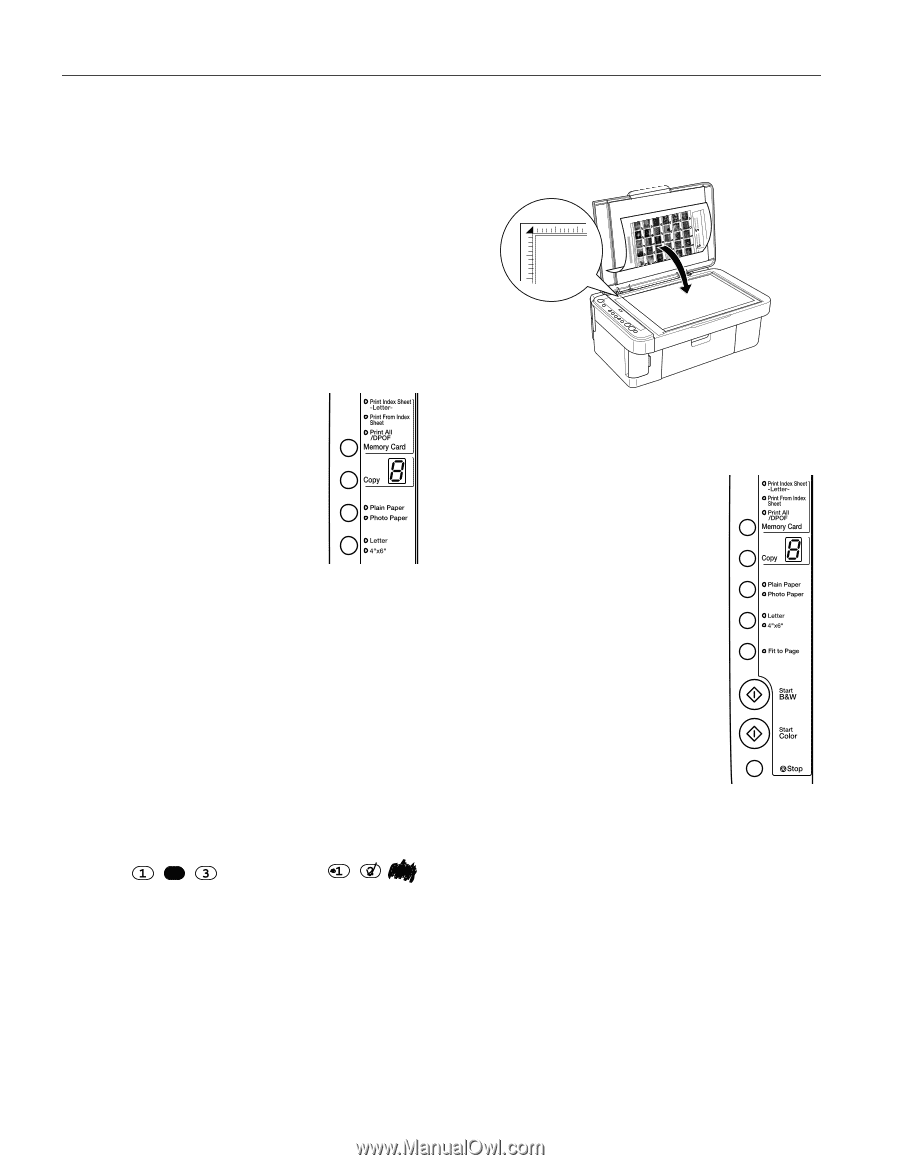
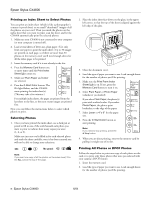
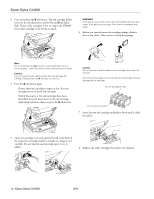
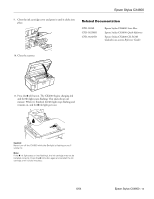
Epson Stylus CX4600 Printing an Index Sheet to Select Photos You can print an index sheet (which is like a photographer's contact or proof sheet) to see small "thumbnail" images of all the photos on your card. Then you mark the photos on the index sheet that you want to print, scan the sheet, and let the CX4600 automatically print the selected photos. 1. Make sure your CX4600 is not connected to your computer (or your computer is turned off). 2. Load several sheets of letter-size, plain paper. (Use only letter-size paper to print the index sheet.) Up to 30 images are printed on each page, so if there are more than 30 photos on the memory card, you'll need enough sheets for all the index pages to be printed. 3. Insert the memory card if it is not already in the slot. 4. Press the Memory Card button one or more times until the Print Index Sheet light comes on. 5. Make sure Plain Paper and Letter are selected. 6. Press the x Start Color button. The On light flashes, and the CX4600 starts printing the index sheet(s). (This may take a few minutes.) For multiple index sheets, the pages are printed from the last sheet to the first, so the most recent images are printed first. Now you can follow the instructions below to select which photos to print. Selecting Photos 1. Once you have printed the index sheet, use a dark pen or pencil to fill in one of the ovals beneath each photo you want to print to indicate how many copies you want (1, 2, or 3). Make sure just one oval is filled in for each selected photo and mark the sheet carefully; once it has been scanned you will not be able to change your selections. OK: No good: Note: If you want one copy of all the photos on the index sheet, fill in the ALL oval at the top of the page. 2. Place the index sheet face-down on the glass, in the upper left corner, so that the top of the sheet is aligned against the left edge of the glass. 3. Close the document cover. 4. Load the type of paper you want to use. Load enough sheets for the number of photos you'll be printing. 5. Make sure the Print From Index Sheet light is on. If not, press the Memory Card button to turn it on. 6. Select Plain Paper or Photo Paper (whichever you loaded). If you select Plain Paper, the photo(s) print with a white border. If you select Photo Paper, the photos print borderless, to the edge of the paper. 7. Select Letter or 4"x 6" for the paper size. 8. Press the x Start Color button to start printing. Note: If you need to stop printing, press the y Stop button. 9. When you are done printing, remove the memory card by pulling it straight out of its slot. Printing All Photos or DPOF Photos Follow the steps below to print one copy of each photo on the card or to print only those photos that were pre-selected with your camera's DPOF feature. 1. Insert the memory card. 2. Load the type of paper you want to use. Load enough sheets for the number of photos you'll be printing. 8 - Epson Stylus CX4600 6/04
-
 1
1 -
2
-
 3
3 -
 4
4 -
 5
5 -
 6
6 -
 7
7 -
 8
8 -
 9
9 -
 10
10 -
 11
11 -
 12
12 -
 13
13
 |
 |