Epson Stylus CX4600 Product Information Guide - Page 9
Using Epson Smart Panel, Epson Stylus CX4600 - installation software
 |
View all Epson Stylus CX4600 manuals
Add to My Manuals
Save this manual to your list of manuals |
Page 9 highlights
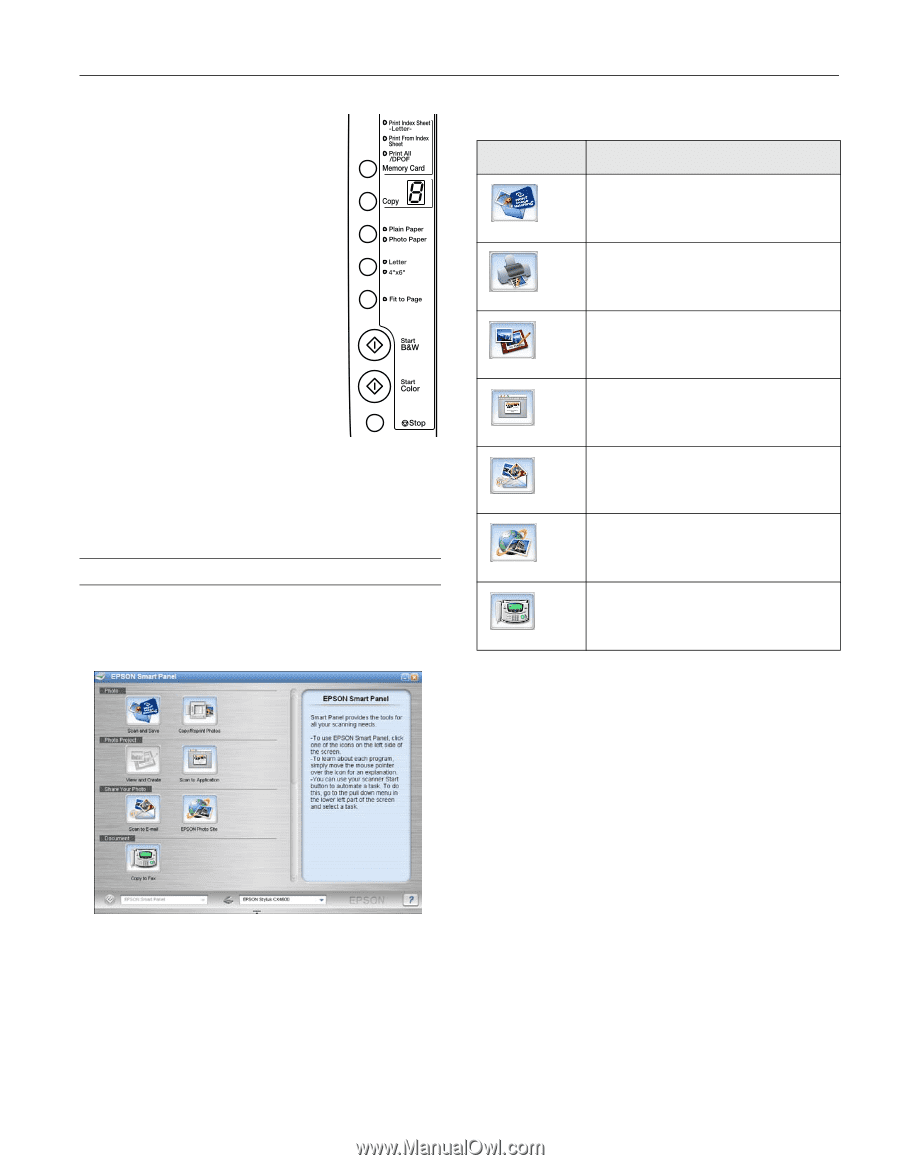
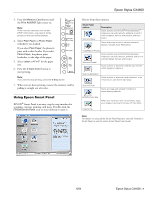
Epson Stylus CX4600 3. Press the Memory Card button until the Print All/DPOF light comes on. Note: If the memory card does not contain DPOF information, one copy of all the photos on the card will be printed. 4. Select Plain Paper or Photo Paper (whichever you loaded). If you select Plain Paper, the photo(s) print with a white border. If you select Photo Paper, the photos print borderless, to the edge of the paper. 5. Select Letter or 4"x 6" for the paper size. 6. Press the x Start Color button to start printing. Note: If you need to stop printing, press the y Stop button. 7. When you are done printing, remove the memory card by pulling it straight out of its slot. Using Epson Smart Panel EPSON® Smart Panel is an easy, step-by-step interface for scanning, copying, printing, and more. Double-click the EPSON Smart Panel icon on your desktop to open it. Choose from these options: Smart Panel options Scan and Save Description Scans a photo into ArcSoft® PhotoImpression™, where you can edit, retouch, enhance, or print it with templates, frames, and borders, and then save it. Scans and prints photos in various sizes and layouts. Includes Color Restoration. Copy/Reprint Photos Scans a photo into ArcSoft PhotoImpression, where you can edit, retouch, enhance, and print it with templates, frames, and borders. View and Create Scans a photo or document and lets you choose which program it opens in. Scan to Application Scans a photo or document and attaches it to an e-mail so you can send it right away. Scan to E-mail Scans an image and uploads it to Epson's photo-sharing web site. EPSON Photo Site When you install your own fax software, scans your image or document into your PC fax utility. Copy to Fax Note: For details on using all the Smart Panel features, click the ? button in Smart Panel or see the online Smart Panel User Guide. 6/04 Epson Stylus CX4600 - 9
-
 1
1 -
2
-
3
-
 4
4 -
 5
5 -
 6
6 -
 7
7 -
 8
8 -
 9
9 -
 10
10 -
 11
11 -
 12
12 -
 13
13
 |
 |