Epson Stylus Photo R2000 Basics - Page 46
Problems and Solutions, Printing Problems, Paper Feeding Problems
 |
View all Epson Stylus Photo R2000 manuals
Add to My Manuals
Save this manual to your list of manuals |
Page 46 highlights
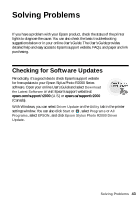
Problems and Solutions Check the solutions below if you're having trouble using your printer. Printing Problems ■ Make sure your paper is loaded printable side up, short edge first, and all the way to the right (see page 6 and page 8). ■ When using the sheet feeder, don't load paper above the arrow mark on the left edge guide. Load only one sheet of compatible paper when using the single sheet guide (see page 8). ■ Make sure the paper size settings in the printer software are correct for the paper you loaded. ■ If the P power and I paper lights are flashing and printing has stopped, make sure the printer cover is closed. Leaving the printer cover open stops or prevents printing. Paper Feeding Problems ■ If paper doesn't feed into the sheet feeder, remove the paper and fan the stack of paper to separate the sheets. Reload paper against the right side and slide the edge guide against it. Do not load too many sheets in the sheet feeder at once (see page 6) and make sure the printer cover is closed. ■ If paper loaded using the single sheet guide doesn't feed, make sure you installed the guide correctly and guided the paper all the way into the printer (see page 8). ■ If paper dust builds up on the rollers, they may lose traction and become unable to feed paper properly. See page 42 for cleaning instructions. ■ Make sure the front manual feed tray is not extended if you're printing on roll paper or with the sheet feeder. Extend it only to load fine art paper or poster board. ■ If roll paper doesn't feed, cut the end of it straight across and uncurl the end by rolling it backward, if necessary. Then reload the paper (see page 10). ■ If thick media doesn't feed, make sure you're loading it straight into the printer and not at an incline (see page 13). 46 Solving Problems
-
 1
1 -
2
-
3
-
4
-
5
-
6
-
7
-
8
-
9
-
10
-
11
-
12
-
13
-
14
-
15
-
16
-
17
-
18
-
19
-
20
-
21
-
22
-
23
-
24
-
25
-
26
-
27
-
28
-
29
-
30
-
31
-
32
-
33
-
34
-
35
-
36
-
37
-
38
-
39
-
40
-
 41
41 -
 42
42 -
 43
43 -
 44
44 -
 45
45 -
 46
46 -
 47
47 -
 48
48 -
 49
49 -
 50
50 -
 51
51 -
52
-
53
-
54
-
55
-
56
-
57
-
58
-
59
-
60
 |
 |